 |
| Image from Pottery Barn Kids |
This is the bedskirt from my daughter's crib (she's almost 10 now). I have always loved this fabric. I have saved it and used it on a few projects for her room.
I started by drawing the outline of an owl on a piece of paper. I just did it freehand and then tweaked it until it was just right.
After cutting out the owl shape out of the crib bedskirt fabric, I cut out the chest of the owl from a sheet of felt. I have sheets and sheets of felt in all different colors. I bought them when they were on sale for $0.15 each.
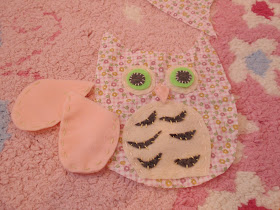
I then cut out the wings, eyes, nose etc out of more felt.
I cut out the eyes in layers of color.
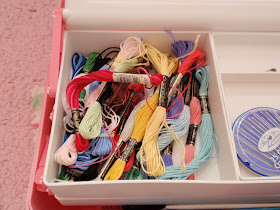
Next it was time to embroider all of the pieces onto the owl.
First I embroidered the grey part of the eye to the green and beige.
I also embroidered on the chest, feathers, nose and eyes to the floral fabric owl.
When I cut out the pink wings, I cut out two per side. I embroidered them together leaving an opening at the top to stuff them a little.
I couldn't find my stuffing, so I used a piece of batting I had and tore it apart a little.
With both wings stuffed, I laid the wings onto the owl, pinning them in place before sewing the back side of the owl on. The right side of the picture is correct. I don't know why the wing on the left is so far over in the picture. It was moved to the edge before I sewed it.
With right sides of the owl together, I pinned the owl sides in place.
Using my sewing machine I sewed the owl together leaving the entire bottom section open. Remember, it's going to be a bookend.
I needed to cut out an oval to serve as it's base. I sewed this base all around the bottom of the owl leaving a small section...just enough to fit a funnel inside. Why a funnel...because I will be stuffing Mr. Owl with white rice. I needed something that would make him weighted. Rice works for me. But before filling him with rice, I stuffed his ears with some batting. That way they would stay pointed.
I had to pour the rice in somewhat slowly to avoid the funnel getting clogged.
The finished product is too cute...don't you think?Mr. Owl is a perfect addition to my daughter's bookcase.
The best part was that I had everything in the house already. A tip if you're going to try this one...when you draw out your owl, make him a little wider at the bottom than you normally would. Mine is a little thinner than I'd like, but still cute.
Let me know what you think of my version of Mr. Owl. I always love and appreciate hearing from you.
Also, don't forget that I will be having my second blog party tomorrow. The link will open up tonight at 8pm EST. Last week was a great success. I hope you will all join in for the fun.
-Judy


What a super cute idea, I wish I could make something like that! I'm not at all crafty when it comes to sewing things.
ReplyDeleteThe owl is adorable!! Love it!
ReplyDeleteThis is such a cute idea! I think I'll have to bookmark this and try it sometime this year. My sister-in-law loves owls and I am always looking for new owl projects for her.
ReplyDeleteI love this idea! Very cute project!
ReplyDeleteSooo cute! I love owls!!
ReplyDeleteI think your are better that PB's
ReplyDeletePattie
This is fantastic!
ReplyDeleteWow Judy! very cute! I'm going to keep it in my to-do list! It will be a perfect gift for little girls
ReplyDeleteSo impressive! I have a slight addiction to the PBK catalog, I must admit.
ReplyDeleteThat's adorable!
ReplyDeleteOh how cute! You did a great job.
ReplyDeleteJudy that is so darling! I am just always impressed with what you come up with...tooth fairy pillows from shirts...owls from a dust ruffle...you are amazing! :-)
ReplyDeleteVanessa
Oh my, this is so clever and so cute. Love it. Thanks also for the reminder about the party. Sorry, I did forget. I will like up my frame. Next week I will plan on something better. Hugs Marty
ReplyDeleteso cute and so much nicer that it is made by you with love!
ReplyDeleteThat is so cute Judy..I bet your daughter things so too. XO
ReplyDeleteHow adorable!
ReplyDeleteThat's amazing...you did an excellent job! Your owl is adorable!
ReplyDeletetoo cute,love it.
ReplyDeletethese are ADORABLE!! I am going to feature them on Handmade Features so I'd love for you to come grab a button :) And thanks so much for linking up to handmade tuesdays @ ladybug blessings! www.ladybug-blessings.com
ReplyDeleteSooo cute! I love it. What a wonderful way to use fabric that has so much meaning attached to it.
ReplyDeleteVery cute, I am actually getting ready to make some of these for a friend of mine who is having a little girl. So glad you shared this.
ReplyDeletePenny
Oh I LoVe these little guys! I'm a new follower! Come on over to and see what I do at fineandhandy.blogspot.com
ReplyDelete