Friday, June 29, 2012

Guest Post - The Handyvergers - Furniture Transformations

I'd like to welcome Kelly from The Handyvergers today to DIYbyDesign.


Hello, everyone!  I'm Kelly (otherwise known as Mrs. Handyverger), and I normally live over at The Handyvergers, where I chronicle the process of turning my house into a home - along with the help of Mr. Handyverger and five cats.  I'm so excited to be guest posting here at DIY by Design.  I absolutely love seeing Judy's home (that Ethan Allen mirror makes me swoon!), and I've been enjoying seeing what all of her readers have been up to every week with her Swing into Spring parties.  I'm just thrilled to be here sharing my latest project, though maybe "latest" isn't quite accurate.


I've been working on spiffing Fred up since April, when I found him at my local Habitat for Humanity ReStore.  If there's one near you, go there!  Now!  Don't pass go, don't collect $200.. wait, you might want to, because I always find amazing things there, like my Ethan Allen dining chairs for super cheap.  


Anyway, Fred came home with me the same day that the dining chairs came home, for a whopping fee of $25.   Here he is in his former glory as an itty bitty end table.


The lighting here isn't fantastic (sorry!), but you can get a sense of Fred's graceful curves and dark wood finish.


Here, you can see that Fred's top is a bit scuffed and scraped.  I could have sanded the scrapes out and refinished Fred, but I had visions.


I had this fabric, which you see in the background of the photo above:


It's hard to tell here, but that's a chocolate brown and off-white canvas - very sturdy.  I've used it in other projects, like reupholstering one of my former dining room chairs:


I found a gorgeous shade of kelly green spray paint (and it's common knowledge that I'm a spray paint addict), and got to work on Fred's makeover.

Fred got a light sanding followed by a quick coat of grey primer.  I sanded the primer once it had dried and began spraying light layers of paint all over.  I'm afraid I wasn't quite as patient as I should have been with this, so I ended up having to deal with some drips.  This is what Fred looked like after priming and his first layer of paint.


Looks sort of like he got a camouflage paint job, doesn't it?  Fortunately, that's not the case.


Finally, after many layers of paint, Fred looked like this:


 At this point, Fred spent about a week drying in the garage.  When I brought him back out, I noticed some spots that needed another coat of paint, and of course, I couldn't just leave well enough alone.  I went and got all fancy.


That's Rustoleum's Hammered Copper spray paint, with a little creative taping - the feet were just screaming for a pretty detail, don't you think?

After yet more drying time, I brought Fred inside and upholstered him.  I didn't manage to get any during shots (since I don't consider myself an upholstery expert), but I used a layer of foam topped with a layer of batting to soften the edges.  One thing I do want to point out, though, is that I removed the legs to get the folds around the corners right, and I pulled the fabric very tightly while I was stapling.  I think that's the key to having a piece that looks - if not professional - tidy.

Here's the final product!

 Isn't he hawt? 


 And this is about when the cats started helping.  See the tail on the left of the photo?


Yet more help from the cats. 
So, there you have it: my table-to-stool makeover.  The stool is pretty sturdy, and I think it looks adorable in my entryway.

Apparently, so do my little helpers!

Judy, thank you so much for allowing me to guest post here at DIY By Design!  I hope folks will stop by the Handyvergers.  Today, I'm sharing a few outtakes from my attempts at photographing Fred.

Thanks so much Kelly!

-Judy

Thursday, June 28, 2012

Guest Post - Your Daily Dose of Del Signore - Kitchen Makeover

The response was overwhelming when I asked for guest posts.  
I appreciate everyone who offered to guest post while I am on vacation. 

 Today I'd like to welcome Wendy from Your Daily Dose of Del Signore.  

Our kitchen is one of the brightest, most cheerful spots in the house. Ryan and I updated the look of our kitchen about a year ago now and we absolutely love how it turned out. If you'd like to see the changes from when we moved in until now, you can click HERE! When we first moved in, our kitchen looked very dated. It has changed a couple of times over the last five years, but I am so pleased with the final outcome.

Today our kitchen looks like this:


We have spent a lot of time and energy making this kitchen look beautiful. Now that it is for sale, I am really hoping that it makes someone a very nice kitchen soon! 

I realize I've never showed off the insides of our cabinets before...


I like having everything so bright and clean looking. It makes my heart happy!


Caleb's sippy cups, plates, and bowls have taken over a whole section. 


I lined all of the cabinets with a red non-skid liner and we love it! 

Thanks so much Wendy.

-Judy

Tuesday, June 26, 2012

Sizzle into Summer - It's a Party #71

Welcome to this week's Sizzle into Summer.  Spring is over and summer has hit with a sizzle.    The first day of summer here in New York was near 100 degrees! 
Well, your projects from last week sizzled as well.  Here are this week's features:

HOME DECOR:

BeBookBound  shared this gorgeous vintage girl's bedroom that was on a 
Parade of Homes tour where she lives.  This bedroom is just stunning.
The Ordinary Beautiful  shared her DIY drapes.  Such a fun fabric.

FURNITURE TRANSFORMATIONS:

Comfortably Carried Away shared how she transformed an ottoman using a coffee sack.

My Passion For Decor transformed a white and neglected craigslist find into this green beauty.
Hope you stop by to check out the before and after photos.

CRAFTY CREATIONS:

Turnstyle Vogue combined burlap and graphics to create this super door hanging.
The House that Built Us shared this super unique wreath making a monogram out of Cheerios.

TASTY TREATS:

Make the Best of Everything shared her recipe for Caprese Cucumber bites.
What a perfect dish for the summer.

Family Love Home shared her recipe for home made coffee crumb cake.
This is one of my favorite desserts.

If you were featured, please grab an "I've Been Featured" button (you can now find my buttons by clicking on the buttons tab right under my header).  Now let's get started with this week's party.  I can't wait to see what you have been up to.  Link up anything you have been working on...home decor, sewing, crafts, organizing, baking, recipes etc.   I will keep this link open through Friday.


A few rules:
1.  Please become a follower (if you already follow me on Google, I would love for you to follow me on Linky Followers as well).  

2.  Please grab my party button above and display it either on your sidebar or somewhere in your post.  This way word can spread about the party.  The more people at the party, the more fun we will have.

3.  Please enter the link to your actual post, not just a link to your main blog page.

4. Please visit others who have linked up.   Everyone works hard on their projects and blogs...let's show each other some love by visiting each other.  Let's have some fun and hopefully make a few new friends along the way.

Ok...Let's Party

-Judy

Winner of PrintRunner Giveaway Announced

The Winner of the PrintRunner giveaway,
according to Random.org is...


Sue!

Congratulations Sue.

DON'T FORGET TO STOP BACK TONIGHT AT 8PM EST 

FOR MY SIZZLE INTO SUMMER PARTY

-Judy

Monday, June 25, 2012

The Art of Packing a Suitcase

We are leaving for our family vacation in a few days and I thought I would share some of my tips on packing a suitcase.  Packing for a trip is much easier with a little planning and organization.

1.  Make a list on paper of how many days you will be away and how many outfits you will need.  We are going to Disney World for a few days and then onto a seven day Disney cruise.  For this vacation, it's almost like packing for two mini trips.  First, I create a list for each member of the family.  On our computer we have a list of all of the things that we always bring on vacation (sunscreen, vitamins, cameras etc) and just print it out year after year.  Planning exactly what you will need not only keep you from forgetting things, it will also help to avoid you over or under packing.  

2.  A few days before you leave, lay out the clothes you plan on bringing.  I organize the clothes by outfit, ideally aiming to have two tops for each pair of pants/shorts.  I also try to pack outfits that can use the same shoes to limit the amount of shoes as well.  

3.  Now it's time to actually pack the suitcases.   I pack the suitcases by outfit for my daughter and myself. For my husband and my son, I pack all of their shorts/pants together and all of their shirts together, since they are less particular about outfits and will just mix and match while we are on vacation.

Folding clothes to fit the suitcase will maximize the amount of items you can fit.  For pants, I fold them in thirds and for t-shirts I fold them as shown to fit four columns of clothing.

4.  The last thing you want when you get to your destination is to have all of your clothing wrinkled.  To help prevent this, I wrap all of my clothing prone to wrinkling in tissue paper.


5.  I use freezer bags to protect delicate clothing and to keep items like socks together.  I also use socks being packed to stuff into shoes to prevent them from getting crushed during transit.


6.  If you follow these simple tips, once you arrive at your destination, you can just pull out the piles as you have them in the suitcase and place them directly in the drawers of your hotel room.  It makes unpacking super fast so you can start your vacation quicker and stress-free.

Hope these tips will help you next time you pack for a trip.

-Judy

Friday, June 22, 2012

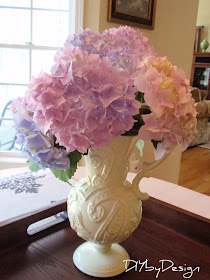
Hydrangeas

My favorite flower is the hydrangea.  I have a few hydrangea plants in my backyard, so early yesterday morning I went out and clipped a few to make a pretty arrangement for my kitchen.
 I used a pretty buttery yellow pitcher I bought at the Ethan Allen warehouse sale many years ago.
 There is nothing like fresh flowers.  
They just make me smile each time I walk by them.
 Here are a few close-ups.
 Centsational Girl has a great post on how to cut hydrangeas.  
In a few days I will drain the water and let these beauties dry.

They will make a beautiful arrangement dried as well.

What is your favorite flower?

Have a great weekend!
-Judy
Pin It