Hi there DIY'ers! I'm Lauren from Much Ado About Somethin' and I'm pretty excited about sharing a cupcake how-to for you today. I've loved following Judy here at DIY by Design because of her fantastic, accessible ideas, so today I wanted to put together a cupcake decoration that anyone can do. No need for lots of "cake gear" or previous experience for this cute summery flower.
To make this flower cupcake, you'll need:
Baked cupcakes
Buttercream Icing
Gel icing color(s)
Large round piping tip (A1 size)
Large star piping tip
2 piping bags (or gallon Ziploc bags)
Paintbrush with bristles at least 1/2" wide
Small bowl of water
You can get all of the above items at AC Moore, Michaels, or your local craft store. Sometimes it's nice to speak with an associate while you're there - they can help you make sure you're buying the right thing!
I think it's a great idea to practice techniques before you try them on a cupcake. To do this, tape a piece of wax paper to your counter top and set aside some of your icing to "practice". This way you can scrape the icing off the wax paper and get all of the mistakes out of the way...and all of your cupcakes will look great!
To begin, mix your icing colors. I decided to make yellow flowers, but it would be fun to make lots of colored flowers - they'll be really pretty displayed together. Use a toothpick to transfer some of your gel icing color into a bowl of butter cream icing. Gel icing doesn't water down your icing like the drops do, so it's best to use this if you can.
Cut the tip off of a piping or gallon Ziploc bag, and drop your large round tip into it so just the tip sticks out of it. Fill your bag about half way with icing, and you're ready to go!
This cupcake is very simple - it boils down to 5 dots and a swirl!
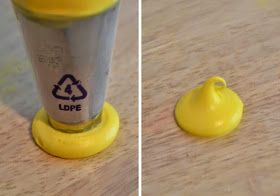
First, practice your dots. Hold your filled piping bag at a 90 degree angle to the surface you're piping on, with the tip just above the surface. Apply pressure to the bag so the icing spreads out slightly. Then release pressure as you pull straight up. If you end up with what looks like a Hershey kiss, you've done it correctly! Practice these until you feel comfortable and most of your 'kisses' are a similar size.
Once you have mastered the dot, grab a cupcake and pipe 5 dots around the edge of the cupcake. These are your petals. If your cupcakes are very tall and rounded, you may want to cut off the tops so the petals don't slide off.
Dip your paintbrush in water and lightly tap the tops of your dots so the "kiss" falls inward and you're left with nice, rounded dots.
All that's left is the pretty center! I decided to do a white swirl for the center of my flower, but you could also use another large round tip and make another dot.
Fill your piping bag with white icing, only this time put a large star tip in the point of the bag. To make a swirl, start with your tip in the very center, pointing straight down. Begin piping with firm pressure and move your hand in a tight circle. As your complete the circle, lessen pressure and "wisp" up and away. Give this move a few tries on the wax paper first.
Repeat this on all your cupcakes, and you'll end up with a beautiful, colorful display perfect for summer.
Interested in other cake tutorials? Check out some of my other designs here, here, here, here, and here! Follow me on bloglovin', Facebook, or Pinterest - hope to see you around!
Thanks again, Judy, for letting me crash your blog!


Lauren is so talented!! Makes me bummed out that I live so far away from her tasty creations :(
ReplyDeletexox
Bailey
http://akabailey.blogspot.com
YUM!! These look so good!
ReplyDeleteLove these!! You are so talented, Lauren :)
ReplyDelete