Monday, February 28, 2011

The Mudroom Redo Begins

Bright and early Saturday morning we started the mudroom renovation.  I was so excited to get this project underway.  I have been planning this for a while now.
Last week I went to our local lumber store and purchased all the wood I would need for the board and batten treatment.  First things first, the wallpaper would need to be removed.
We emptied the room out and were ready to begin.  We have removed wallpaper many times.  This specific wallpaper was also in our kitchen and powder room, and with the exception of one small area in the kitchen, it all removed easily.
Our expectations were that the wallpaper in the mudroom would strip just as easily as it had in the kitchen and powder room.  
One issue we knew we would have is that the cabinets were installed after the wallpaper.  Those cabinets you see are from our kitchen and three years ago when we renovated the kitchen (you can check out the renovation here) we moved those cabinets into the mudroom.  So we knew we would have to cut around the cabinets to remove the paper - not a big deal, in theory.  So with all hands on deck, we began.  
With scrapers and warm water we began to peel off the wallpaper.

Usually we peel off the top layer of the paper, soak the bottom layer and then peel away the sheets.  I had figured the entire job of wallpaper removal would take about three hours...four tops.  Well I was WRONG!!
This is a photo from several hours into the job.  The paper was coming off in tiny little pieces...not the big long strips it usually comes down in.  
This was almost two hours after the last photo.  Now at this point we had tried all kinds of methods of removing wallpaper, including but not limited to scoring the paper and then soaking it.  The only thing that seemed to be happening was we were doing damage to the wall. 


Eight hours later (yes eight - which with four people working is really 32 man hours) the wallpaper was finally gone.  We tried to figure out why this wallpaper seemed to be hung using super glue.  The only thing we could come up with is maybe because it's a laundry room and there is heat given off by the dryer...behind the washer and dryer was by far the worst of the room...in the end it doesn't really matter why...it was just the worst.
The wallpaper was gone, but left behind was much damage to the walls (I'd like to say the children caused this, but there was equal damage caused by all four of us fighting with that paper to get it off).  Not only was there damage caused by the scraper, but after the wallpaper was removed I clearly remembered why I had wallpapered this room in the first place...these wall were a mess.  I guess the builder figured this was a mudroom and didn't take the same care in finishing the walls.  In addition to all of that, there was also glue all over the walls.  I had hours and hours of work ahead of me to skim coat these walls and get them into shape before we could even think about starting the next phase of the project.  

We were all exhausted.  They say it's always darkest before the dawn, and right about now it was darn near pitch black.

Please stop back tomorrow to see if this story has a happy ending...I will give you this hint...a whole lot more goes wrong first before it starts going right.  This project only proves just how important a good sense of humor and a little ingenuity is in any DIY project.
Don't forget about the Winter Blues Wednesday party...links open up on Tuesday at 8pm EST each week.  Hope to see you then!

-Judy


Friday, February 25, 2011

Organized Linen Closet

I am so much happier when my closets are organized.  So you can imagine how unhappy I was when I took a look at my linen closet and saw that it was somewhat of a disaster.
Here's problem number one - the closet is more than just a linen closet.  In addition to sheets and towels, it also is the home of photos and scrapbook supplies, bandaids, medicines, batteries etc.  It's a large walk-in closet that just needed to be organized.
I started by emptying out the closet and grouping like items together.

Here is the after.  There is nothing on the floor anymore.  I ended up relocating many of the older towels to the rag pile now.  

It is so much nicer to look at this closet now.  My kids linens are in my son's bathroom closet and each of their towels are in their own bathrooms.  This closet really only has the sheets for my bathroom and towels for guests.  

I hope you have a great weekend.  My plan for the weekend is to start my mud room renovation.  The wallpaper removal is hopefully tomorrow.  All members of the family will be enlisted for help.  Can't wait to share that with you.  Don't forget the Winter Blues Wednesday party link will be open until midnight tonight.
-Judy

Thursday, February 24, 2011

A Day in NYC

My kids are home this week for mid-winter break and I've spent the week trying to keep them entertained.  Yesterday we drove into New York city to see a broadway show.  We live thirty miles outside of the city so it's easy to do.  My husband works in the city, but the kids and I only go in a few times a year.
First stop, the Toys R Us.  It's three full floors of fun - truly a kids wonderland.
They have a huge, indoor ferris wheel in this Toys R Us.  My kids still love going on it...for the bargain price of $4.50 per ticket for the ride...it is New York City after all.  We sat in the M&M car.

So many cool things in this Toys R Us.
When my daughter was little we couldn't go anywhere near this dinosaur...way too scary for her back then.

Next we went to lunch at Planet Hollywood in Times Square.  I really felt like I was doing the tourist thing.  We usually try to not go to the tourist traps...but I let the kids chose the restaurant.  What do they know from tourist trap?
We got to Planet Hollywood at 12:15pm.  The show was at 2pm and only a block away, so this should have been plenty of time.  They said the wait would be 10 minutes....it was 25 minutes....so we were seated at 12:40pm.  A waiter did not come to the table until 12:55.  I explained that we were going to a show and that we needed to order and eat quickly.  He was very nice and said no problem, our lunch would be out within twenty minutes and he would put a rush on it.  At 1:30pm...no food yet.  Our waiter was very apologetic and said worse case scenario we could come back after the show...no, no I said, my kids need to actually eat before sitting through a 2 1/2 hour show.  At 1:40pm the food came and I have never seen my kids eat so fast.  We got to the show at 1:52...eight minutes to spare.  Not the leisurely lunch we would have liked, but at least we made it to the show.
After that lunch I needed a few laughs...and that's what we got with The Addams Family.  Nathan Lane and Bebe Neuwirth star in the show.  It was very funny.  Nathan Lane is always amazing.  We bought the tickets on Saturday and the only seats left were premium seats, so we had great seats...5th row center.

The show let out at 4:40pm and we were in the car at 4:45pm and at my kids tennis academy by 5:15pm.  My brother says a day with me is like a day with Clark Griswold from the movie Vacation...I do tend to schedule things in such a way that requires precision timing.
Don't forget the Winter Blues Wednesday party is still going on.  You can click here to join in the fun.

-Judy

Tuesday, February 22, 2011

Winter Blues Wednesday - It's a Party #4

Welcome to the fourth Winter Blues Wednesday.  I am so excited to see what you have all been working on.  Last week was another success with 62 links!  There were so many great posts linked up.  Here are a few highlights:

Jodie from Love Laughter and Decor created this gorgeous nursery for her daughter...on a budget.  It is so amazing.  I hope you stop by her blog and check out all of the photos.

Vanessa from At The Picket Fence created a guard rail slipcover.  What a great idea.  I refused to put the guard rail up when my daughter moved into a big girl bed because it messed up her decor.  I chose the piles of pillows on the floor to break her fall method.  This would have been such a better solution.  
Cindy from Camera and Chaos did a laundry room makeover.  She did the same board and batten treatment I am planning on doing in my laundry room.  I was so inspired by the job she did, I went out and now have all the wood and supplies in the house and will be starting on my laundry room makeover this weekend.

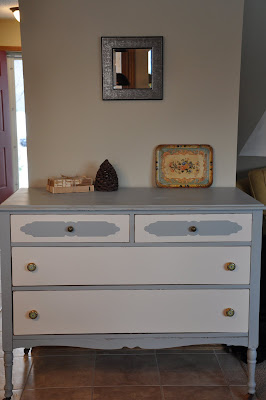
Allison from Fab Rehab Creations completely transformed this beautiful dresser.  You must go and check out her blog.  It's really filled with inspiring ideas.

If you were featured above, please grab my "I've Been Featured" button to display on your sidebar (you can find it on my sidebar).    

Now let's get started with the party.   I can't wait to see what you have been up to this week.  Link up anything you have been working on...home decor, crafts, sewing, organizing, baking, recipies etc.  I know you are all so talented out there and have been keeping very busy during these winter months.  I'll be keeping the link open through Friday.


A few rules:
1.  Please become a follower.  

2.  Please grab my party button above and display it either on your sidebar or somewhere in your post.  This way word can spread about the party.  The more people at the party, the more fun we will have.

3.  Please enter the link to your actual post, not just a link to your main blog page.

4. Please visit others who have linked up.   Everyone works hard on their projects and blogs...let's show each other some love by visiting each other.  Let's have some fun and hopefully make a few new friends along the way.

Ok...Let's Party
-Judy

How to Grout Tile

This weekend I was in maintenance mode.  Yesterday I showed you how to re-caulk a shower or bath.  Today I'm going to share with you just how easy it is to re-grout tile.
The grout in front of my shower had cracked over time and little by little a space has developed.  The first thing I did was scrape out any extra grout that was cracked.
When we built the house we asked the tile installer to leave us with some extra grout.  That way we would always have a perfect match.  Grout doesn't go bad and it takes very little to do these type of minor repairs.  Here's a tip - always ask for extra grout.  If you don't have any on hand, you can get some at a local tile store or Home Depot.  Grout does come in colors so if you are trying to match an existing grout keep that in mind.

In a container I mixed a small amount of grout with a little water.  I added a water a little at a time until the grout was the consistency of a thick brownie mix.  You don't want it too thin and you don't want it too thick.
Then I used the paint stirrer to dump the grout along the edge of the shower and the tile.
Then using a sponge or a wet paper towel, smooth out the grout.  It's that easy.
In less than five minutes, the grout looked brand new.  I gave it twenty four hours to dry before using the shower.

Hope I've inspired you to make those minor repairs.

Don't forget about the Winter Blues Wednesday party.  The link will open up tonight at 8pm EST.  Hope to see you then.

-Judy

Monday, February 21, 2011

How to Re-caulk a Shower

Last week I shared with you my master bathroom. You can check out the entire room here.

We built this home almost twelve years ago.  From time to time some maintenance needs to be done in order to keep a home looking good.
Take my shower, for instance.  For a while now I have been noticing that the base of the shower was in need of some help.
The bottom of the shower was turning a disgusting color.  We have tried every product and we realized that the caulk was beyond cleaning at this point.
Yes, it was downright gross.  We were going to have to re-caulk.
We bought this kit from Lowe's for $5.39.
Using the tool provided in the kit I scraped back and forth and back and forth.  Things were going along fine for a while.  Some of the caulk came off right away.
Then it got to a point where the tool wasn't enough.  I had to get out the big guns...the utility knife.  Carefully, I scraped out the rest of the existing caulk.  This in combination with the tool from Lowe's worked really well.
In no time at all (an hour later) I had scraped out all of the existing caulk.  Actually the most difficult part was trying to stand back up after scraping for an hour in a squatting position.
It was time for the new caulk.  This stuff really is easy to use.
I ran a bead of caulk all the way around the base of the shower and on the corners, working one side at a time.
Then using the second tool provided in the kit, I made a perfect seam all the way around.
Now the base of the shower is like new again.  It looks so much better.  It's one of those projects that really is so easy to do and I had to ask myself why did I wait so long to tackle it.

Stop back tomorrow to see what else I did in this bathroom over the weekend.  I was really in a maintenance kind of mood.

Let me know what you think.  Have you taken on this type of project before?

-Judy

Friday, February 18, 2011

Home...The Perfect Nest

I found this frame in the clearance aisle of Home Goods for $3.00.  What I liked about it was that it was flat and it would be easy for me to make it into something a little more special.
I started by looking through my stash of scrapbook paper and letters.
Now which paper to pick?
This one was cool, but not exactly the look I was after.
I liked this one.  It had a blue/green color and the darker dots are raised.
I took the frame and the paper and placed them both upside down on a cutting board.  Using my knife I cut around the frame to make the paper the exact size.
I then used the same knife to cut away the center of the paper as well.
Using a corner cutter, I clipped each of the four corners of the cut paper.
Using Mod Podge I glued the paper onto the frame.  I only glued the back.  I didn't apply any Mod Podge to the top because I liked the texture of the paper and didn't want to affect that.

I used adhesive ribbon to cover the edges around the center section.
You can see better in this picture the four corners that I used the corner cutter on.
I used adhesive letters (which I had to add a little glue to since they are so thick and didn't really stick too well).
Some more embellishments and I was done.  Now I just have to find the perfect picture.

I love the frame now.  It was such a simple project.  Let me know what you think.  I always love and appreciate your comments.
Don't forget the Winter Blues party is open through tonight. You can still link up your projects.
Have a great weekend.
-Judy