

A few weeks ago I shared with you a tutorial on how to sew pinch pleat lined drapes.
When sewing my drapes I wanted them to look as professional as possible. One of the ways I achieved this was to sew a blind hem on my drapes.
When sewing my drapes I wanted them to look as professional as possible. One of the ways I achieved this was to sew a blind hem on my drapes.

What is a blind hem? A blind hem is a stitch that is barely visible from the right side of the fabric. The best part is that it is easier than you would think. If you can sew a straight line, you can sew a blind hem.

Ideally you would start with the blind hem foot that came with your sewing machine. Here is what the foot looks like from the back...

...and the front. If you are unsure which foot is the blind hem stitch foot, just refer to the owners manual for your machine. Most machines come with this type of foot. If you don't have this foot you could still do it, you would just have to guide yourself carefully to keep the line straight.

Next select the blind hem stitch on your machine. On mine it is #17. See how the stitch looks...that is typically the universal symbol for the blind hem stitch.

For the hem...I folded my fabric up two inches and pressed it into place.

Then I folded it another four inches and pressed it for the final hem. Then I pinned it into place.

Now if you were to sew the hem with a straight stitch the stitches would be visible from the front, even if you used the same color thread.

Here comes the important part...Take your hem and fold it back as shown above. You want there to be about 1/4" of the hem to sew on as shown.

Next, line up the fabric under your blind hem stitch foot. Notice how the fold is lined up with the cut out part of the foot.

I used green thread so that you could easily see the stitches. For my actual drapes I used an off-white thread so that it completely disappeared. Notice how only each sixth stitch catches the fold to the left.
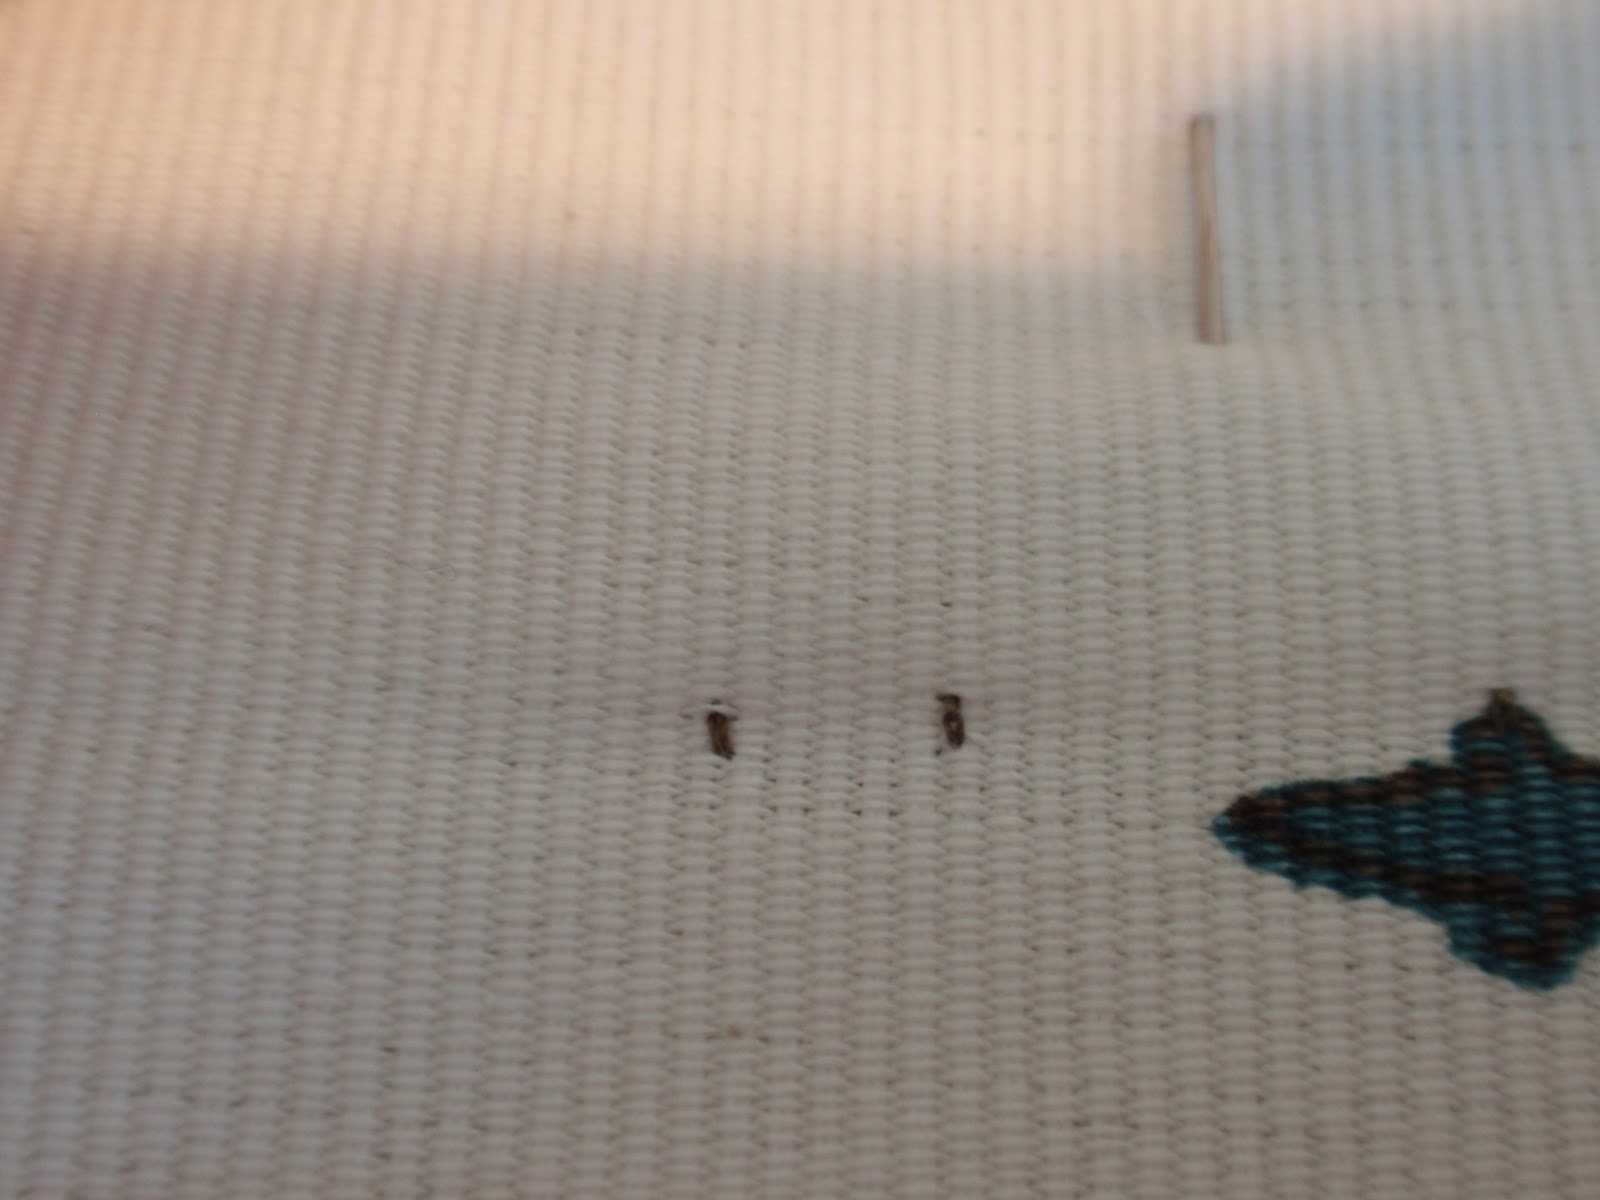
This is all you would see from the front of the fabric (see the green dots).

Here's what the blind hem looks like on the actual drapes that are now hanging in my guest bedroom. That's a super up-close photo. When standing in the room you cannot see any stitches and even up close all you see is some faint dots.
It's as simple as that. I hope now that you know how easy it is, you too will try to sew a blind hem on your next project.
-Judy
I always love and appreciate your comments. Have a great day!


8 comments:
Thanks for sharing this. I sew...but my sewing is mostly basic. I've always wanted to know how to do a blind stitch! Thanks for sharing this!!! ~Tammy
Nice tip, Judy! I don't know when I'll be sewing drapes or curtains again, but I'll be keeping this in mind. I know my sewing machine came with so many things, I don't know what half of them are!
Great tutorial and your drapes look amazing. Hugs, Marty
I literally just had a "Ah ha!" moment. I never knew how to do a blind stitch with a machine. Thank you so much for teaching us!
Love the pattern! They turned out great!
Judy, I am so glad you joined the party at StoneGable or I probably would not have found your blog. Thanks for the easy to follow tutorial since I soon plan to make draperies. I look forward to reading your past posts to see what you have been up to.
This is the good news.The information you provide is very useful for me.Thank you for sharing it.I will come to see if you have new post every day.
good bar food in singapore
I really don't think anyone has put it that way before!. Your blog is definitely worth a read if anyone finds it. I'm lucky I did because now I've got a whole new view of this. Thank you!
Upholstery
Post a Comment