Pages

Showing posts with label wallpaper. Show all posts

Thursday, February 13, 2014

Easy Update - Wallpapering the Back of a Bookcase

It's another snow day here in New York.  We really got a ton of snow this time.  Being stuck in the house so much has given me a chance to do some little projects around the house that I might not otherwise get around to doing.
As you know we just painted our dining room a lighter and brighter color.  There is a small bookcase built into the columns that separate the living room and dining room.

I decided to take the bookcase from ordinary to something a bit more special.
I started by emptying out the bookcase.  It turned out the bookcase needed a little touch-up so I pulled out the paint and painted the shelves.
Next I used temporary wallpaper I had left over (which is the same wallpaper that I used to cover the DIY magazine holders).  
It only took a few minutes for this update.  
I had already edited what was going back before I decided to add the wallpaper, so it was easy to put everything back.

I love easy projects that make such a big difference.


Can't wait to hear what you think.

-Judy

Pin It
Sharing with Savvy Southern Style
Sharing with The Scoop
Sharing with A Stroll Thru Life

Friday, December 7, 2012

Creating a Focal Wall

As you know little by little I have been trying to add color to my very beige basement family room.
The other day I made another step in the direction of adding color!
This one was a big step.
I've taken my inspiration for color from the fabric I made the curtains with.
Here's a close-up of the fabric.
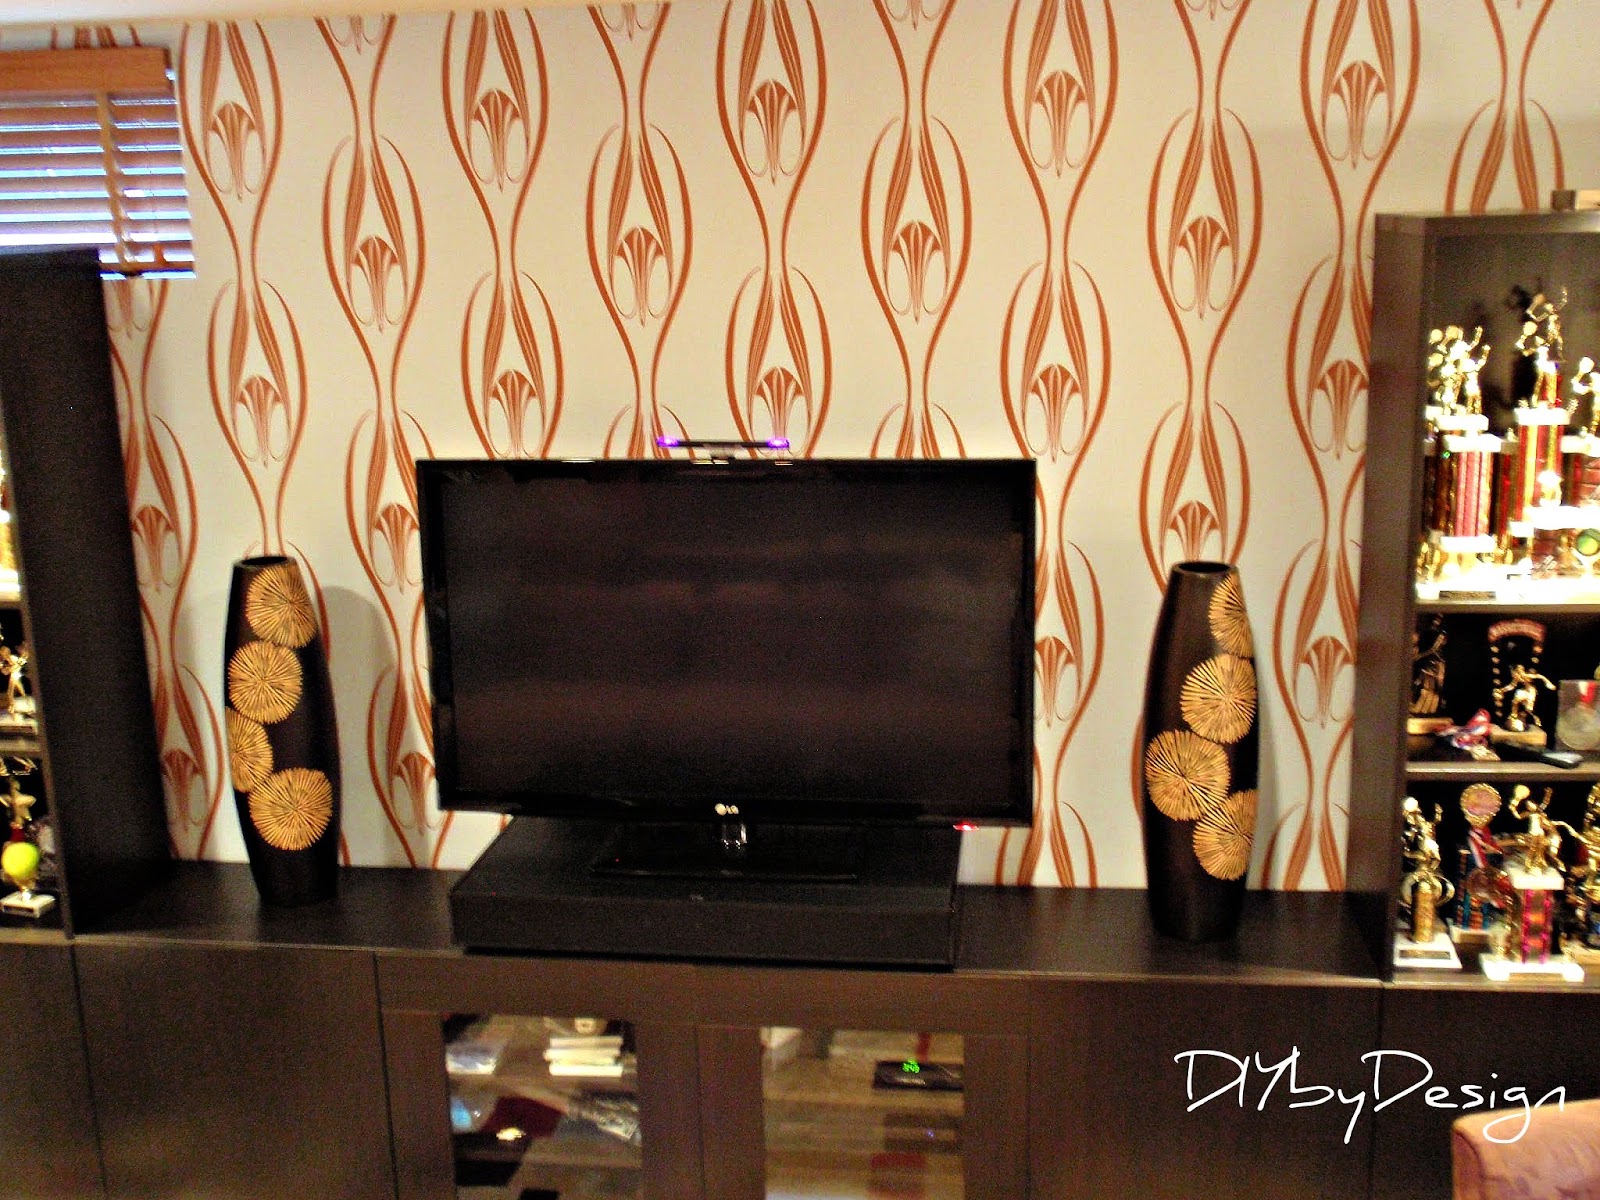
So when I found this temporary wallpaper at Home Goods, I knew I had found an awesome solution for a focal wall.  (You can click here to see the temporary wallpaper I added to my kitchen).  Tempaper retails for approximately $85/roll online, so when I saw it at Home Goods for only $19.99 a roll, I just had to grab it. 
Here is a look at the room before:

So while the kids were at school I got to work.
There were two obstacles to this project:
(1) I did not want to take apart and move the media unit.
(2) I needed to remove the vinyl wall phrase, however I wanted to try to re-use it.

I was able to accomplish both.
It wasn't easy but I was able to wallpaper without moving any of the furniture.  I slid the television from side to side and wallpapered far enough behind the furniture that no one will ever be the wiser.  My arm was all scraped up the next day from getting the wallpaper behind the furniture and my manicure was ruined from taking off the vinyl, but it was all worth it.
I have no idea why, but I couldn't get a clear photo.  Every photo was blurry that day.

In a couple of hours my focal wall was complete.  I was even able to remove the vinyl letters.  I had to use a hairdryer to loosen it a bit, and it came off one letter at a time, but ultimately I got it off and was able to move it to surround our family photo.

After standing back and admiring my work,  I noticed that it looked a little funny that I did not wallpaper the bump-out on the left hand side. 

 So the next day, I went back and finished the job.
This photo is with a different camera - still a blurry mess.
Yep, I pretty much gave up on getting a clear photo.

Here's a closer view of the wallpaper.
It's the perfect blue.  
I chose these lamps because they picked up on the copper in the wallpaper so well, 
plus I really liked them.

The lamp bases and shades are from Target and are a story in themselves.  
I'll tell you about it next week.

I can't wait to hear what you think about how my room is coming along.

Hope you have a great weekend.  
We are putting our Christmas tree up on Saturday...finally.  We usually put it up the day after Thanksgiving.  Yikes!

-Judy
Pin It

Monday, October 22, 2012

Temporary Wallpaper

I love wallpaper, but don't always want to make the long term commitment.  A few days ago I was searching the internet for temporary wallpaper for our finished basement.  I came across a very cool site that sold such wallpaper.  It was fairly expensive costing approximately $85 a double roll.  Not wanting to spend that much, I dismissed the idea and went on with my day.  The next day I was doing a quick run-through Home Goods when I saw something out of the corner of my eye.  The sales people had filled a cart with mostly Christmas stuff that they would be putting on the shelves.  I saw these rolls of paper, that looked bigger than Christmas paper, so I went over to investigate. I couldn't believe it!  It was the very same temporary wallpaper I had spied on the internet, except Home Goods was selling it for only $19.99 a  double roll.  I bought all four rolls of a pattern I plan on using in the basement (the exact same pattern I was considering the day before).  I also bought one roll of a more neutral pattern, not knowing exactly what I was going to do with it, but liking it enough to figure something out.
In my kitchen we have a "bar" area with a backsplash in need of a little something.  Originally I thought I would have an antique mirror installed.  But because of it's unique shape it was going to cost me thousands of dollars.  So instead it had just stayed painted for the last few years.  
This would be where I would wallpaper.  First thing I did was go through all of the papers and junk and either throw it out, file it, or just put it where it belonged.
 It was well overdo to clean up and organize this area.
This temporary wallpaper is applied very much like contact paper.  It's a bit more stable, but other than that it's very similar.  It's easier than regular wallpaper to hang because there is absolutely no mess.  I actually hung this paper dressed in nice clothing...not my normal project/paint clothes.

I started in the center and worked my way back to either side.
I used a square to keep all of my cuts perfectly even.
It went up super easy.  I used a level on the first piece and then just lined up each of the next pieces.

In no time at all it was done and it looked great.
Then I took a step back and realized that now that I wallpapered the backsplash area,
 I really needed to do the same on the archway wall.
Again, in no time I got it wallpapered.
It looks so much better.  I didn't even use up an entire roll 
so I'm sure I will cover something with the rest.

In the meantime, I have put together a quick mood board showing you the pattern of the temporary wallpaper I scored for the finished basement.  The basement is going to be undergoing some changes.  More about that later.
I can't wait to hear what you think of the new wallpaper 
(and how much improved the whole area looks now that I have cleaned up - Lol)

-Judy
Pin It

Tuesday, September 6, 2011

Back to School

My kids start school tomorrow.  My daughter will be entering Middle School and my son will be entering High School.  Too crazy!  For my daughter that means lockers for the first time...which means a decorating opportunity for me.
Last week she had orientation where she was given the opportunity to set up her locker and try out the lock.  It was a typical ugly locker, complete with old graffiti.
While my son showed my daughter around the school, I went to work on her locker.  I started with some fun locker paper from The Container Store.  Honestly, you could create the same look using contact paper for much less, but my daughter had her heart set on this pattern, with all the matching accessories, so I caved and bought it.  I bought two rolls, which didn't go as far as I would have liked.  I added the paper to the inside of the door and to the top shelf.

Then with the few scraps I had left I covered over the rest of the graffiti.  To finish it off I added the matching accessories.  My daughter loved the finished product.  So we shut the locker and let her try out her combination one more time.  This time she couldn't open it.  So I tried...I couldn't open it either.  Then I realized that I must have put the paper over the lock and now we couldn't pull up the handle of the locker.  Security!!  The security guard had to come and use pliers to open her locker.  It wasn't just the lock...but the whole mechanism that runs up the side of the door of the locker that couldn't be covered. The security guard was very nice about the whole thing.  He showed me how the mechanism worked and told me I had to cut away the part that covered that mechanism.   So I cut that part away and now the door opens.

On a funny side note...while I was decorating my daughter's locker, another mom and daughter saw what I was doing...left the building...and came back with contact paper to do the same.  I did walk over and tell her that I was waiting for security and she should be careful not to cover the lock (this is before I realized you couldn't cover the entire mechanism).  After security helped us out they left and we got ready to leave.  I looked down the hall and saw this mom and daughter having the same issues we had...not being able to open their locker.  She too had contacted over the mechanism.  As I left the building, the last words I heard were...Security!!

Don't forget to stop back tonight and join in my Sizzle into Summer party.  The link opens at 8pm EST.  Hope to see you there.

-Judy

Monday, February 28, 2011

The Mudroom Redo Begins

Bright and early Saturday morning we started the mudroom renovation.  I was so excited to get this project underway.  I have been planning this for a while now.
Last week I went to our local lumber store and purchased all the wood I would need for the board and batten treatment.  First things first, the wallpaper would need to be removed.
We emptied the room out and were ready to begin.  We have removed wallpaper many times.  This specific wallpaper was also in our kitchen and powder room, and with the exception of one small area in the kitchen, it all removed easily.
Our expectations were that the wallpaper in the mudroom would strip just as easily as it had in the kitchen and powder room.  
One issue we knew we would have is that the cabinets were installed after the wallpaper.  Those cabinets you see are from our kitchen and three years ago when we renovated the kitchen (you can check out the renovation here) we moved those cabinets into the mudroom.  So we knew we would have to cut around the cabinets to remove the paper - not a big deal, in theory.  So with all hands on deck, we began.  
With scrapers and warm water we began to peel off the wallpaper.

Usually we peel off the top layer of the paper, soak the bottom layer and then peel away the sheets.  I had figured the entire job of wallpaper removal would take about three hours...four tops.  Well I was WRONG!!
This is a photo from several hours into the job.  The paper was coming off in tiny little pieces...not the big long strips it usually comes down in.  
This was almost two hours after the last photo.  Now at this point we had tried all kinds of methods of removing wallpaper, including but not limited to scoring the paper and then soaking it.  The only thing that seemed to be happening was we were doing damage to the wall. 


Eight hours later (yes eight - which with four people working is really 32 man hours) the wallpaper was finally gone.  We tried to figure out why this wallpaper seemed to be hung using super glue.  The only thing we could come up with is maybe because it's a laundry room and there is heat given off by the dryer...behind the washer and dryer was by far the worst of the room...in the end it doesn't really matter why...it was just the worst.
The wallpaper was gone, but left behind was much damage to the walls (I'd like to say the children caused this, but there was equal damage caused by all four of us fighting with that paper to get it off).  Not only was there damage caused by the scraper, but after the wallpaper was removed I clearly remembered why I had wallpapered this room in the first place...these wall were a mess.  I guess the builder figured this was a mudroom and didn't take the same care in finishing the walls.  In addition to all of that, there was also glue all over the walls.  I had hours and hours of work ahead of me to skim coat these walls and get them into shape before we could even think about starting the next phase of the project.  

We were all exhausted.  They say it's always darkest before the dawn, and right about now it was darn near pitch black.

Please stop back tomorrow to see if this story has a happy ending...I will give you this hint...a whole lot more goes wrong first before it starts going right.  This project only proves just how important a good sense of humor and a little ingenuity is in any DIY project.
Don't forget about the Winter Blues Wednesday party...links open up on Tuesday at 8pm EST each week.  Hope to see you then!

-Judy


Related Posts Plugin for WordPress, Blogger...