

Here is one of my favorite tutorials from last year. Enjoy.
I have been wanting to make my own coasters for a while now. We have a box of left over tumbled marble tiles in our garage from our kitchen backsplash which I knew would be perfect for this project.
I have been wanting to make my own coasters for a while now. We have a box of left over tumbled marble tiles in our garage from our kitchen backsplash which I knew would be perfect for this project.
 |
| Do you like my new Le Creuset tea kettle? It's in my favorite color. |
I started by going to The Graphics Fairy, and picking out four french designs that would reduce to 4"x4" easily. It's important that you don't pick a design that is too wide or else it will cut off part of the design when you reduce it to 4"x4". Next I printed out the mirror image of the design on my printer (you need it to be the mirror image of the design since that is the part that will be sticking to the tile).

There are so many different ways to transfer a design onto tile. I wanted to do this entire project without having to leave the house to buy anything, so I went with this method.
I cut out the design and brushed mod podge onto the printed side of the paper.

I then placed it on top of the tile and smoothed out the paper.

I baked the tiles at 170 degrees for 20 minutes.

When the tiles came out, I wet my finger and started to rub off the paper.
Do not soak the paper or else you will wipe off the ink as well.
You just have to keep wetting your finger and wiping off the back of the paper a little at a time.
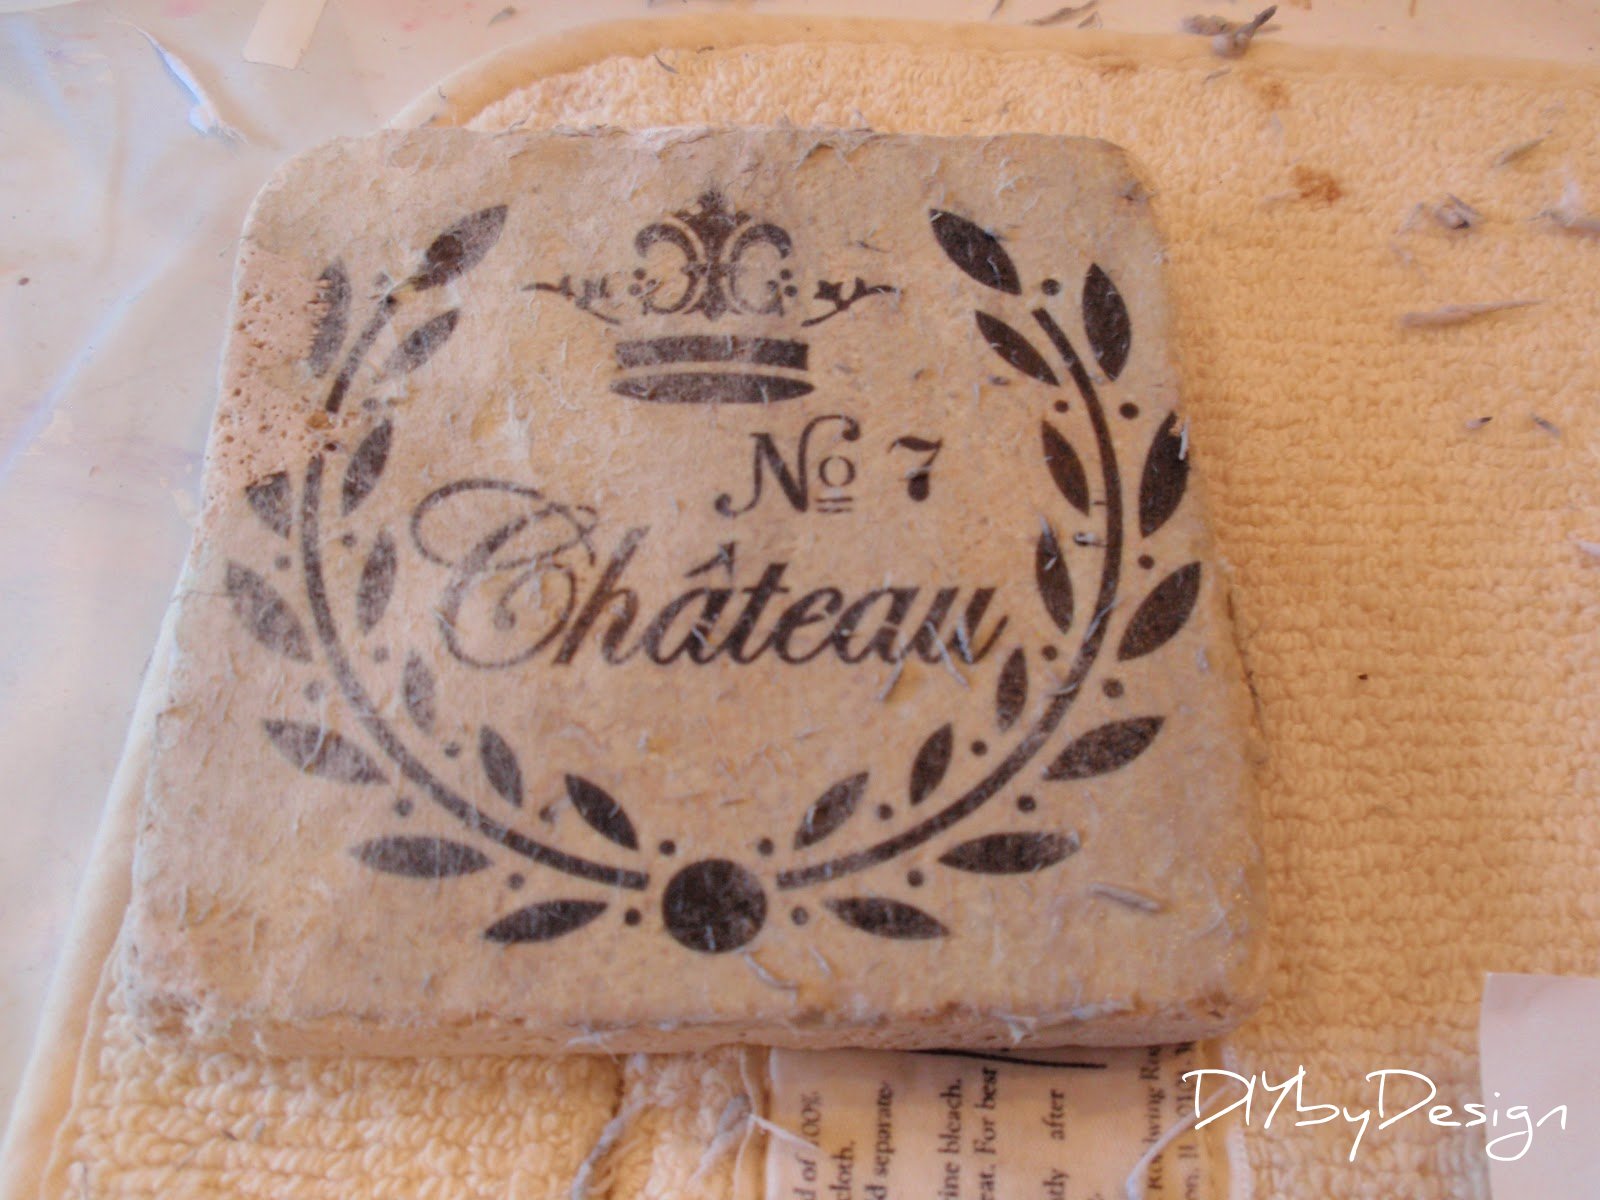
You can see in this photo that I had a little bit more to wipe off.
It took only a few minutes to get it all off.
It took only a few minutes to get it all off.

Once all of the backing of the paper is off, it is time to polyurethane.

I brushed a thin layer of polyurethane on top of each tile to protect it
from any moisture from drinks placed on it.

Once the polyurethane was thoroughly dry (a few hours), I added self stick cork to the bottom.
If you don't have self stick cork, you can use felt.
You just want to ensure that the tiles won't scratch the top of your furniture.
 |
| It was only 11am when I took this photo...too early for wine...so it's fruit juice. Lol |
Time to enjoy my new coasters.
These would also make a great gift.
Can't wait to hear what you think.
-Judy


13 comments:
Since I've started doing this transfer technique, Judy, I will have to try these out. I like to have something to put my drinks on when I'm in the sunroom or living room and this is much prettier than a napkin!
Your coasters are beautiful and I can't wait to make some for my home. I actually have some tiles to. Great project!
I think I love these! So pretty, great job. Thanks for sharing.
What a great idea! They look fabulous and would definitely be a great gift!
Lauren
Those are so cute- what a great hostess gift they would make. I have never seen that transfer method done- it looks like it works really well- xo Diana
I love these Judy!!
These turned out just great- thanks so much for the tutorial!!!
Great idea for gifts :)
I have wanted to try these for a long time. I too have so many left over tiles! Did you use just regular paper from your printer? Or does it need to be a special paper?
Thanks for sharing this tutorial.
Love this!...I thought I would try that method by just using stamps....but love this method..!!
Have a wonderful weekend!
I just used regular paper.
This is beautiful, Judy, and looks pretty simple to do compared to come other similar projects I've seen. Thank you so much for sharing your tips with us!
Make several identical coasters to give out as party gifts or wedding favors, using a photo of the honoree or bride and groom in the insert.
Marble Coaster
even its not behalf of English but still awesome post thank you
bolly4u
Filmyhit
9xmovies
amazon customer care number nashik
amazon customer care number dehradun
Post a Comment