I just love Valentine's Day.
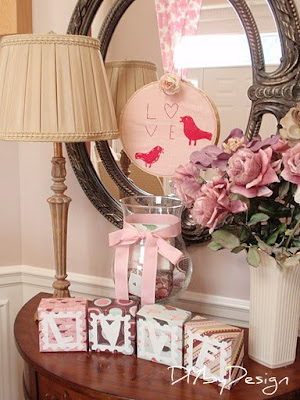
In creating my Valentine's Day vignette for my front entryway, I knew I wanted to spell out the word LOVE. In my head I pictured using building blocks of some sort. I searched through the house and couldn't figure out what to use. After some thought, I came up with the idea of creating paper boxes out of scrapbook paper.
In creating my Valentine's Day vignette for my front entryway, I knew I wanted to spell out the word LOVE. In my head I pictured using building blocks of some sort. I searched through the house and couldn't figure out what to use. After some thought, I came up with the idea of creating paper boxes out of scrapbook paper.
Then using my Silhouette machine I cut out the word love out of white vinyl from a template I purchased over Christmas when everything was 50% off at Silhouette.
I then made more paper boxes, in various sizes, out of Valentine's Day paper
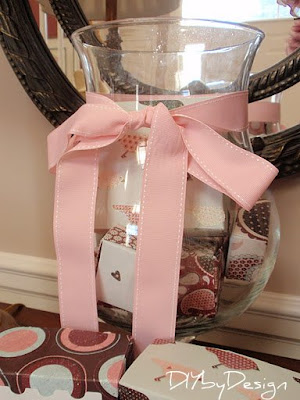
and filled a glass canister with them.
I tied a pink grosgrain ribbon that was from a Pottery Barn Kids
gift my daughter received a few years ago (I always save ribbon).
I swapped out flowers and brought these from upstairs. However, something still seemed to be missing. I wanted to create a type of wreath. I wanted something a little different.
That's when I came up with the idea of using an embroidery hoop I had and creating a wreath out of that.
I used pink fabric I had from my daughter's room, and hand embroidered the word LOVE using a heart for the "O". I then cut out two love birds out of hot pink felt and hand sewed those on as well using embroidery thread. I cut off the excess fabric from around the hoop. I hung it using tie-dyed ribbon and using a paper rose to hide where the loop screws together.
The perfect greeting for everyone who enters my home.
The boxes are really easy to make. Here's all you have to do...
You start with your favorite scrapbook paper. I used a 12" x 12" for my LOVE boxes and 6" x 6" for the smaller boxes in the canister. The only rule is it must be a square piece of paper.
Then I folded the paper in a series of folds. I thought it would be easier to show you "in person" rather than in just photos. So, below is a step by step video tutorial on how to fold paper to create paper boxes...it's my very first video tutorial. I hope you will check it out.
Hope to see you tonight at my Winter Blues Wednesday party that opens at 8pm EST.
-Judy
Pin It


15 comments:
Super cute, I can't wait to watch the video when I get home. (Can't at work) I needed something for <3 Day
Amber
PS found you on Sugar Bee
cute!
Great tute, Judy! You look so pretty! : )
Love the paper covered boxes. I saw pretty matchboxes at a store I was in last week and she had them displayed in large glass jars like you have. They were so pretty and I had no idea what they were until I finally picked one out and slid the box open.
I just watched the video tutorial - great job Judy! Just pinned this one :)
Hi, my name is Heather! Please email me when you can, I have a question about your blog!
HeatherVonSJ[at]gmail[dot]com
Looks like love is in the air at your house!
=)
Cute cute cute Judy! Great video too!
Such a beautiful space!
Beth
http://alyssabeth1.blogspot.com/
Oh what a lovely Valentine's display. I love it. So pretty and so elegant. Great video. Thanks tons for joining TTT. Hugs, Marty
Cute tabletop and great video!
Your Valentine's Day vignette is lovely! I save ribbon too! My husband thinks I'm crazy but you never know, right? =)
Jeanine
What a pretty Valentine's Day vignette you've made!
And look at you with video tutorial! Thanks for sharing how to make the boxes. You make them look so simple.
Thanks for the tutorial & your vignette is so pretty!
xoxo
twentyfour7
http://xoxotwentyfour7
Very cute and creative. We'd love to have you link it to WIW and share with us.
Hugs,
Patti
Great tutorial! And sweet Valentine's decor!
Post a Comment