Pages

Showing posts with label diy. Show all posts

Thursday, March 5, 2015

DIY Faux Stained Glass Front Door Sidelights


What started out as a temporary solution fifteen years ago has lasted through the years.  Our front door has sidelights and a transom.  For privacy reason I used Gallery Glass to created faux stained glass.  I did a leaf and floral which at this point felt really dated to me.  I started pricing new front doors.  For a new door with sidelights and a transom, I'm looking at $7,000-$8,000 installed.  Plus I have detailed moulding around the front door which would have to be removed in order to install a new door, which would then require painters to come in and repaint the foyer.  Yeah...I'm not giving that mouse a cookie just yet.

You can see in this photo that originally I did not use the Gallery Glass on the transom.
The best thing about Gallery Glass is that it last forever left untouched, but if you want to remove it, it scrapes right off.

 Okay...it doesn't scrape right off.  Three hours and two sliced fingers later, it all scraped off.   In the meantime I had some left over Gallery Glass, but not enough to do a whole project.  I wasn't even sure they made it anymore.  I'm happy to say that I found it at AC Moore so for under $20 I was able to completely restyle my front door.  I designed a pattern based on all of my favorite "new door" designs.  I taped the pattern to the outside of the front door and then traced the pattern using the faux lead.

The ready-made lead comes only in black.  I used a Sharpie pen to paint the leading gold. 

I used mostly clear paint and the etching paint with just a little gold.  It dries in a couple of hours and cures in a week or so.  I tried several things with the clear and scraped it off a few times until I finally settled on using my fingers to make swirls to create the effect I wanted. By the way, it scrapes off super easily and in big pieces if you take it off within the first hour which allowed me time to figure out exactly the pattern I wanted on the clear.  


 Here is the finished door.  I love how it came out.  I originally designed a pattern for the transom that was horizontal, but it didn't look right with white moulding cutting it up.  I had to go with what made sense and have the pattern live within the white moulding lines. 

For less than $20, I completely changed the look of the front door.  So much more updated and beautiful.  So the way I see it I saved over $7,000.  Awesome!

Can't wait to hear what you think.

Have a great day.

-Judy

Monday, April 28, 2014

DIY Clay Bowls

This is a project I have been wanting to try for a while now.  I had the supplies already, so it was just a matter of actually sitting down and trying it.

Here's what you will need:
Clay (I got mine from Wholeport
Lace
small oven-proof bowl

For the colored clay bowl, I mixed blue and pink together and rolled it out.  I then placed the lace over the clay and pressed it into the clay to make the impression (which shows up much more in person than in photos).  I carefully cut around the lace any excess clay.  Then I laid it over a small pyrex bowl and put it into the oven at 275 degrees for 15 minutes.
I put this cute little bowl in my daughters room for hair clips etc.
The other bowl I made using white clay.
For some reason the lace seemed to show up much better on the white clay.
Again I cut around the lace using a sharp knife.
I again laid it over the pyrex bowl, but this time made a more square shape out of the clay.  I filled this bowl with dried roses and added it to my living room.


Hope you will give these super easy bowls a try.

-Judy

Pin It
Sharing with Savvy Southern Style
Sharing with The Scoop
Sharing with A Stroll Thru Life

Friday, February 1, 2013

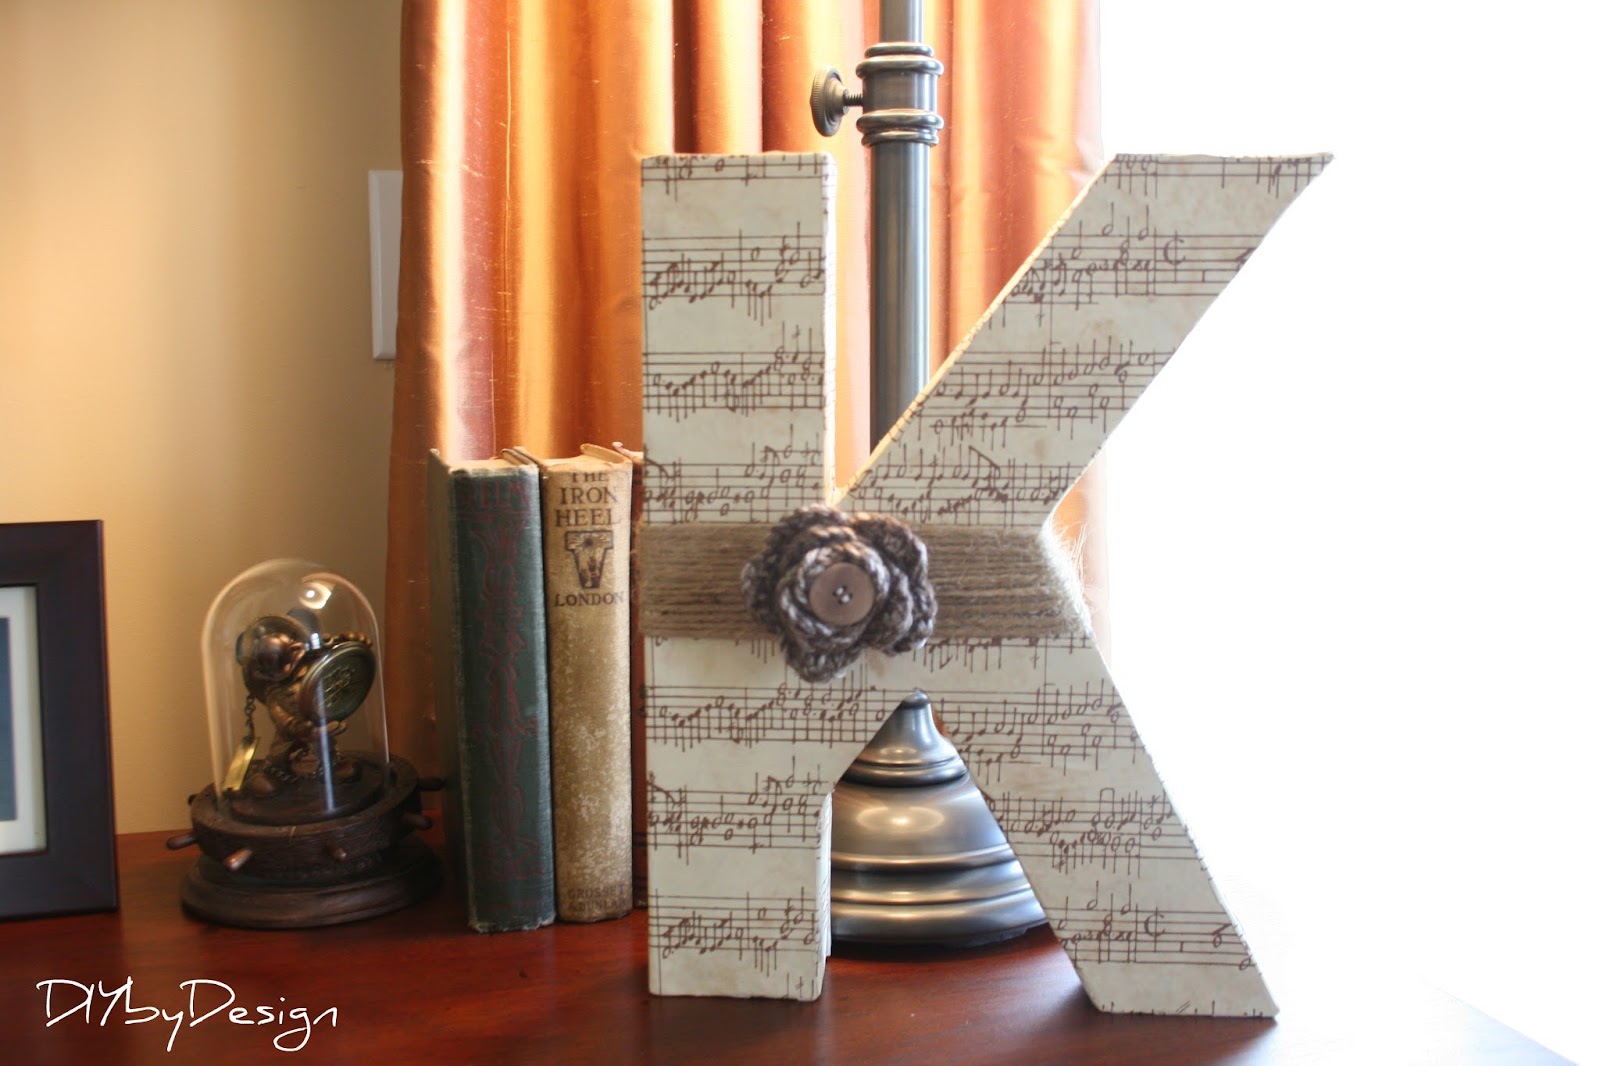
DIY Monogram Letter

Here's a fun and quick project I put together using things I already had in the house.
I already had the letter which I bought a while ago at JoAnn's.
I had decoupaged it once before, but it was time for a change.
I used the same music note wrapping paper ...
that I used for these candle holders.
Using Mod Podge, I adhered the wrapping paper to the letter.
I used the extra twine from my DIY Twine Pears and wrapped the letter K.
I then used a crocheted rose I made and added a button.
Simple, quick and super cute.
Have a great weekend!

What do you think of my DIY monogrammed letter?
-Judy

Pin It

Tuesday, January 29, 2013

Twine Pears

I love these twine pears.  They are easy and fun to make.
They are very Pottery Barn like and add warmth to any room or vignette.
Westlake Ace Hardware sent me all of the supplies I needed to put together these awesome twine pears.
Here is what Westlake Ace Hardware sent me. 
Here is all you need to make these twine pears:

-lightbulbs
-hot glue gun
- gardening twine (jute)
- a twig from outside

That's it.

I started by going outside and finding a loose twig.  I then cut off a small piece and hot glued it to the end of the lightbulb.
I added hot glue as I wrapped the twine around the lightbulb.
I just kept wrapping and gluing and wrapping and gluing.  Make sure you glue as you go along or else the twine does tend to move.
This was the first one I made where I wasn't gluing the entire time.
 I got much better at it as I continued making these pears.
They are so cool looking.  These would be great to make with bulbs that have burned out too.
Once I started making them, I just couldn't stop.
In no time I had twine pears all over the place.
I want to thank Westlake Ace Hardware for providing me with all of the supplies. 
  For more holiday and home decor ideas, check out Westlake Ace Hardware.  

Don't forget to stop back tonight for my Winter Blues Wednesday party.


The party opens at 8pm EST.  Hope to see you then.

-Judy

Pin It


Sharing with Savvy Southern Style 

Friday, January 4, 2013

DIY Candle Holders

This is one of those projects that came together with things I already had in the house.
Those are the best kind of projects.  Especially right after Christmas, I am trying to use what I have on hand first before going and buying anything new.  

As I mentioned yesterday, my husband bought me three flameless candles for Christmas.  I am in love with these candles...they look so real, even in person.

When I opened them Christmas morning and saw the container they came in, I knew I wanted to make something out of it.  I wasn't sure exactly what in the moment, but it came to me yesterday.

They would make awesome candle holders.  

I had bought this music note wrapping paper from Home Goods before Christmas, but never used it.  It's a nice weight and would be perfect to cover the tubes the flameless candles came in.
I was going to use mod podge, but decided to just use a glue stick.  
I cut the wrapping paper to size (I was able to get all three covered with just one width of the paper) and then glued the wrapping paper all around. 

Then I used leftover ties that were used to ship the area rug in my daughter's room (yep, I kept those thinking they might look cool on a project someday).  I used my hot glue gun to adhere the ties.  

I wanted something to cover the seam where the ties met.  I decided to make clay tags .  You can check out a full tutorial on how to make these clay tags here.  I used a heart shape cookie cutter and stamped the words on the clay before I baked it.  After I baked it I painted the stamped letters using craft paint.  
Then I used my hot glue gun again to adhere the clay tags.  
I added them to my vignette on my coffee table in my "new" family room.  
One more finishing touch - I tied some left over wire ribbon (one with music notes on it too) to the glass vase with flowers on the table.  

When my husband saw what I had made with the containers the candles came in, he said, "I saw them as boxes to be thrown away, somehow you see home decor."  I think that sums me up perfectly.  

What do you think?  Do you love them as much as I do?  I best part is that they were free!  

Have a great weekend!

-Judy
Pin It

Related Posts Plugin for WordPress, Blogger...