Pages

Friday, July 20, 2012

The Great Window Seat Solution

I'd like to welcome Tamara today who has written a post especially for DIYbyDesign.  Enjoy!

One day, I walked into my teenage daughter’s room to put away the billionth load of laundry and had an epiphany. No longer would her room be cluttered with too much furniture and things scattered everywhere. I had thought of a way to get rid of her desk (that is never sat at and only used to cram stuff in) and her big fluffy papason chair that has seen better days. You see, she has a bay window that brings in lots of light, has a mountain view, and is under-utilized. What better way to make good use of her window, give her a cozy hang out spot, display her treasures and hide her clutter? A bay window seat with shelving and storage! Ingenious! Or at least it is in theory.

First step: Look at her room (pictured here) and take all measurements needed to make a bay window seat 20 inches high, with two doors underneath for storage and at the side angles, small shelving to display her treasures and store books.

Step 2: Compare my space with the experts who I use for those home interior remodel projects that are beyond my scope of DIY. This is a great seat idea for storage with the drawers underneath and using the white bead board for covering the inside of the area. I love the white finishing and two-tone color with the oak seat.


And another example for the final type of seat cushion with pillows for maximum comfort and how my daughter says “maximum cuteness.” Pillows are cushions are obviously a must as is the idea of lower book shelves.


Step 3: The build. Now that I have my ideas all on paper, these great reference photos and measurements taken, I can begin the building! There are many ways to build a window seat for any size and shape window and many options to use including doors for a big storage area, baskets or drawers to use and even building a hinged lid as the seat. Whichever design you prefer, it’s a great way to make use of under-utilized space and one more step in helping your home becoming design-pleasing and clutter free; no matter how many kids you have! Now, I’m off to go build my daughter’s new window seat and perhaps once all the cushions and pillows are in place with the finishing touches – to test it out by reading a book and taking a cat nap before letting her know it’s complete!

Thanks Tamara!

Have a great weekend!

-Judy


Thursday, July 19, 2012

Flooring Options


Today I'd like to share with you this insightful article written especially for DIYbyDesign by Anna Hicks.  Enjoy!
Flooring options: Carpet, hardwood and tiles
There are many flooring options and choosing the right one for your home can be rather daunting. Carpet, hardwood and tile are just a few of the choices available and the option chosen often depends on the room where it will be installed.
Carpets 

Living rooms, dining rooms and bedrooms are good choices for carpet. They are made of different fibers, pile and loops.Nylon, acrylic, polyester, olefin and wool are popular carpet styles. Nylon fibers are strong and flexible. They are resistant to wear and do not easily absorb moisture. Acrylic fibers are stain, moth and fade resistant. It dries easily and is flexible.
Carpet Party
Polyester fibers are strong and easy to clean. It resists chemicals, mold and wear. Olefin fibers are hard wearing and resist chemicals, mold, stains and fading, and are less likely to create static. Wool fibers are durable, easy to clean and resist wear. It feels warm resists wear and fire.
Cut pile is when the loops are cut, resulting in a flat finish. The quality of the pile is determined by the fiber, density and amount of twist.
Level loops are all the same height. Multilevel loops have different heights and create an interesting pattern in the carpet. Textured carpet forms a pattern from the cut and twist in the pile. It is hardwearing and is also known as Frieze carpet. 
Hardwood 
Hardwood floors come with different styles and finishes. Solid wood flooring is a solid piece of wood. The benefits of solid hard wood are that it can be sanded and refinished. Engineered wood floors use layers of different wood veneers. Its advantages are that the wood will expand and contract less than solid wood flooring. 
Hardwood floor with Circular Fireplace, www.tucsonazflooring.com

Bedrooms are a good choice for hard wood flooring. Place a decorative area rug on the floor for color and warmth. 
Laminate 
Laminate flooring is made of layers of synthetic flooring products that are fused together. It is easier to install and maintain than wood flooring. This is a good project for the do-it-yourselfer. Hallways and stairs are good places to install laminate flooring. 
laminate floors installation service


Tile 
There are two main types of tile flooring, ceramic and natural stone. Both are installed the same however the natural stones will need more care. Ceramic tiles are made of different types of clay. Natural stone tiles are made from granite, marble or slate. Kitchens and bathrooms benefit from tiles flooring. 
Stone Tile Floor


Vinyl
Vinyl flooring comes in a 6-12 foot wide sheet or as tiles. Sheet vinyl is popular and covers large areas with few seams. Vinyl tiles or planks take longer to install yet are an easy home project. The tiles come in many patterns and colors. Kitchens and bathrooms are great places to use vinyl.
Wood Look Vinyl Flooring

Flooring options are many and the choice depends on the room and whether it will be a do-it-yourself project. A little research will help you choose the perfect flooring for your home.
Thanks Anna!
-Judy

Wednesday, July 18, 2012

Sizzle into Summer - It's a Party #74

Welcome to this week's Sizzle into Summer party.  It is sizzling here in New York with temperatures hitting 100 degrees here today.  Nothing better than cooling off here at DIYbyDesign and catching up with all of the inspiring posts from last week.  Here are this week's features:

HOME DECOR:

My friend Kathy from Creative Home Expressions shared her guest bedroom that she recently redecorated.  That gorgeous headboard is from Walmart!  Stop by Kathy's blog to get all the details.
The Old Post Road showed us how she created a custom roller shade.
  Hope you will all stop by for the step by step tutorial.

FURNITURE TRANSFORMATIONS:

Decorate With A Little Bit hand-painted this table and transformed it into something beautiful. 
 I just love the songbird in the center.
Blue Star Antiques  transformed an old chest into this stunning piece.  I just love the numbers.

CRAFTY CREATIONS:
Petals to Picots shares an awesome tutorial on how to transform a plain pair of flip flops to the cutest flip flops ever.  You know I love to crochet so this is definitely going on my "to do" list.

Life on Lakeshore Drive created this scrabble sports frame for her son's room.  If you stop by her blog you can also check out the baseball wreath she made in the same post!

TASTY TREATS:
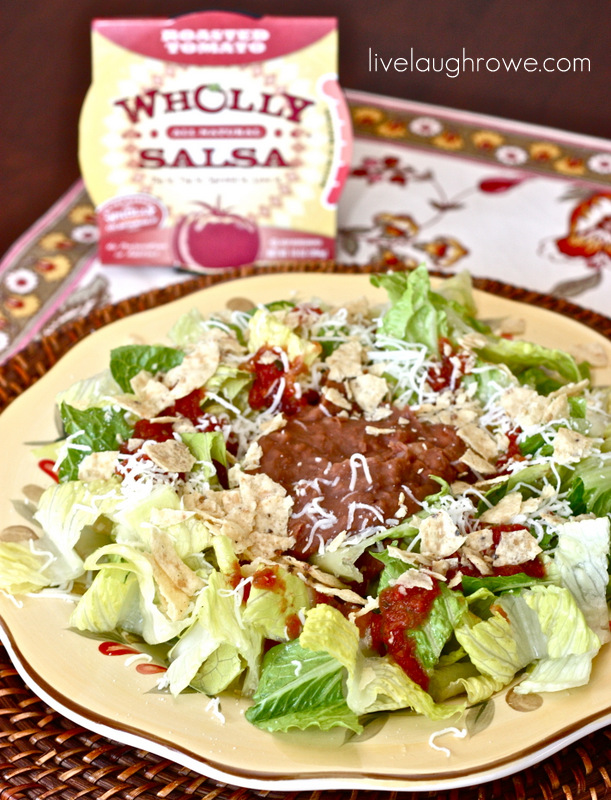
Live Laugh Rowe shared her recipe for low fat taco salad. 
 Love that - all the yumminess with none of the guilt.
Life's Creative Journey shared her beautiful rosette birthday cake that she made herself.


If you were featured, please grab an "I've Been Featured" button (you can now find my buttons by clicking on the buttons tab right under my header).  Now let's get started with this week's party.  I can't wait to see what you have been up to.  Link up anything you have been working on...home decor, sewing, crafts, organizing, baking, recipes etc.   I will keep this link open through Friday.


A few rules:
1.  Please become a follower (if you already follow me on Google, I would love for you to follow me on Linky Followers as well).  

2.  Please grab my party button above and display it either on your sidebar or somewhere in your post.  This way word can spread about the party.  The more people at the party, the more fun we will have.

3.  Please enter the link to your actual post, not just a link to your main blog page.

4. Please visit others who have linked up.   Everyone works hard on their projects and blogs...let's show each other some love by visiting each other.  Let's have some fun and hopefully make a few new friends along the way.

Ok...Let's Party

-Judy

Tuesday, July 17, 2012

DIY Magazine Holder

I thought I would share one of my most popular posts from April 2011.  Enjoy!

I have wanted to get my daughter a magazine holder for her desk for a while.  It would help neaten up her desk as well as give her a place for all of her tween magazines.  I've searched for a while for one to coordinate with the memo board I created (click here for that tutorial).
I couldn't find anything I loved.  I thought about buying a magazine holder and then covering it with the leftover fabric I had from the memo board, but why spend money on a magazine holder when I could probably make one from scratch.
My solution...a UPS box.  You could also use a Fed Ex, USPS etc box as well.  I used the medium size UPS which had a depth of 3" which would work for the magazine holder.
I put one end of the box together and stood it next to a magazine holder I had in the house from my mudroom.  I used my mudroom magazine holder as a guide and traced all four sides.
Then using a utility knife, I carefully cut along my pencil line.
Using the left over fabric from my daughter's memo board, I laid the new magazine holder on the fabric and traced around it, rolling the box as I continued to trace the shape.  This way I had one continuous piece of fabric (only one seam that way).
Using Mod Podge I applied the fabric to the box.  I must tell you that Mod Podge works so well with fabric.  I find it so much easier than working with paper...but that's just me.
I wrapped it all around until the last edge overlapped a little bit.
I folded under that edge and used Mod Podge to hold it in place.  It holds almost immediately.
I then folded each of those edges over to the inside of the box and used Mod Podge again to adhere it.  I then used the remaining fabric and covered the inside as well.   The inside was trickier mainly because I was cutting it close on fabric...I had one continuous piece of fabric inside as well except for one little patched area (which is low enough that you can't see it).  Keep in mind that both the memo board and the magazine rack were created using a total of one yard of fabric.
Here is the final product...it came out exactly as I had envisioned it.
You can see how I folded over all of the inside and outside edges in this closeup to give it a store-bought look.  I love this project -  it was easy and free.  What a perfect combination!


DON'T FORGET TO STOP BACK TONIGHT AT 8PM EST 

FOR MY SIZZLE INTO SUMMER PARTY

-Judy

Monday, July 16, 2012

Master Bedroom Duvet

Last week the Pottery Barn Bed and Bath catalog arrived in my mailbox.  I don't know about you, but I actually get a little excited when a new PB catalog arrives.  I really enjoy flipping through the pages.  The front cover of the latest issue of the Bed and Bath catalog had new bedding featured.  
Image
When I saw the new "Charlie Paisley Duvet" I thought...hmmm...this would look really beautiful in my master bedroom.  I wanted to see it in person, because sometimes the colors appear much different from the photograph.  So I went to my local PB, which generally carries a small selection of bedding (we have a larger PB further away that carries everything, but I thought I would start with the shorter drive).  As luck would have it they had this duvet in stock.  It was even more perfect in person.
The blue in the duvet in person was more like the robin's egg blue in my bedroom, not as blue-grey as many of the PB duvets (or as blue/grey as it looked in the photo).   
I was thrilled when I put it on the bed.   I think it adds so much to my master bedroom.
Here is my bedroom before.  We had a cream textured duvet and then the beige throw on the end of the bed.  I have been wanted to bring a bit more of the robin's egg blue into the bedroom for a while and have been keeping my eye open for something.  This new PB duvet works so well.
Now that I know the duvet is staying, I have to finish off the look.  
Image

Unfortunately, PB only sells standard and euro shams in this pattern.  I have two king size shams.  But I have a plan.  I noticed while at PB they sell a shower curtain in the same fabric.  I have to feel it, but my guess is that it is made from the same material.  If so, I will be sewing my own shams.  
I will be sure to share how I do it if I go this route.
I need to bring a little more color to the head of the bed and I'm thinking the shams being placed closest to the headboard will achieve this.  Also, the cream textured duvet that we had on the bed is now being used as a coverlet.  It's a very heavy weight fabric and actually looks and feels like a coverlet.  
I can't wait to hear what you think of my new duvet!
I hope to have more to share later in the week.

-Judy


Friday, July 13, 2012

Finding Dinner in Blogland

From time to time I find myself at a complete loss as to what to make for dinner.  That's when I turn to my friends with food blogs to find inspiration.  Last night was one of those nights.  
I went to one of my favorite food blogs, The Food Yenta, and found one of the best mac and cheese recipes ever.  My son is not a big mac and cheese fan, but this one has bacon in it, and even he loved it.

It was also simple to make with ingredients I already had at home.  I did substitute the shape of the pasta, since I didn't have any elbow macaroni in the house, but it didn't really change the end result.

I have actually tried many of The Food Yenta's recipes and they have all been great.  Hope you will check out her blog next time you're at a loss for what to make for dinner.

How about you...which food blogs do you turn to for great recipes?

Have a great weekend.

-Judy
Related Posts Plugin for WordPress, Blogger...