I originally post this tutorial two years ago, but it's one of my most popular all time posts and thought it would be a good time to re-post it. Enjoy!
I've been showing you my Christmas decorations for the past few days and I thought now might be a good time for me to teach you how to make the bows I have on my tree, my mantle and my staircase.
This is the one of the many bows I have on my railing. It was made using wired ribbon and floral wire. If you don't have floral wire, you can use those little flowers they sell in Michaels or AC Moore that have wire on them as I did below (they are usually in the wedding favor aisle).
I've made bows using a cardboard template as well as without cardboard. For me the cardboard is ideal if you are making many bows and you want their size to be uniform. Otherwise it is very tough to measure it out exactly each time. If you are only making one bow, you don't need the cardboard.
For this bow I started with cardboard folded in half (to give it extra strength) that had a final measurement of 9 inches long.
I start by laying out a piece of ribbon which extends beyond the cardboard (for the tail on one end of the finished bow).
I then start wrapping my ribbon around the cardboard, lengthwise. When you wrap the ribbon, it won't be able to go on top of the tail part. It's ok if it's just next to it like I show above.
I continue wrapping it until I have gone around five times (you can go around more times the bigger and fuller you want your bow). I like five loops on each side (ten total). Don't wrap it too tightly or you will have a tough time getting it off of the cardboard.
When you are done wrapping you should end on the opposite side of the first tail. DO NOT cut the ribbon at this point. Keep it attached to the roll.
Remove it from the cardboard. Be careful not to let it come apart as you remove it. Since the ribbon is wired it should stay together without much effort.
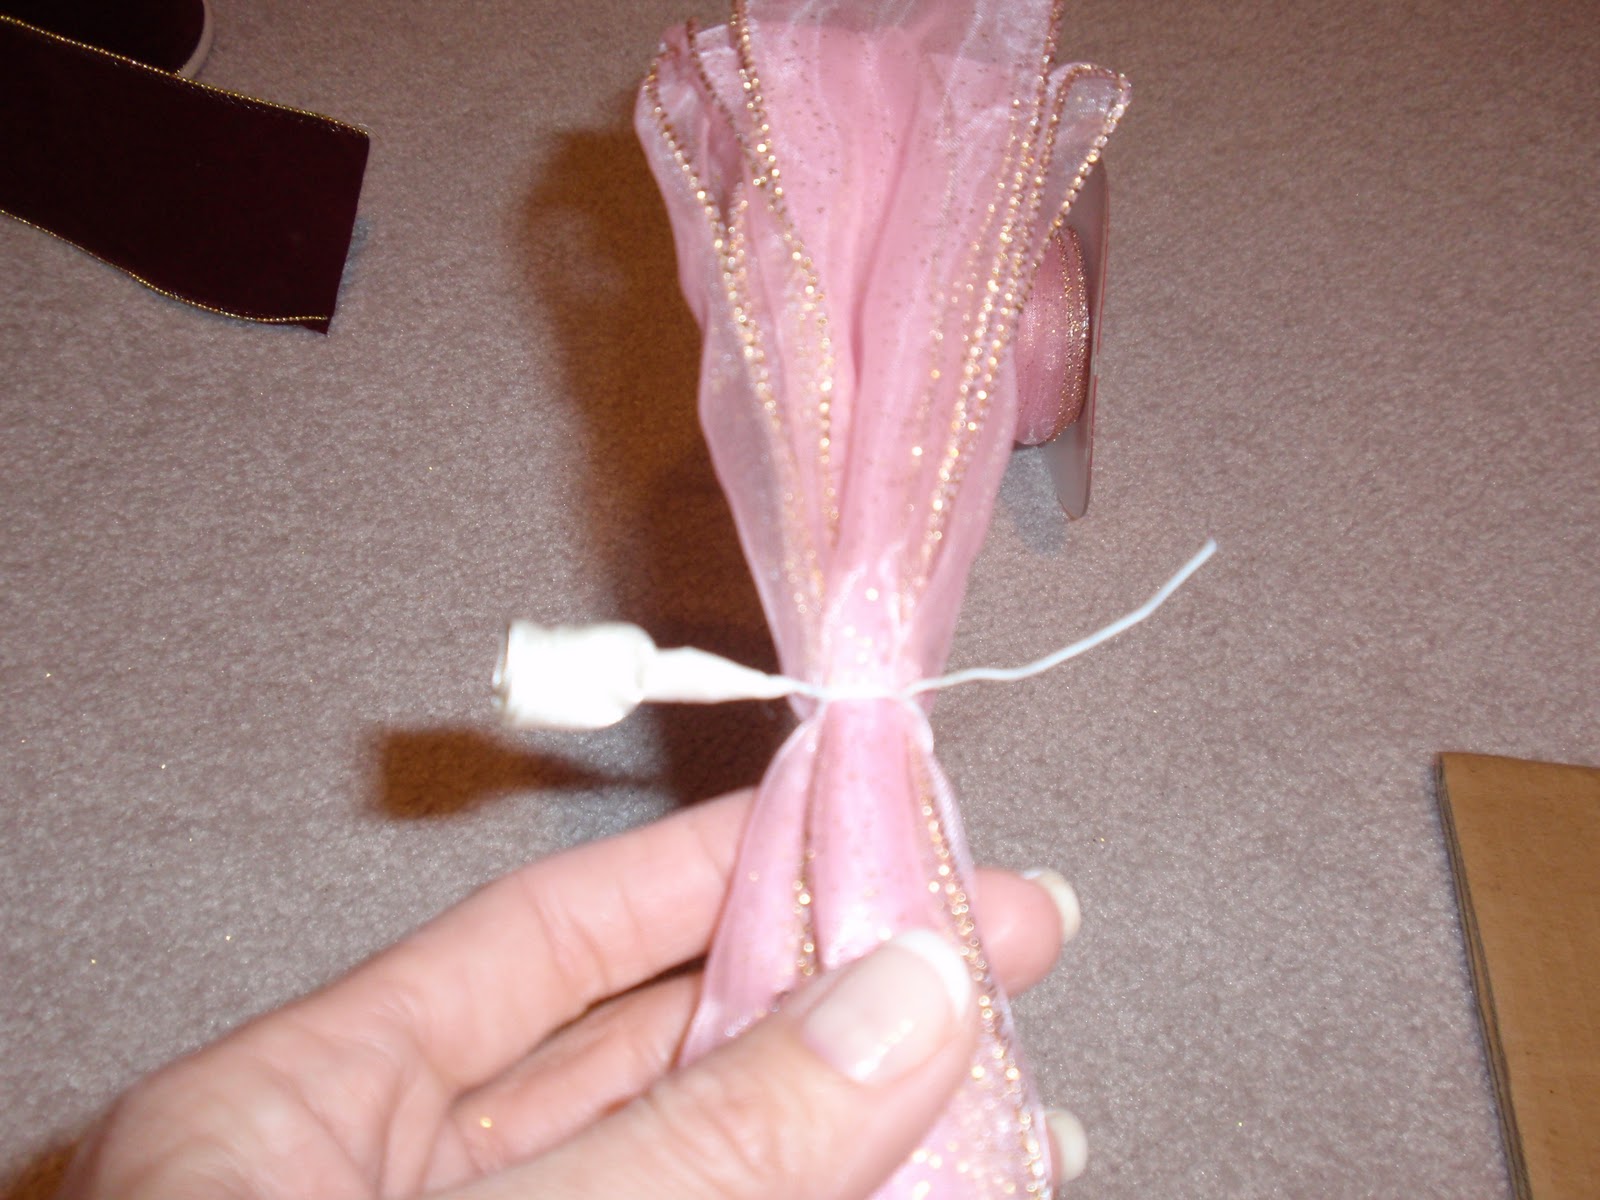
In the center pinch your ribbon together.
Now take one of the flowers with wire and simply wrap the wire around once and twist the wire together a few times (like when you rewrap a loaf of bread).
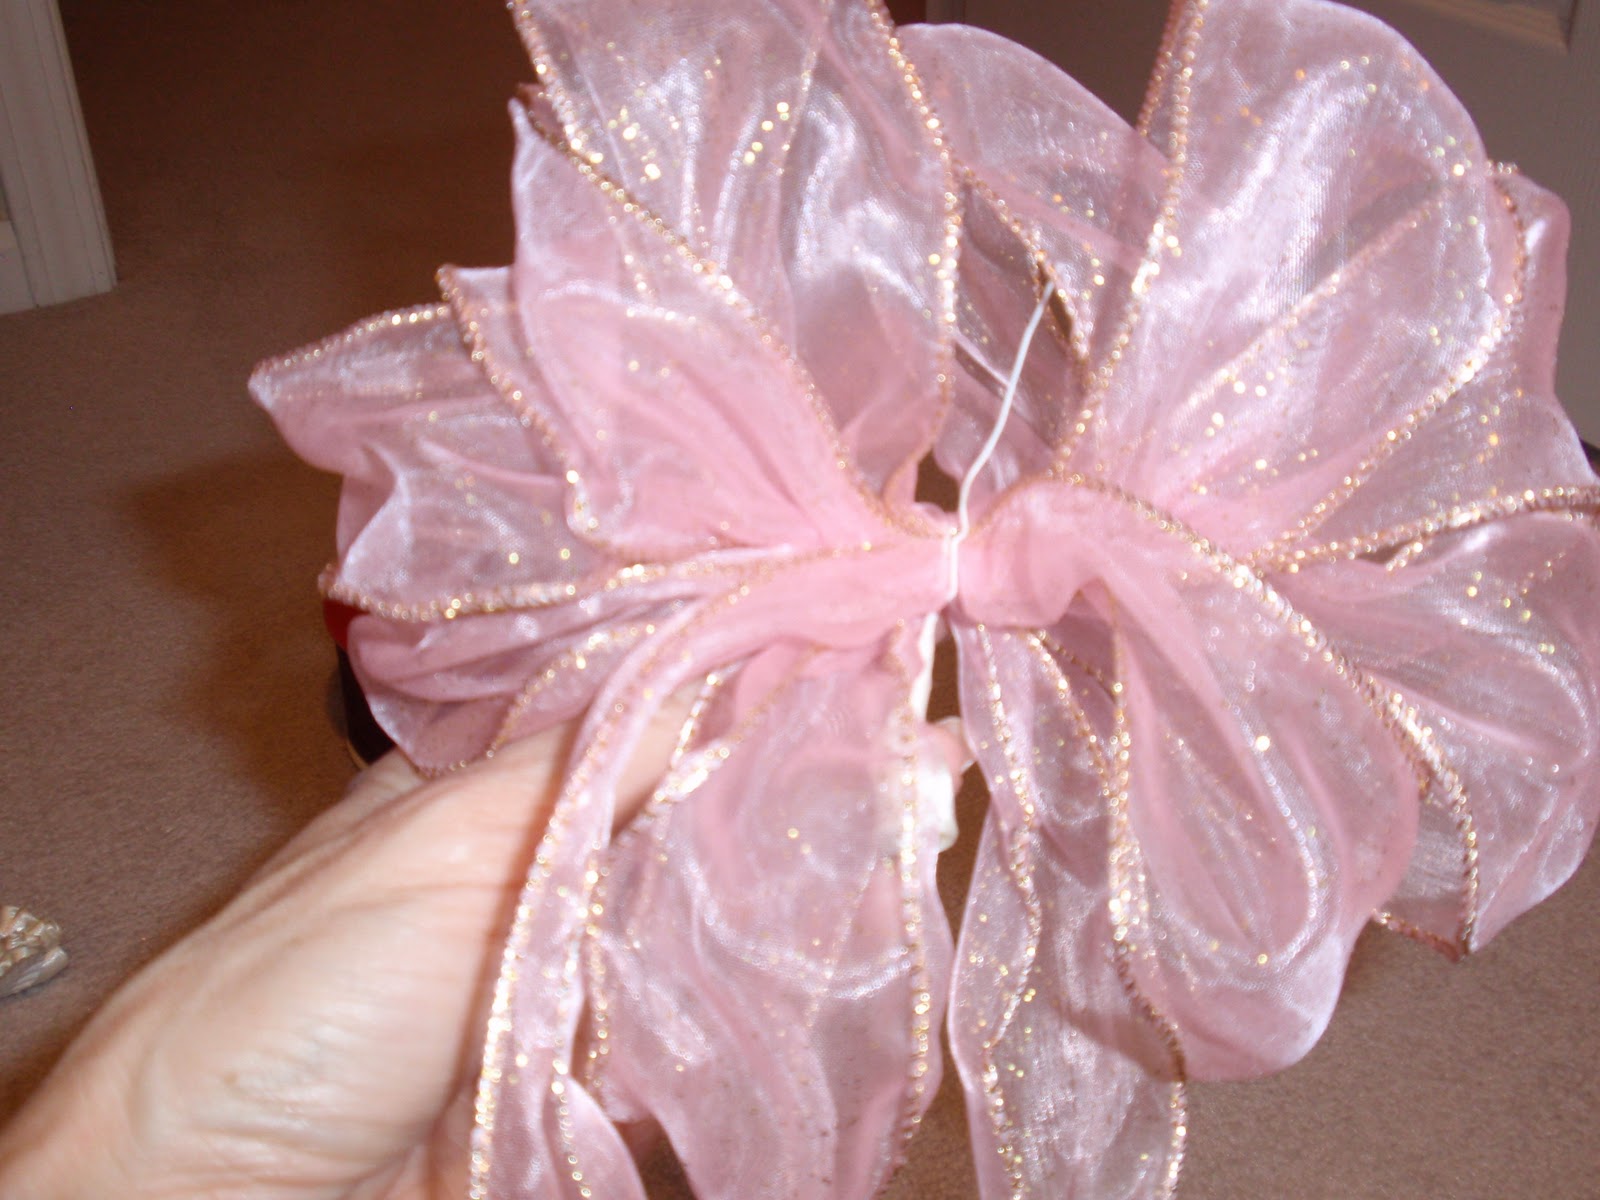
Now that it is together, start pulling one loop out at a time and fluffing it up. Use your fingers to spread out each loop. You don't have to be too careful, it should hold together easily.
Continue this process one loop at a time until you finish one side.
Then open up all of the loops on the other side.
Ok. Remember when I told you not to cut the ribbon before. Here's why. From the side that is still attached to the spool of ribbon take a small amount of ribbon and form a loop over the center where your wired flower is. Take the extra portion of wire on the flower and secure the loop from behind.
Adjust your flower, cut the ribbon from the spool to a length that matches the other tail and voila...beautiful bow. So easy, so quick, and so perfect for holiday decorating.
Here are some up close photos of some of my other bows.
These bows can be used year after year. It's okay if they get a little squashed in storage after the holidays are over. Next year you can just poof them out again. I've been using some of these bows for more than ten years.
I hope you try this super easy project. Let me know if you do. I'd love to see what you've done. As always, I love and appreciate your comments.
-Judy


2 comments:
thanks, judy. i need all the help i can get!
hope you will find a moment to stop by and enter a giveaway i am hosting for followers (i hope you win!):
http://hellolovelyinc.blogspot.com/2012/12/personalized-lovely-giveaway.html
happy weekend to you!
michele
How I wish I read this post of yours Judy in December.. I’m struggling for a ribbon design for our Christmas tree as well as my little daughter want to accessories her room with pink ribbon. Well I guess I need to bookmark and save it for 2015.
Thanks,
Nancy
Window Planet Triple-pane Glass - Superior Quality Windows and Doors
Post a Comment