Pages

Showing posts with label pillows. Show all posts

Thursday, October 16, 2014

DIY Pillows for Living Room

Sometimes when you really want to find a fabric that works in a room you can't find anything. Then there are those times you are just walking around JoAnn's and you stumble across the perfect fabric.  The latter happened to me last week.  I found this very pretty fabric in JoAnn's for $6.99 a yard so I bought one yard.  I was pretty sure it would go in my living room.  When I got home I was so happy to see that it really did have the perfect colors for the room.
Right away I got to work on some new pillows.  Because I wasn't 100% sure about the colors when I was standing in the store I only bought one yard of fabric.  
That's ok...I had some coordinating fabric I bought a while ago that worked and I sewed up some pillows using the same tutorial I used here.  Honestly, since I learned how to sew a pillow with a zipper, pillow making has become so much easier.  I whipped out three pillows in less than a half hour.  The blue/grey solid fabric picked up on those same tones in the floral fabric as well as the blue/grey in my Serena and Lily awesome throw from Home Goods.  
  One of the reasons I made these pillows is I wanted to simply how many different patterns I had on both sofas.  I think the more unified look is easier on the eye.
In order to achieve this, I really needed one more gold pillow.  I went through my stash of fabric and found enough of the gold fabric left to make one more pillow with a zipper.  Yay!
So what do you think of my new pillows?

Have a great day.

-Judy

Thursday, March 27, 2014

Trial and Error Pillows

I am still working on the finishing touches in my living room.  I have not yet found artwork that I love, so I thought that if I could settle on the pillows I could move this project forward.

The thing with pillows is you really have to try them in the space to see if they really work.  I saw this coral pillow at Pottery Barn, and loved it in the store,  and thought it would be a good addition to the living room.
I felt it would pick up on the same color coral-ish color in the area rug.


It does pick up the color in the rug, but it's taking the room in a direction that I don't want to go.  It's a little too harsh and I feel that it pulls your attention too much.  So I will be returning it to Pottery Barn.  
Back to the drawing board.


-Judy

Pin It
Sharing with Savvy Southern Style
Sharing with The Scoop
Sharing with A Stroll Thru Life

Thursday, January 30, 2014

DIY Pillow With Zipper

I love to sew and I especially love to sew pillows.  Changing up pillows is a quick and easy way to redecorate any room.  I have made many pillows over the years but I have always been afraid to try making a pillow with a zipper.  I've tried looking up tutorials but they always seemed a bit confusing.  I usually make envelope pillows and pillows where I hand sew the pillow closed after adding the insert.  
I finally got up the courage to try my hand at a zipper enclosure pillow after seeing this tutorial from Centsational Girl last week.  Seriously, this tutorial has forever changed my view of sewing a pillow with a zipper.  It's so easy!!
First I cut my fabric to size for my pillow insert.  I love this self-healing cutting mat I got at Wholeport.  It seems to keep the fabric in place much more than any other mat I have ever used before. 
  I use a square when making pillows.   I use a pencil and mark the edges of my pillow on the back side of the fabric.
It's much easier to make straight cuts using a rotary cutter.  I used to try not marking the fabric and just using the rotary cutter with the square, but that never seems to go well.  Usually I end up moving the square just a little bit and messing up the cut.  Much easier to mark it and then use the rotary cutter.  I ultimately made four pillows so the rotary cutter made things go much faster.
I followed the Centsational Girl directions completely. 
After sewing the edge close to the zipper, I also sewed the outside edge of the zipper to make the edges look a little more professional.
In less than twenty minutes from start to finish,  I had completed my pillow.  
Two of the pillows I used on the chairs in our basement family room.
Just look at my zipper enclosure.  So happy with it.  I actually tried to buy the invisible zippers, but JoAnn's didn't have it in the sizes I needed.  These worked just as well.
The other two I made to use on my family room sofa.
Yep - really happy with my new zipper enclosure pillows.  
Can't wait to hear what you think.


-Judy

Pin It


Thursday, January 17, 2013

Adding Color to the Family Room with Pillows

When I blog about one of the rooms in my home and look at the room through photos, I tend to see things that I don't otherwise see just walking through the room.  
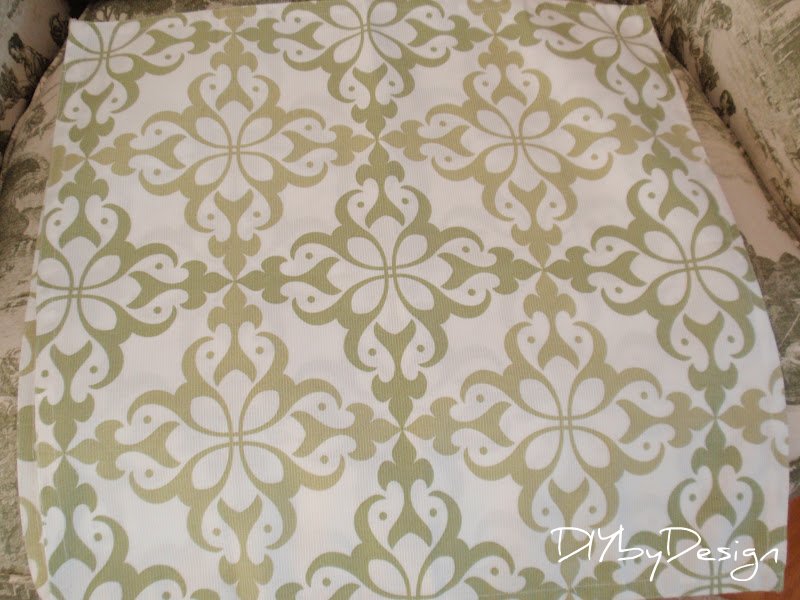
  So when I rearranged all of the furniture in my family room a few weeks ago, I realized that the brown chair by the fireplace could use a little color.  I wanted to bring in some of the green accent color.  I went to Calico Corners, where they were having a 25% off fabric sale, and found this fabric.
I liked it because it brought in the green I wanted as well as picked up on the wall color.
I bought 1 1/2 yards of fabric to make two 20" square pillows.  Since the fabric has such a large pattern I had to order the extra 1/2 yard to make sure I could center the pattern.   I used the existing pillows and just covered them with a new pillow cover.
I cut two 20"x20" squares out of the fabric.  I centered the pattern on one, and let the back side fall wherever to give me options as to which side I wanted to display.  I placed the two squares, right sides together.  After sewing three sides together I clipped the corners and turned it back to the right side. 
 I hand sewed the open seam together.  
This is upholstery weight fabric so it hides the stitches wonderfully.
Here's the chair with a little color added to it.

After being so careful to center the pattern, I think I may like it better on the reverse side.
Here is the reverse side.
Here is what was left of the fabric after the two pillows were made.
Be sure to stop back tomorrow to see what I did with the leftover fabric.

I can't wait to hear what you think of my new pillows. 
-Judy

Pin It

Monday, July 23, 2012

Dinner Napkin Pillows

Happy Monday.  It was a gorgeous weekend here in New York.  
However, I did take a few minutes to come inside and sew together some pillows.
These  have to be one of the easiest pillow projects ever.
It all started when I spotted these pretty napkins at Home Goods.  These beauties were $9.99 for four napkins, which would make two pillows.  These napkins have a nice weight to them with ridges.
 I knew they would make gorgeous pillows.
I took two of the napkins and pinned them together, wrong sides together. 
Since the napkins are finished on all four sides, I followed along the sewing line from the napkins and sewed three sides together.

Once the three sides were sewn together, I stuffed it with the pillow insert.  With the insert in the pillow, I put the pillow back on the sewing machine and sewed the fourth edge to finish the pillow.
Within a few minutes, I had two new pillows for my living room sofa.  
If you can sew a straight line, you can make these too.
If you can't sew a straight line, you could still make these using fabric glue.
Can't wait to hear what you think.

I always love and appreciate your comments.
-Judy
Pin It

Friday, June 1, 2012

A Funky Pillow for a Funky Chair

My daughter received the coolest, funkiest chair for her birthday from her Mema (my mother-in-law).  It is from Pottery Barn Teen and is such a perfect accent in her room.  I love the round shape and thought it would be fun to make a round pillow to match.
It was a quick and simple project.  I found this fabric at JoAnn's and knew it would be cool for my daughter's room.  I used a round tray to create a perfect circle.  I actually flipped the fabric 
to have the right sides together  (not shown) and then traced around 
the tray on the wrong side of the fabric using a pencil.  
 I used fabric glue to adhere pom pom trim around the perimeter 
of the circle making sure the pom poms faced toward the center.
 With right sides together I sewed around the circle leaving 3-4 inches
 to turn it right side out and stuff it.
 After stuffing it full, I used the fabric glue to seal the pillow.
 A funky pillow for a funky chair.
 Here's a closeup of the fabric and the trim.  
What do you think?  I can't wait to hear.
Hope you all have a great weekend.

-Judy
Pin It

Related Posts Plugin for WordPress, Blogger...