Pages

Showing posts with label guest post. Show all posts

Thursday, February 8, 2018

Moving in Together - A Guest Post

I'd like to welcome Ashley with a guest post I think you will all enjoy:

Moving in Together? 
About Home Decorating & Renovation
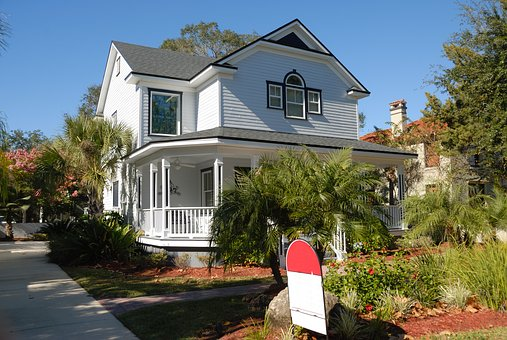
Maybe you just got married or you’re just about to, and your two separate lives (and residences) are about to become one. There is a big difference between visiting his/her place and living in “our” place. It will pay to think ahead and consider how moving in together will affect your home decorating and renovation plans.
When we’re talking about home renovation, that can mean a wide variety of changes. And the total project’s extent will vary too. It can be a light facelift, a total overhaul, or anything in between. 
But regardless of how far you want to go, we believe you will find these 10 home decorating tips (5 Dos, 5 Don’ts) for new couples just moving in together to be truly helpful.

1. Do sign up for an online wedding registry.

Find a registry that goes “beyond” thordinary. Mark favorite products, set up a honeymoon and moving-in cash fund, and opt for a registry that makes making returns as easy as wedding cake. (And don’t buy anything that you might get as a wedding gift until you know for sure!). If you are searching for the perfect wedding gift registry, you should check out Blueprint Registry - Bed, Bath And Beyond.

2. Do invest in enhancing indoor lighting.

You can almost never have too much light in a room. Almost, that is. Buy as many lamps as you like, install new, stylish lighting fixtures (LED will save you energy!), put in more and bigger windows, and install a skylight. You both will enjoy the light, be healthier for it, and more natural light will lower your energy bill and help you stay on track with your “circadian rhythms” (that is, get a better night’s sleep.)

3. Do buy newer, better appliances.

Neither of you two will object to a more luxurious fridge, a more efficient stove/oven, a high-end washer and dryer, or a “non-manual” dishwashing machine to help around the kitchen. If you ever resell, they will only add to the selling price, and you will greatly enhance your “convenience and comfort” level in the meantime. Oh, and let’s not forget about coffee machine! You know what they say - life is too short to drink bad coffee. If you are a coffee lover, you’d find this best coffee beans bucket list from Home Grounds really useful. 

4. Be bold, daring, and vibrant with colors.

Add color to your house, and you add color to your life. Why not not go with that deep “sunny” yellow kitchen wall and those countertops done in a glossy red. You only live once, and you want your new home to be as unique and inviting as possible. Combining paints, wallpapers, carpeting, furnishings, and other decor to create a room that makes the kind of bold statement you want to make will make you feel at home, with a home decorating scheme that fits and expresses both his and her personality.

5. Do upgrade your outdoor spaces.

Everyone loves a wood deck, a natural stone patio, or an outdoor kitchen and barbecue. No one will have any problem with a nice new fence, improved landscaping, or an in ground pool. These kinds of upgrades to your lot add value to your home, increase your “usable living space,” and give you and your partner a peaceful, private place in your own backyard to relax and enjoy the fresh air.

6. Don’t throw out his/her stuff without permission.

Too often, upon moving in together, a couple gets into a fight over what stays and what goes. You both have to learn to live together, and that means conversation and sometimes compromise, but if one or the other person resorts to the “brute force” of the trash can, resentments may fester.
In terms of decorating and renovating, this means finding a way to fit in his/her favorite chair or those heirloom items from grandma or grandpa into your new ambiance.

7. Don’t ignore all the latest remodeling trends.

With a brand new place to live together, and maybe a brand new marriage, you don’t want to fall behind the times on your interior decorating. You may wish to preserve some timeless, classic elements in the “scenery,” and you definitely want to express your unique tastes and personalities. But there are numerous trends that can add beauty, vibrancy, or comfort to your new home, so learn what they are so you can select the ones that work best for you (two).

8. Don’t undervalue open designs.

Spaciousness is more than a trend; open designs are here to stay. You may want to tear down a few unnecessary walls to open things up and allow things to “flow” from room to room. There are situations where putting up new walls may be beneficial to create a new bedroom or bathroom, but think carefully about finding ways to “maximize spaciousness.”

9. Don’t forget to integrate rooms with their contents.

 When you repaint, put up wallpaper, install a new color of carpeting, or install new wood cabinetry, all of these kinds of renovations create a context in which you place your furniture, curtains, drapes, and in which you use your china. To do a true full home or full room renovation, think through how the room’s movable contents will complement its more permanent decor. 

10. Don’t begin major remodeling without a budget.

When undertaking a major remodeling project, you can’t afford to be “budget-less.” For smaller projects, you might get by with a bare, rudimentary budget, but you’ll want to get a detailed estimate before undertaking an extensive renovation. You want to finish your project and see your full vision come to life, not run out of money only halfway through. That will take planning and financial creativity, but it can be and often has been done before.

Friday, January 9, 2015

On a Budget Designs - The Rustic Look

I'd like to welcome Anna Hicks who has written a post especially for DIYbyDesign.

On a Budget Designs: The Rustic Look

When my husband and I re-designed our entire house, we couldn't agree on a single thing, other than wanting our beautiful cabin home to have a more rustic looking interior that matches the beautiful wood-finished exterior. Outside of those general concepts, we debated everything from colors, to budget and it seemed that our much-needed re-design was going nowhere fast. Luckily, we were able to pull it together, and we ended up with a look that we were both happy with as well as staying on budget, and remaining happily married throughout the entire process (not an easy process - ask anyone who has done a big project with their spouse). 
Here are some of the ways we were able to get that done:

Utilize Craigslist for Used or Rustic-looking Items
Craigslist turned out to be the unsung hero of our entire remodel. Between the variety of the goods offered, as well as the great prices for used merchandise, Craigslist proved to be a godsend. We found most of our items just browsing through sections like "furniture" or "household goods" but the handy search feature allowed us to use keywords such as "rustic" or "antique" in our searches. 
Craigslist is a mixed bag for some people, and there are stories of scammers and just generally scummy people out there, so I'd advise everyone to meet in a public place if possible, or to bring a friend or family member with you in order to reduce your possibility of anything bad happening. That said, for as many transactions that happen on Craigslist, in my experience it's very safe, and most people aren't out to scam or rip you off. Use your best judgement here.


Seek Out the Niche Online or Brick and Mortar Retailers for Hard-to-Find Items
Some things are just hard to find. For example, our lighting fixtures were nearly impossible to find on Craigslist or any retailer in our area. We wanted rusting barn lighting, but we also wanted it to be energy efficient, so we chose to use LED lighting. We ended up finding some great deals on barn lighting fixtures with a plethora of color options. 


Do It Yourself
Pinterest is a wealth of information for any number of DIY (do it yourself) projects across a wide variety of styles. Searching for "rustic DIY" or "home remodeling projects" showed us an amazing number of results for some really cool projects that we were able to tackle in mere minutes, or just a few days. Don't overlook the value and the custom appeal of doing things yourself in a remodel project. For those of you that haven't used Pinterest, you can even create boards that allow you to organize or bookmark projects that look interesting to you so that you have them easily accessible at a later time. 


In addition to Pinterest, sites such as This Old House, and major hardware retailers such as Lowe's and Home Depot have amazing tutorials on their websites. 

In addition, I'd urge each of you to check out yard sales, garage sales, auctions, and estate sales to find some great one-of-a-kind pieces to add to your remodel. Remodeling a house is hard work, but for that rustic appeal, your options are numerous once you know where to look.

Friday, September 5, 2014

Hiding Unsightly Wires When You're On A Budget


Hiding Unsightly Wires When You’re On a Budget
As you know, when we did our home theater upgrade, we installed a lot of wireless tech (and boosters to keep our movies from dying slow, mood-killing, buffering deaths).  But what if you don’t have the budget for that extensive an upgrade? What if you don’t have the money for running Ethernet and other cables behind your walls? How do you get the connectivity you want, without turning your entire house into a web of wire and cable?


Go As Wireless as Possible
God bless blue tooth, right? Between wireless routers and blue tooth technology, most things can be networked without requiring you to run hundreds of feet of cable around your home. AT&T’s UVerse, for example, runs through a wireless router. Thanks to wireless converter “dongles,” you shouldn’t have to run any cables between it and the devices that require its signal (and in case you were wondering “hey, got a U-verse Internet coupon code to share?” Yes, yes we do! There you go!).
Still, wireless routers, televisions and sound systems do require electricity to operate. 
Here is how you can camouflage those unsightly electrical cords.
1. Run Them Through Trim
There is a great tutorial that will teach you how to hide cords in trim over at Sawdust Girl. Their television was mounted over their fireplace. Even if you are planning on mounting your television on a plain wall or on a fixture unit, you can still use mounting to cover up the cords. In fact, you could probably turn the mounting into a really great art installation!
If you don’t want to worry about making a huge installation don’t worry, you can still use trim to create ad hoc base boarding near the floor to help your cords blend in.
2. Make Them Decorative
You can buy decorative wire clips really cheaply through outlets like Amazon. The great thing about these clips is that, in addition to holding your wires in place, they turn those cables and wires into decorative touches.
3. Backdrop Cloth
Probably the worst offender, when it comes to wires, is a desktop computer. There are so many wires and cables that are required for all of a desktop computer’s different components. Those wires are all different lengths and widths, so even if you did bundle them up to try to relieve some of the chaos, the bundle would likely be clumpy and odd shaped. The best way to hide this mess is with a backdrop cloth.
If you don’t like the idea of there being fabric that close to your cords and power strips, you can also use very light weight boards. Simply paint them to match your wall or go with something decorative that you pick up in a home décor section.
4. Clip Them Up
Part of what makes wires so ugly is that they dangle and, often, get tangled up together. To keep this from happening, tie all of your cables and wires together to form a single cord that extends down to your outlet or power strip. Then, instead of trying to hide the “extra” within that single cord (making it unnecessarily bulky), clip the longer bits up to the underside of your table, desk or cabinet. This way everything looks organized and nothing hangs down to gather dust and mar the otherwise beautiful appearance of your home.

-Judy

Thursday, October 24, 2013

Bathroom Trends 2014


I'd like to welcome Amber Hash who has written an article especially for DIYbyDesign.

Every futuristic movie, television program or book has described flying cars, robotic housekeepers and unusual kitchens and bathrooms in which the obvious features are hidden away, tucked into invisible recesses or so fundamentally changed that they no longer look like a toilet, basin or bath. While flying cars and jet packs do technically exist, they are far too expensive or unsafe for public usage, and robotics, while making tremendous advances year on year, have still not come up with one that combines the perfect home companion and domestic servant in one, but modern design, technology and materials have advanced enough to allow us to indulge in our dream sci-fi bathroom! 
The 2014 trend for bathroom décor is to invest in bathroom fittings that look different; not just to other bathrooms, but to any bathroom! This wonderful hammock design bath positively invites use, promising a smooth comfortable cradle while you soak in steaming, fragrance water. 


This bathroom is similar, offering the same soft and round contours, while having the bath more firmly on the ground but still unique and distinctive enough for any discerning fashionista. 


While the bathroom feature here has a clearly recognizable toilet (which will be a relief to any guests in urgent need of relief!) the bath itself is splendidly reminiscent of an eternity pool, speaking of relaxing, candlelit pampering sessions after busy days at work.


Many modern architects and interior designers are choosing to strip out barriers and walls inside bathrooms, creating one generously large wet room. These bathrooms are not only attractive and spacious, they are perfect for people who have poor mobility or even rely on a wheelchair to get around. 


As you can see, having a wet room rather than a traditional bath can really open out a bathroom, making even the smallest space seem larger. If it is necessary to have a wall or barricade of some kind in the bathroom, perhaps opt for clear glass. This allows the full dimensions of the room to be displayed to the best effect, while containing water, steam and warmth into a small area. 


The environment is a popular theme for many and for most of us switching to eco-efficient systems and materials is an easy matter when redecorating or renovating. Choose bathroom fittings that use as little water and power as possible, while still providing a good bathing experience. 

Solar heaters can be used to make sure that you always have enough hot water for the whole family to bath, without it costing you a penny on your electricity bill! For small bathrooms you can install heated towel rails from My-bathrooms.co.uk as they provide good quality bathroom products at very affordable prices.


So bathrooms in 2014 are going to be energy efficient, spacious and futuristic-looking, but what color themes are going to be popular? The answer is, any color you like! 


Add a few metallic touches to add a warm touch and try to stay to a scheme that uses no more than three colors (more than three can create a muddled look, especially in a room that is traditionally small). Your bathroom is going to be used several times a day, every day for years so make sure that it is one that you will enjoy going into each day!


Thanks Amber!

-Judy

Friday, September 20, 2013

Let a Turf Pro Provide The Backdrop for Your Future Baseball Pro


I'd like to welcome Anna Hicks who has written an article especially for DIYbyDesign.

Many homeowners have done amazing things to their interior spaces as well as to their outdoor living spaces. Everything from garage steps to patios can be transformed into works of art, all with some basic know-how and patience.
Lawns
http://www.flickr.com/photos/davydubbit/5124796142/in/photostream/

But when it comes to the yard--you know, that grassy space that isn't house and isn't patio--making it a work of art takes weekly attention. A repainted bedroom is finished in a weekend and needs no repeat work for years. A well-manicured lawn will need your attention for mowing every six or seven days, under normal rainfall conditions. And it will need just as much attention in drought-stricken areas, like the one encompassing hundreds of miles around Denver right now.

Wally and the Beaver sure had it easy with the old manual lawn mower. They grabbed it, made a few passes across the lawn, and were ready to go cause trouble with Eddie Haskell.
Once the 50's ended and everybody got into power mowers, things changed. A 120-pound teenager and a 20-pound tool didn't leave much evidence of their travels, but the greater weight of a motorized system created tire tracks on the grass during mowing.

Soon everything from Soldier Field to your neighbor's patch of paradise had wild, random imprints that were rather unsightly.

Lawns at Wisley
http://www.flickr.com/photos/david_wilmot/12963017/

It didn't take long for groundskeeper and homeowner alike to figure there had to be a better way. The time saved by using a gas-powered mower didn't look as important when the yard took on the appearance of a tractor proving ground.

Professional sports got on the case first. Before long, simple back and forth patterns were carefully maintained for football, baseball, soccer, and the like. Sweeping camera views from high elevation showcased their handiwork.

But the prison-stripe pattern soon fell away after one single grounds crew somewhere said, "We can do something prettier than this." 

Crews began angling the stripes and creating plaid-like patterns. Before long, complex designs and even team logos were appearing in the vegetation. And so began the one-upmanship of turf art.
As you and your ball-and-bat crazy kid view these ornate fields on TV, the thought probably crossed your mind: How cool would it be if my lawn looked like that?

It would be very cool, indeed...and very difficult. When the Rockies hit the turf at Coors Field, they are striding across a surface that takes hours to prepare. From any angle, the lines are perfectly straight and intersect precisely at 90 degrees.
Baseball Field
http://www.flickr.com/photos/kuroda/52043725/

That's the work of experienced people with commercial equipment on a very flat, very uniform surface. In other words, that's three things you probably don't have access to.
So maybe you can track down a landscaping maven. Denver lawn care professionals throw in shrub and tree care and even pest control to their services. In baseball parlance, they are 3-for-3.
When the DIY project you're into is one that you complete in a few days and enjoy for hundreds more days, it's reasonable to work your way through the process yourself. But if the work of art you want to create has to be created anew 20 or more times a year, you're far better off to let experts handle the canvas for you.

Thanks Anna.

Have a great weekend.
-Judy

Related Posts Plugin for WordPress, Blogger...