Pages

Showing posts with label decoupage. Show all posts

Monday, January 7, 2013

Easy Desk Update

This weekend I did a simple update to my daughter's desk in her room.
If you remember, this desk was originally a Craigslist find for $30.
After painting this desk with chalk paint and reupholstering the chair, I added a piece of clear acrylic to the top.  It was one of the smartest things I did, no longer having to worry about the top of the desk being damaged.  It also gave me an opportunity to add a pop of color by using scrapbook paper underneath the clear acrylic top.
The scrapbook paper was colorful, but it was never exactly right.  
I was always on the lookout for something a little bit better.
When I saw this wrapping paper at Home Goods a few weeks ago, I thought it would be perfect for my daughter's room.  I have been very impressed with the wrapping paper I have bought in Home Goods.  It is all very substantial and great for so many different projects.

I took the clear acrylic off the desk and used it as a guide to cut the wrapping paper to size.
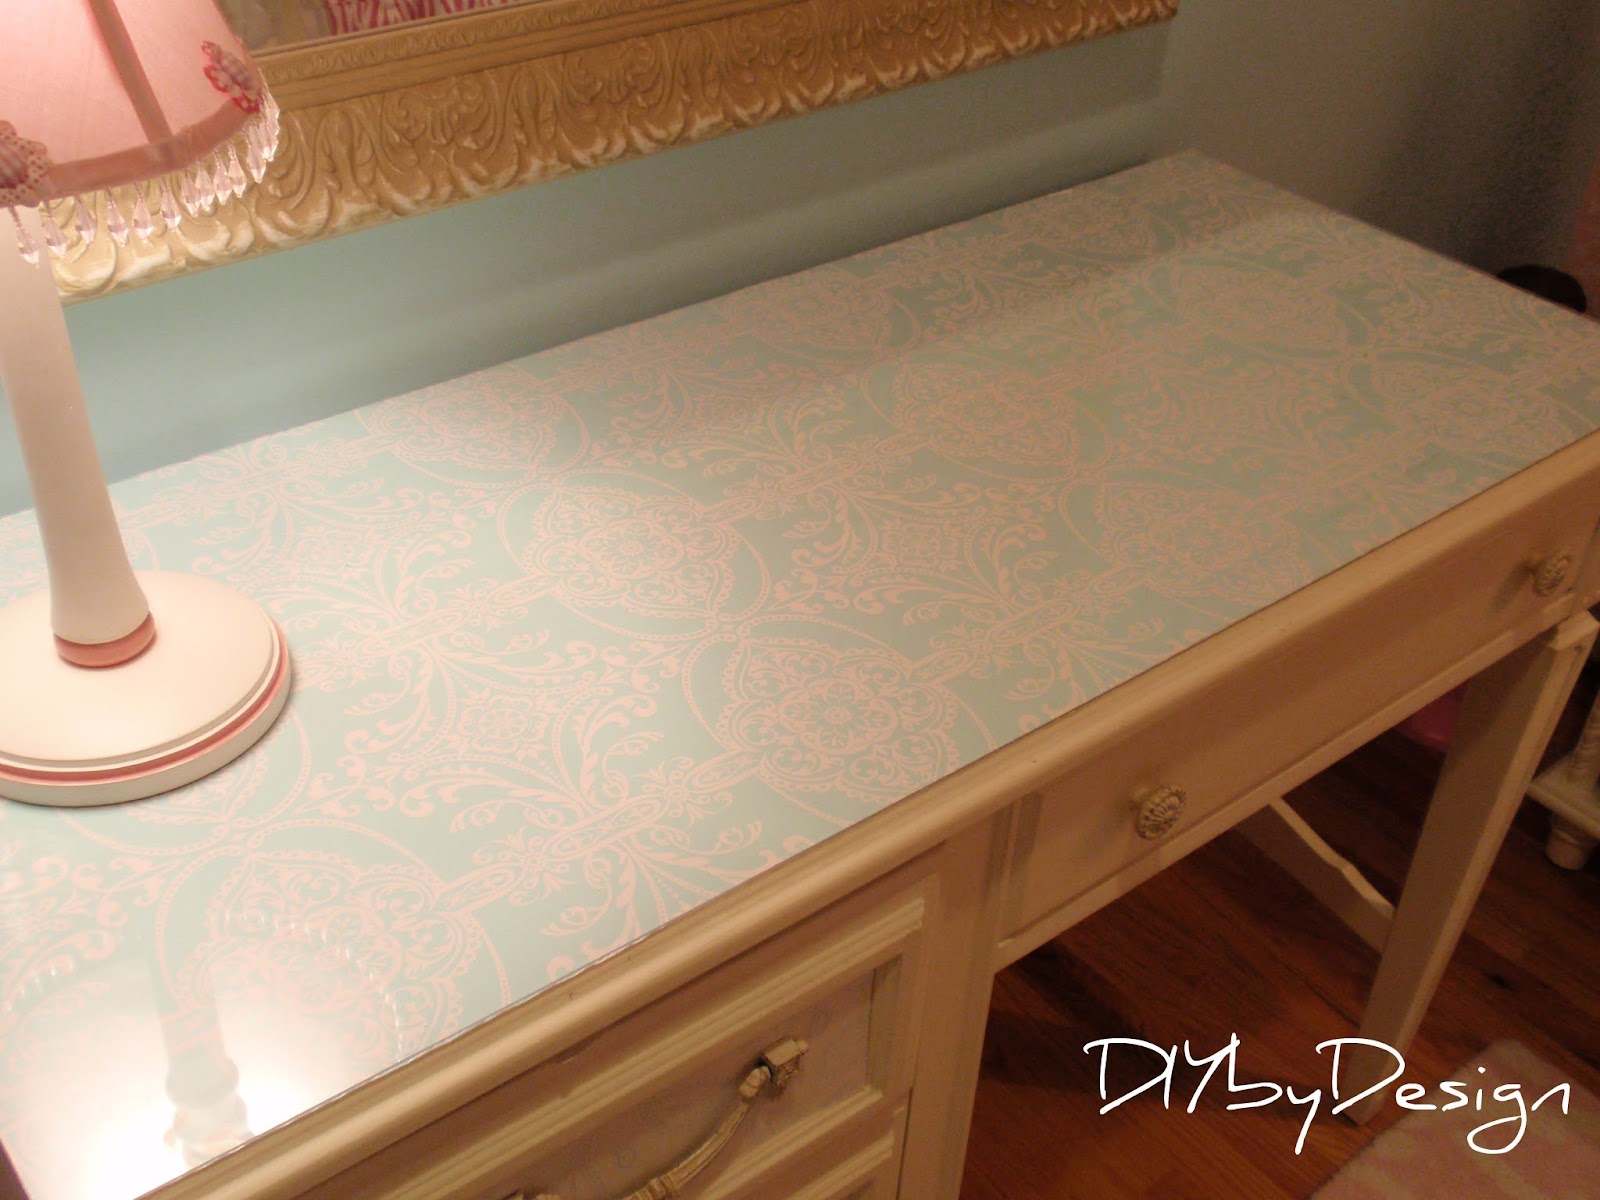
It changed the look immediately.
Then I thought I would get really crafty and cut out pieces of wrapping paper to fit the fronts of each of the drawers.  I glued it to card stock so that it wouldn't curl or bend. 
What a difference a little wrapping paper can make!
For the side drawers the card stock is so sturdy that it didn't need to be 
adhered in any other way other than being held on with the handles.  
For the center drawer I added a little mod podge to the edges to keep it all in place.
The color is beautiful and picks up on all of the decor and accessories in my daughter's room.
You could do this with any desk you have.  The clear acrylic was bought at Home Depot and we cut it to size at home.  It was inexpensive as well.  You could add fabric or paper to match any decor.  
My daughter loves the update!
I can't wait to hear what you think.

-Judy
Pin It


Sharing with Saavy Southern Style

Monday, October 15, 2012

How to Create a Coffee Bar

For so many people, starting their day off right means starting it with a wonderful cup of coffee.  That's my husband.  He loves his morning cup of java.  What could be more perfect than having a coffee bar in our own kitchen?  We have a little counter space between the refrigerator and wall oven.  
It's the perfect spot for a little coffee bar.
What do you need for a coffee bar?  Well...not that much.  If you love coffee, I'm sure you already have all of the elements you need to make your own coffee bar.  
You too can create this  - you just need a little counter space to dedicate to it. 

When we renovated our kitchen a few years ago, we made sure we did not have anything interrupting our beautiful backsplash...ie electrical outlets.  Instead we have electrical outlets under each of the upper cabinets.  It's great until you have an appliance with a cord that's too short to reach...in this case it's my husband's favorite single serving coffee maker.  No problem...I can fix that.

I needed something small, yet decorative,  to raise up the coffee maker so that the cord would reach the outlet.  I took a shoe box and cut off the lid.  Then I cut the box in half and slipped the two halves back together to form a smaller box.  I used tape to hold it all together.  
Then I covered the smaller box using my favorite leftover contact paper.  

I went to my favorite site, The Graphics Fairy, and printed out and decoupaged some coffee graphics onto the box.  I picked two different graphics and put one on the front and one on the top.
The top one is going to be mostly covered by the coffee maker, but I still liked it and wanted to use it.
Now the cord will reach the outlet!
I gathered my supplies - favorite coffee makers, coffee pods, ground coffee, sugar and creamer and anything else I could think of to create a coffee bar.
It's as simple as that.  
A coffee center with everything needed to make that perfect cup of coffee - all at our fingertips.
I hope you will make one in your home.

Can't wait to hear what you think!

-Judy
Pin It

Tuesday, December 20, 2011

Bringing a Little JOY to the Kitchen

With Christmas just days away, I wanted to add a bit of joy to my kitchen.
Literally...
I bought these oversized letters from JoAnn's.  They were on sale for $1.99 each.  Using Christmas scrapbook paper, I laid each letter upside down on the backside of the paper and cut around the letter with an exacto knife.  Then I used mod podge to adhere it to the front only. 
I used gold paint and painted the sides and back of each letter.  I intentionally decoupaged the front first so that if any gold got on the edges, it would just add to the final effect.
Last, I applied the lightest coat of mod podge to the top of the letters 
and then sprinkled gold glitter on each letter.
I added my JOY to the top of the refrigerator in the kitchen.
This project took less than fifteen minutes.  I've never seen paint dry as fast as it did on these letters.  Can't wait to hear what you think.


Don't forget to stop back tonight at 8pm EST for my Fall into Fall party.


Also, my Alexander Creative giveaway is still going on.  Click here to enter.

-Judy

Thursday, October 13, 2011

Fall Mantle

Last week I shared some of my Fall Mantel over at A Stroll Thru Life.  In case you missed it, I am sharing it again today with an addition to the mantle.
Here is what my mantle looked like in the past few weeks.   
A little boring...but then again, it was in between seasons.

Here is my mantle ready for Fall.


I found my Fall decor at my favorite store...Home Goods.  I just love the creamy white pumpkins.  I took a little crate and laid it on it's side and filled it with a few mini-pumpkins.
On the other side I took some more pumpkins and a lantern I had purchased during the summer.  I like decorating my vignettes using three items in varying heights.  That's usually a safe bet for a good look.
I made book covers out of scrapbook paper and tied it together with a little raffia.  So simple, yet it adds so much texture and interest to the mantle.

It still felt like something was missing.  I needed something for that empty spot in the middle.  I really wanted an owl, but in looking around I couldn't find one I loved.  So instead...

I started with a box that we received an invitation to a party in.  It was a nice sturdy box just the right size for what I had in mind.  I picked out a piece of scrapbook paper in the right color and using Mod Podge adhered it to the lid of the box (no need to do the back...no one will see it).
Then I went to the Graphics Fairy and printed and cut out this owl.  
Then using some scrapbook letters I added the words "Happy Fall".
Now my mantle is complete for Fall.  What do you think?

-Judy

Tuesday, October 11, 2011

More Decoupage Projects

I love to decoupage.  It's easy and quick and can transform almost anything.  I bought some new scrapbook paper which always inspires some creativity.
Yesterday I showed you how I decoupaged a $2.00 tray from AC Moore.

Today I wanted to share with you two more projects I created using decoupage.

I had a nice, sturdy box I had lying around from a perfume gift a few years ago.  
I liked the purple lacy design already on the lid of the box.  I flipped through my scrapbook paper and picked out paper that would coordinate.
I started by using Mod Podge to adhere the paper to the box.  
I like to use a foam brush to apply the Mod Podge to the box and then adhere the paper. 
 I do one side at a time to ensure total coverage and no air bubbles.  
For the lid, I picked a smaller pattern that coordinated with the floral.  I incorporated the lacy design already on the box.  I simply cut the paper to size and used Mod Podge to adhere it.  
Again, I spread the Mod Podge onto the box directly. 
 I love how the paper coordinates perfectly with the original detail on the lid.  
While I was in the decoupage mood, I also decoupaged a box to house my new stationary.  A few weeks ago I hosted a giveaway from UPrinting.  The folks over at UPrinting were nice enough to provide me with some new stationary as well.  You can see my blog header is now the header of my new stationary.  Now, I just needed a little box for my stationary.  I had an old invitation/announcement kit.  The box was the perfect size.  Again, I started by picking out scrapbook paper. 
I wanted any visible portions of the box to look finished so I made sure to measure my paper so that it would fold over the edges and finish off the inside of the box as well.  
Two easy projects using things I already had in the house.  

What do you have lying around that you could decoupage?


Don't forget to stop back tonight at 8pm EST for my Fall into Fall party.  Hope to see you then.

-Judy

Monday, October 10, 2011

Decoupaged Tray

Happy Columbus Day.  My kids are home today and it's a beautiful day with summer-like temperatures. Here is a project I made over the weekend.
I bought this tray at AC Moore, with a coupon, for a total cost of $2.00.

My plan was to transform this tray into something beautiful using 
left over chalk paint and scrapbook paper.

I started by painting the sides of the tray with chalk paint in Old White.  I left the base unfinished as I knew I would be covering it with scrapbook paper.
Next I cut scrapbook paper to size to fit the bottom of the tray.  Using Mod Podge, I decoupaged the paper to the bottom of the tray.  I like to work in small sections to make sure the glue adheres to the entire piece of paper.  Otherwise you can end up with air bubbles that are hard to get out because there is not any glue for the paper to stick to.
While the paper dried I used a clear wax followed by a dark wax on the painted portions of the tray.  You can see in the photo a rolling pin - that's what I used on the scrapbook paper to smooth it onto the tray.  I bought the rolling pin from a Pampered Chef party years ago. 
 I use it more for crafts than anything else.
Next I added a coat of Mod Podge to the top of the paper to act as a sealer.
Using the dark wax, I continued waxing until I got my desired color.  It's so easy to work with.
Here is the finished product in the bar area of our kitchen.  
I love my $2.00 tray now.  

I always love and appreciate your comments.  Can't wait to hear what you think.  Have a great Columbus Day!

-Judy
Related Posts Plugin for WordPress, Blogger...