Pages

Showing posts with label stencil. Show all posts

Tuesday, October 2, 2012

Cutting Edge Stencils Review and Giveaway

When Cutting Edge Stencils contacted me and asked me if I would like to review their product and host a giveaway, I jumped at the chance.  I have been in the process of adding some color and brightness to my finished basement.  I knew stenciling a focal wall by the pool table would be perfect addition to the space.  Cutting Edge Stencils has so many gorgeous patterns to choose from, 
 it was hard to narrow it down to just one.  Ultimately I picked the Covington Allover pattern.  
Here is the finished wall.  GORGEOUS!!
This super cool wall took me less than two hours to complete...including cleanup time.
Let me tell you how easy this was.

I received a package from Cutting Edge Stencils which included my stencil, a roller and a clip-on level.  
In addition to the allover stencil, Cutting Edge Stencils also included another stencil that is used to finish off the top of the wall.  It's a mini stencil that allows for a perfect finished edge by the ceiling.  Genius!
It also comes with step by step instructions.  If you'd rather watch a video on how to stencil, Cutting Edge Stencils even has a "how to" video you can watch.  
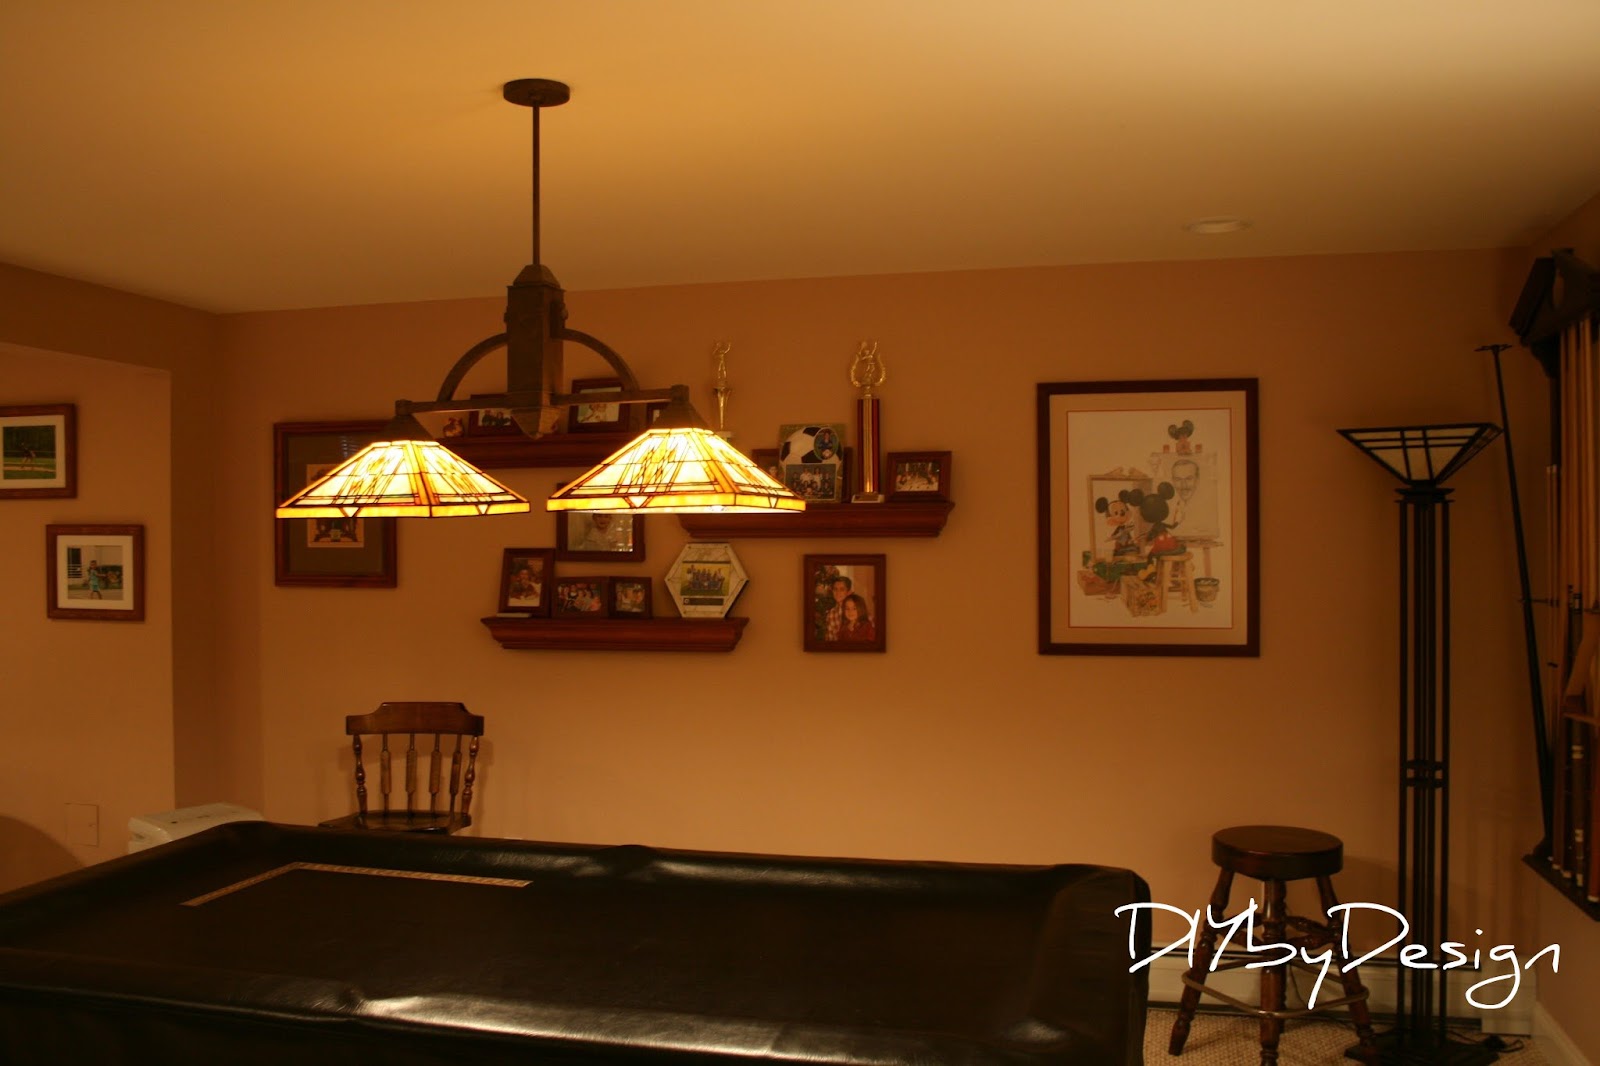
Here is the before photo.
I started in the center of my wall and clipped on the level they included.  I kept the level on for the entire project which kept everything perfectly aligned.  I used just a few small pieces of blue tape to keep the stencil in place.  I know some people use spray adhesive to keep the stencil in place.  
I have never tried that method as I seem to get pretty crisp clean lines without it.  
I used paint I have leftover from my kitchen.  It adds so much brightness to this side of the room.

I did an entire column and then added another column to the right and then another column to the left
 and kept going back and forth to allow time to dry. 
This is what I had after finishing the entire wall. 
See the space up at the top - this is where the extra stencil 
Cutting Edge Stencils included came in handy.
The extra stencil for the stop is incredibly valuable.  I have stenciled before and getting a perfect line across the top is very difficult.  This made my stenciling project so much easier.  
The roller they included was pretty awesome as well.  I had no issue with drips or debris left from the roller as I have with other rollers I have used in the past.
This entire 14 foot wall took less than two hours  - even I'm impressed.  
Yes I have stenciled before, but typically a single wall has taken me anywhere from 4-6 hours!  Having a product that you don't have to fight with makes the entire process go so much faster and smoother.  Another plus, the stencil cleans up beautifully.  All of the paint came off easily and I stored it back in the bag that it came in for future use.  I have never had a stencil clean off so completely.  For me that's a huge plus because I would like to use this stencil again.
Here are a few more photos to show off my new wall.

Here is the before and after photo:

  Such a big difference!

Now it's your turn.  


Cutting Edge Stencils has generously offered 
one DIYbyDesign reader 
$50 credit plus free shipping 
to use toward any one of their amazing stencils.  

Imagine the possibilities:
Image
Image
Check out Cutting Edge Stencils Blog for even more ideas.

Here's how to enter:

1.  Mandatory - Head on over to Cutting Edge Stencils and come back here and let me know which stencil you would choose and what project you would use it for.

Additional Entries:

2. Like Cutting Edge Stencils on Facebook and come back here and let me know that you do.

3.  Follow Cutting Edge Stencils on Pinterest and come back here and let me know that you do.

4.  Tweet, post on Facebook or blog about this giveaway, and come back to let me know.

5.  Follow Cutting Edge Stencils on Twitter and come back and let me know that you did.  

That's up to five entries!!  What are you waiting for...start entering!  

The giveaway will close on Sunday October 7 at 11:59pm EST.  You must leave a separate comment for each entry in order to maximize your chances to win. Must be 18 years or older.  Open only to residents in the 48 lower states.  If your email address is not linked to your Google account, please make sure to include your email in your comment so you can be contacted in the case you win.

Good Luck!

Cutting Edge Stencils did provide me with a free stencil, however the opinions expressed are entirely my own and I did not receive any monetary compensation for my review.  
-Judy
Pin It

Monday, January 23, 2012

Home Gym Reveal and Giveaway

I am so excited to be revealing our new and improved home gym.  
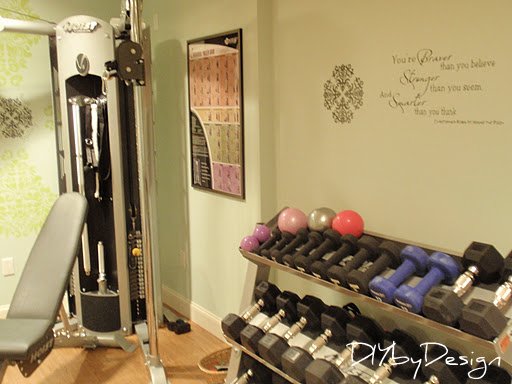
We have more equipment than before, but with the new layout, we actually have more open floor space.


Let me remind you where this home gym began.

The old gym was a mess and was not inspiring at all.  Those flesh colored walls...yuck!
It had a treadmill with a motor that had burned out and other outdated equipment.  
First thing I did was paint the room Benjamin Moore Palladian Blue.
Then I wanted to make a focal wall.
I started by centering a medallion vinyl wall decal I got at AC Moore.
I used the stencil Royal Design Studio had sent me to review a few months ago.  
You can click here to see what I did with this same stencil in my niece's room.  
This time I would use it to create my focal wall.
Using lime green craft paint, I painted four points using the stencil.
In the center I added all four of our names around the medallion.
 I cut out our names using my Silhouette machine and silver vinyl.
We ordered all of the equipment from Gym Source.  We went to our local Gym Source in Paramus, New Jersey and worked with Terry.  He was awesome to work with and the guys they send to assemble the equipment were equally amazing.  
They know exactly what they are doing and assembled everything in about three hours.
We now have a gym filled with awesome equipment for a perfect workout anytime we want.  
We purchased the Hoist V6 functional trainer, a Hoist adjustable bench
 and a Hoist three tier weight rack. 
 We now have weights that range from 3lbs to 50lbs.  (We had 3lbs to 12lbs...everything else is new).
We also needed a new treadmill.  We chose the True Z5 which we also purchased from Gym Source.
In the old gym we had a tube television with VCR in the corner where the Hoist V6 now resides.

In the new gym we have a flat screen television with DVD player.  
My husband and I had to run a cable line to the new location of the television.
 It was so easy to install the flat screen onto the wall using this wall mount.
I also needed to update the wood clock that was in the old gym.
I painted it the same color that I used on the stencil.
I wanted the gym filled with inspirational quotes and photos.
I bought six frames from Ikea.  I filled them with action photos of my kids and two quotes I created on my Silhouette machine but printed on scrapbook paper.

The room was really starting to come together.  Just a few more touches...


 I created both of these quotes on my Silhouette machine using black vinyl.

Because I can only create a few words at a time on a sheet on the Silhouette machine,  it took hours for me to apply it because it all didn't fit onto one sheet.  
For the last quote, I went onto Etsy and bought this one from Madebytheresarenee.
It came right away and I was able to apply it in minutes rather than hours.  I flanked the quote with more of the medallion pattern that I bought from AC Moore (the package came with four medallions).
I thought this quote was perfect to have above the weight rack.

GIVEAWAY
 Madebytheresarenee, the Etsy shop I purchased this quote from,  is generously offering 
one lucky DIYbyDesign reader a $25 store credit to Madebytheresarenee
Her shop offers so many quotes to chose from.  
Here's what you need to do for your chance to win:

1.  You must be a follower of DIYbyDesign and in a comment let me know what you think of my new home gym.  Visit Madebytheresarenee and in that same comment let me know which vinyl wall quote you would chose. 

2.  For an additional chance, post on Facebook and come back and leave a comment letting me know that you did.

That's up to two chances to win.

I can't wait to hear what you think.  We are totally thrilled with our new home gym.

The giveaway will close on Friday January 27th at 11:59pm EST.  You must leave a separate comment for each entry in order to maximize your chances to win. Must be 18 years or older.  Open only to residents in the 48 lower states.  If your email address is not linked to your Google account, please make sure to include your email in your comment so you can be contacted in the case you win.  If you do not include your e-mail another winner will be chosen.

-Judy

Friday, November 18, 2011

Winner of Stencil Giveaway and What I've Been Up To

Drumroll please...
The winner of the Royal Design Studio Stencil giveaway is...


#33 - Mary from Because I Like To Decorate
Congratulations Mary!
Thank you all for entering.
(for the life of me I can't get the numbers to print out on the random.org)
I will be sending out an e-mail to you this morning.

Now...onto what I have been up to...

My daughter is 11 and started Middle School this year.  Middle School is changing her, not in a bad way, but she is definitely growing up.  If you remember, less than a year ago, I gave her room a mini-update.  I updated it from a young child's room to a more elegant room.  At that time I asked her if she wanted a full size bed and she insisted that she wanted to keep her daybed (which is why the update remained mini).  I LOVE her current room.  I love the floor plan, I love the bedding I made, and I just love how the whole thing came together.  However, I knew very soon she would want a bigger bed.
Well, it turns out it was sooner rather than later.  For the past few months she has been telling me that she is now ready for a full size bed.  I ignored her comments at first, but she is persistent, so eventually I had to listen.  She is a girl who knows what she wants... as well as what she doesn't want.   I understood that she wanted a bigger bed, and it would be fine to just swap out the daybed for the full size bed.  However, she had bigger ideas than just changing the bed.

For starters, apparently the aqua I painted on the walls was not aqua enough for her.  I love the current color and the shabby chic feel it gives to the room.  She loves the color aqua and after seeing one of my friend's daughter's room, she was hooked on repainting the room a brighter aqua.  Did I mention how persistent my little sweetie can be?  Day in and day out I heard about this aqua color.
After going back and forth, we finally agreed up Benjamin Moore's San Clemente Teal (the lighter one on the left in the photo).  I told myself...it's just paint.
So while Sydney was at school the other day, I painted her room the new color (that's normal, right?  every mom is painting her kid's room when she has two hours to spare)

However, if I was going to paint again, then I was definitely going to use this opportunity to do crown moulding (see how these things happen).  You know I am all about DIY, however, crown moulding is not one of the skills I have.  So I called my carpenter, who has done all of the crown moulding in our home, to come and install new crown moulding and base moulding.  I literally decided this on Tuesday after I painted the walls in the new color.  I called him up, we agreed on the materials we would use, and I went to the lumber store and had them load up my car.
Then having 45 minutes before the kids came home from school...
I painted all of the crown and base moulding Benjamin Moore Atrium White in semi gloss (that's normal too, right?)  I painted it all in advance because I needed him to be super careful so that all I had to do was touch up the paint a little bit.  I didn't want to paint anything again.  
However...if there was going to be new crown and base moulding...maybe it was time to tear up the carpet.  We have hardwood floors throughout the house that we covered up with carpet when we first built our home.  My daughter really wanted hardwood in her room with an area rug.  
 My life reads very much like the book "If You Give a Mouse a Cookie".
Here's where we are at so far...and here is where we are headed...

She picked out a new full size bed and area rug from RH Baby and Child.  
Image from RH Baby and Child

We waited until last week when they had their friends and family 20% off sale to 
order the bed and area rug.  
Image from RH Baby and Child

The rug arrived a few days ago (although we have not put it in the room yet).  Notice how the rug picks up on the stenciled wall she has in her room as the focal wall (that wall stayed...there was no way I spent as many hours on that wall as I did only to have it painted over ).   

The bed is being delivered tomorrow.  Hopefully by Monday I have her room all ready to reveal.

What do you think so far?  

Hope you have a great weekend!!


-Judy


Related Posts Plugin for WordPress, Blogger...