Pages

Monday, October 31, 2011

It's a Different Kinda Halloween This Year

Happy Halloween!  
I live in New York, and for the first time that I can remember, it's going to be a white Halloween.
Here is our Halloween Snowman.  Saturday morning started out like any other Fall day.  We heard there was a storm coming, so we decided it was time to put away all of the outdoor furniture.  Bright and early we put everything away.  Literally as we put the last item into the shed, the snow began.  It snowed heavy, wet snow.  Great packing snow.  But it's only October.  The leaves are still on the trees.  In case you ever wondered why the leaves fall off the trees before the winter, it became crystal clear during this storm.  The trees with leaves held this snow and it caused the tree branches to snap from the weight.  While we were outside building our Halloween snowman we kept hearing what sounded like gun-shots.  It was all of the trees in the neighborhood snapping and falling.  Trees fell everywhere and we have been without power for a while now (I am actually at my parents writing this post).  
Look at the devastation in my parent's backyard.  
Yep...that's right over the roof of their sunroom.  It's still hanging there as of now.  The tree people were supposed to come today to assess the damage, but never made it out.  
Well, this is the craziest Halloween weather we have ever had!  

Hope you all have a safe, fun Halloween.  
-Judy

Saturday, October 29, 2011

Ugly Sofa Slipcover Giveaway

Happy Friday!!

Do you have an ugly sofa?  Do you have a sofa you just want to update?  Well then I have the contest for you.  Slipcovers are an awesome way to completely change the look and feel of a space with a minimal time investment and at a fraction of the cost of new furniture.  Ugly Sofa is a company that carries popular catalog slipcovers at unbelievable prices.  They call their brand, Brand "X", because they x out the brand name tags in order to prevent returns to the original store.  But I bet you can recognize where these slipcovers are from.

So, when Ugly Sofa asked me if I would like to review their product I jumped at the chance.  Immediately I knew I wanted to update the look in my great room.  I seem to be drawn to the Pottery Barn slipcover look lately.  Plus, I really would love the chance to change out my throw pillows seasonally, and that is just not possible with my existing sofa.  However, my sofa is in perfect condition, so it would be really hard to justify purchasing a new one.  Slipcover to the rescue!

I chose the Loosefit T-Cushion Boxpleat Slipcover in Natural Twill.  Last night when I got home I was so excited to see that the slipcover had arrived.  Last night I opened the package and took a quick look.  Right away I was impressed with the look, feel and weight of the slipcover.  So, bright and early this morning, right after the kids left for school, I got started transforming the look of my family room.
I started by putting the slipcover on the sofa straight out of the packaging, just to get an idea for the fit.  I was very excited when I saw how good it looked already, without me really trying yet.  I took it back off and ironed it.  Honestly, you don't have to iron it because the wrinkles would work themselves out or if you just like that more casual look.  But you know me...I'm a little more high maintenance than that... so I ironed it.  I only ironed it a little bit...I didn't do each and every section.  I mainly focused on the box pleat skirt.   It only took about ten minutes.

I love the new look!

And watch this...

BAM!  I can change out the pillows just like that (picture me snapping my fingers).

How would you like the opportunity to transform your sofa?

UglySofa is generously offering a slipcover to one lucky DIYbyDesign reader. 


Here are the details:


Mandatory:  You must be a follower (or become a follower) of DIYbyDesign

1.  Mandatory - Head on over to UglySofa.com and come back here and let me know which slipcover you would choose.

Additional Entries:

2. Like UglySofa.com on facebook and come back here and let me know that you do.

3.  Tweet, post on Facebook or blog about this giveaway, and come back to let me know.

That's up to three entries!!  What are you waiting for...start entering!  

The giveaway will close on Thursday November 3 at 11:59pm EST.  You must leave a separate comment for each entry in order to maximize your chances to win. If your email address is not linked to your Google account, please make sure to include your email in your comment so you can be contacted in the case you win.


Good luck!
GIVEAWAY HAS ENDED
-Judy

Thursday, October 27, 2011

This Recipe You Have To Try

I don't post recipes that often, but this one is a keeper.  My husband is always looking for new recipes.  He came across this one on his way to Sweden a few weeks ago while reading the New York Times on his nook.
This recipe brings pork to a whole new level.  
It is a little labor intensive, but the end result is so worth the effort. 

Pork Katsu with Pickled Cucumbers and Shiso
1/2 pound small Kirby cucumbers sliced into 1/4 inch thick rounds
1 teaspoon coarse kosher salt
1 1/4 teaspoons sugar
8 thin boneless pork medallions
2 eggs, lightly beaten
2 tablespoons Worcestershire
1 tablespoon tomato paste
2 cups panko crumbs
1/2 cup flour
Black pepper
Peanut or vegetable oil for frying
2 tablespoons sliced scallions
2 teaspoons rice wine vinegar
1 tablespoon minced shiso or basil (we couldn't find shiso in our supermarket but the basil worked fine)
1 teaspoon soy sauce
1 teaspoon toasted sesame oil

1. Toss the cucumbers with 1 teaspoon sale and 3/4 teaspoon sugar
2. Place each piece of pork between sheets of waxed paper and pound meat to 1/8 inch thickness
3. Place eggs in a large shallow bowl; whisk in the Worcestershire and tomato paste.  Place the panko and flour in two separate shallow bowls.
4. Season cutlets with salt and pepper.  Dip each cutlet in the flour (tap off excess), the egg mixture (tap off the excess), then dredge in panko crumbs.
5. Heat a large saute pan, pour in 1/8 inch of oil.  Working in batches put cutlets in the skillet.  Immediately shake and tile the pan so that the oil rolls over the pork in waves.  Shake the pan occasionally until cutlets are golden on the bottom, about 3 minutes.  Flip cutlets and shake pan again.   Cook 2 to 3 minutes longer.  Put pork on a paper towel-lined platter to drain.


6. Pat the cucumbers dry with paper towels.  Toss with scallions, vinegar, shiso, soy sauce, sesame oil and 1/2 teaspoon sugar.  Serve cutlets with pickled cucumbers.


As a side dish, my 14 year old son made homemade fried rice.

My husband made a wasabi sauce as a dipping sauce for the pork.

I hope you will try this recipe.  It's really amazing.
Have a great day!

-Judy

Wednesday, October 26, 2011

Fall into Fall - It's a Party #37 - My Memories Giveaway Winner

Before we start tonight's party I'd like to announce the winner of the My Memories giveaway...

Shary

Shary...please contact me via e-mail to claim your prize (you didn't leave an email so I can't contact you).

Now onto the party.  Last week was filled with so much inspiration.  Here are this week's features:

I love this chair reupholstered by Britt from Interestosity.  It was her first time reupholstering...I am very impressed.  Please stop by her blog and check out the before photos.

I love this slipcovered bench from Random Thoughts.  Gina had this old bench that she decided to slipcover and use with her current set.  She had her Aunt Genevieve sew it for her.  Her aunt did an awesome job on this slipcover.  Just beautiful.
I just love this little stool recovered by Forever Decorating.  Again it shows you the power of awesome fabric and trim.
These scrabble coasters created by Art is Beauty are so clever.
I love a good bathroom renovation.  But a bathroom renovation that costs $0 really gets my attention.  Well that's just what Momma Hen did with this bathroom makeover.


If you were featured, please grab an "I've Been Featured" button (you can now find my buttons by clicking on the buttons tab right under my header).  Now let's get started with this week's party.  I can't wait to see what you have been up to.  Link up anything you have been working on...home decor, sewing, crafts, organizing, baking, recipes etc.     I will keep this link open through Friday.


A few rules:
1.  Please become a follower.  

2.  Please grab my party button above and display it either on your sidebar or somewhere in your post.  This way word can spread about the party.  The more people at the party, the more fun we will have.

3.  Please enter the link to your actual post, not just a link to your main blog page.

4. Please visit others who have linked up.   Everyone works hard on their projects and blogs...let's show each other some love by visiting each other.  Let's have some fun and hopefully make a few new friends along the way.

Ok...Let's Party

--Judy


Tuesday, October 25, 2011

Is There Anything I Won't do to Get the Job Done?

For years now I have wanted to do something with the space above my front door.  We have a two story entry and there is a ledge above the front door underneath a window.  When we first moved in I placed two artificial plants up there and called it a day.  It has been on my "to do" list forever, but it has always fallen to the bottom of the list as something else always seemed more important to do first.
You can see in this photo just how sad the space looks.  So what finally got the ball rolling on this project?  Well, a few weeks ago I replaced the drapes in my guest bedroom with new drapes I sewed.
That meant that the cream silk drapes from Pottery Barn, which were less than two years old, 
no longer had a home. This was the perfect opportunity for me to relocate those drapes to the space above the front door.  
For the past three weekends I have been wanting to start this project.  
I bought the rods, had the accessories...so now I just needed to find a few hours on the weekend to recruit my husband to get it done.  After the past three weekends came and went, we finally got started on Sunday.  My husband got out the big ladder and brought it into the entryway.  He climbed up the ladder and then looked down at me and said that he didn't think he could do this.  Excuse me?  Hubby say what?   "What do you mean you don't think you can do this?", I asked.  He said, "you know that heights aren't my favorite thing and once I get up here I probably will have to stand on a step stool in order to reach high enough to hang the drapes...I don't think I can do it".  Okay...deep breath...while I totally understood...there was no way I was not hanging those drapes right then and there.  
I said, "ok, get down...I'm going up".  

I do not have any real issues with heights so I figured how bad could it be.  First things first, I held up the drapes on the rod and had to be on my tippy toes in order to reach.  Well, the height wasn't the only issue...it was the fact that the depth of the ledge is only 27".  
That meant once I was up there I also had to have a step stool in order to reach high enough to install the brackets.  Then I would have to be super careful not to have the step stool too close to the edge, but I also couldn't have it too close to the window or else I couldn't get far enough away to gain the right leverage to drill the pilot holes and screw in the brackets.

Now in fairness to my husband, he stayed up on that ladder and held the step stool and handed me the tools and basically did everything he could to make sure I didn't end up falling.  Usually when we do projects like this he is the one doing the project and I am the assistant.  It was much harder, and funnier, having the roles reversed since the whole time I was up there I could never think of the word for whatever I needed next and kept referring to whatever I needed as the thingie.
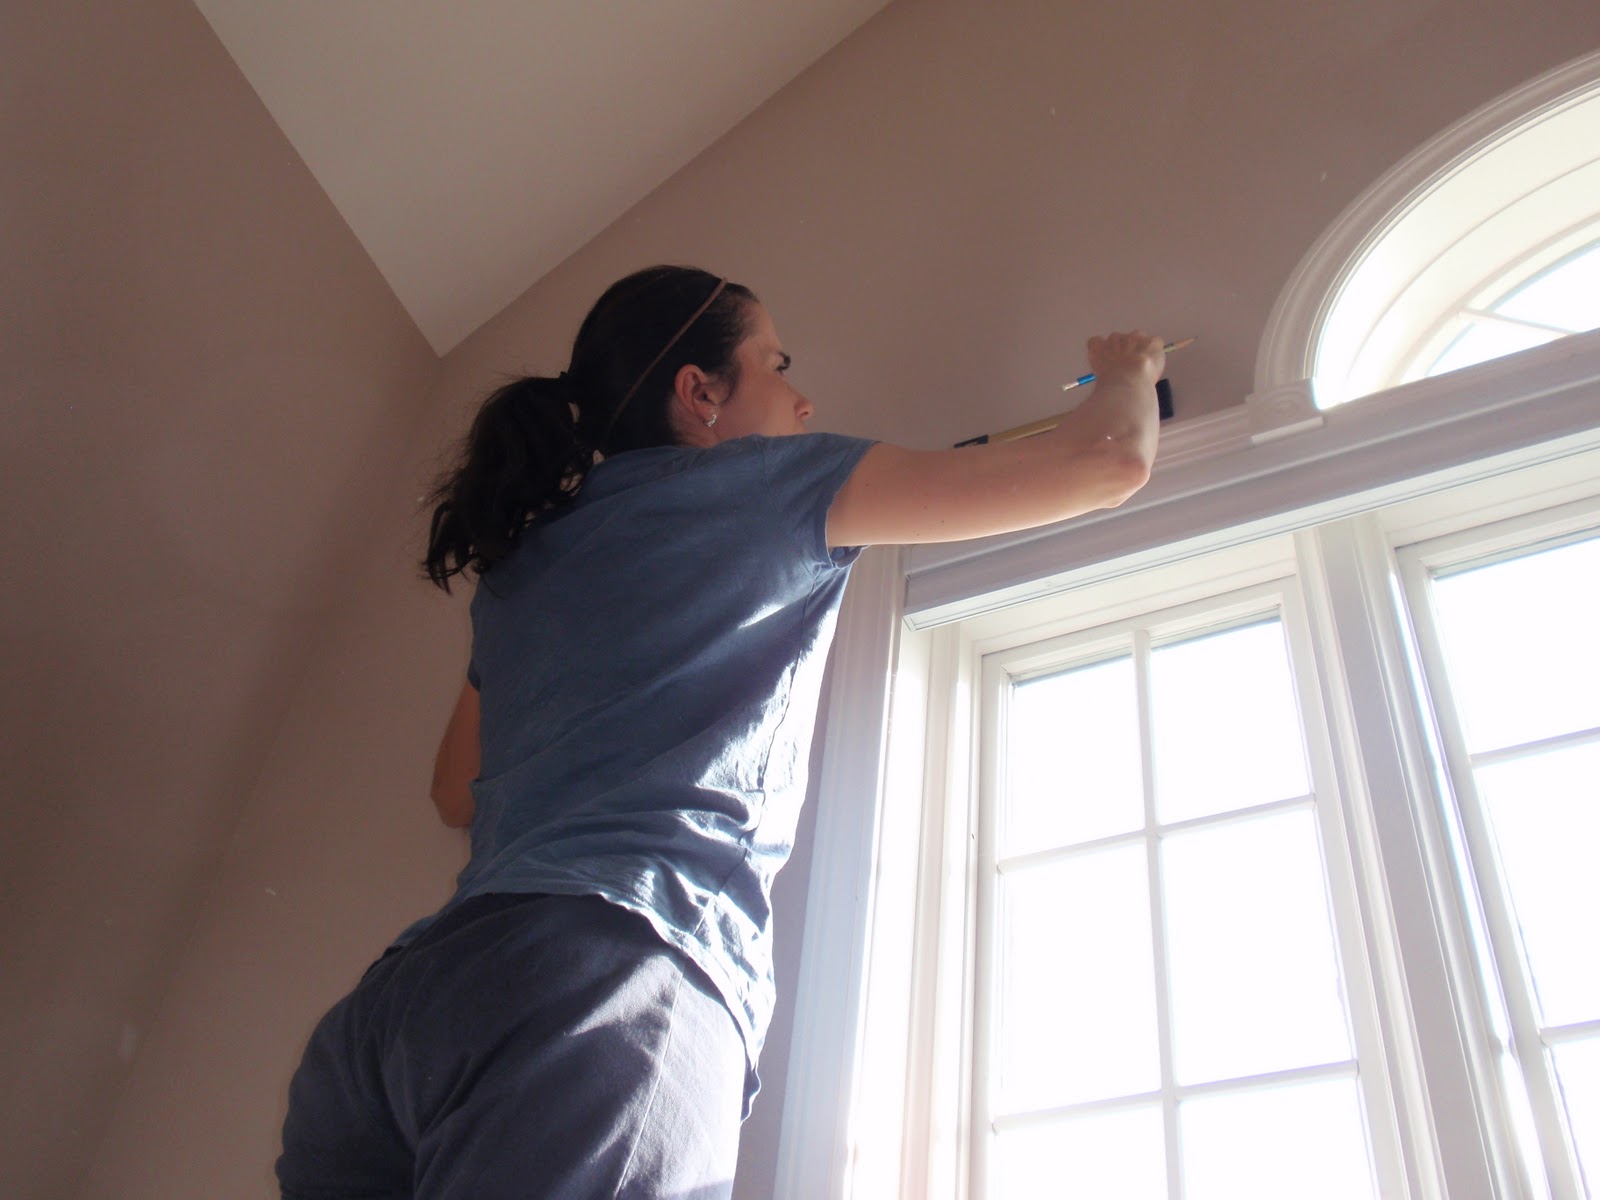
The sun comes directly in the front window at this time, but I had to keep the shade open or else I didn't have anywhere to hold on.  Disclaimer - the photos aren't great of me up on the ledge.

Just because I was fifteen feet off the ground didn't change what I needed to do in order to hang the drapes correctly.  I still had to measure and level the brackets and make sure they hung at the same height on both sides.  A bit trickier at that height.
Here's another not so attractive photo...but it does show you what it took for me to hold onto the window and attempt to screw in the brackets.  I just had to laugh.

My parents stopped by around this time and my mom said I looked like Lucy in that episode from I Love Lucy when she is on the ledge of their apartment building.  Remember that episode?

While I was up there I also needed to hang the candle sconces I had purchased from Home Goods.
Then I fussed and primped the drapes until they puddled just right.
Now it was time to accessorize the ledge.  I carefully made my way down the ladder and my father climbed up.   I handed the accessories to my husband who was on the ladder and he handed them to my father.  I had to snap this photo of my father taking a call on his cell phone while he was up there.  
Here is the finished space.  I just love how it came out!  In creating this look I layered my pieces to give it that out of a magazine look.  It's not like I have to worry about anyone moving anything.

 The candle sconces are from Home Goods.  The birdcage I have had in my dining room for years.  The pillows were in the closet not being used.
The gate is another Home Goods find.  The gate is leaning on the window sill, however, my husband nailed two nails into the floor to stop the gate from slipping forward.  We also had to be careful that it leaned forward enough so that the remote controlled shade could pass behind it easily.  My husband added a piece of styrofoam (from the curtain rod box) to the back of the gate with double-sided tape and used it as a buffer from the molding.

On the other side I used a little table I had in a closet along with two topiaries that used to be on my mantle.  The ball made of sticks is also from Home Goods.
As an added bonus, having this area decorated has also made my beautiful chandelier look even more beautiful now that it has this as it's backdrop.
The gate picks up on the color of the medallion from the chandelier.
The end result was so worth the risk of bodily injury. Lol
What do you think?  Do you love it as much as I do?
By the way...for anyone keeping track...this officially means I met all of my home goals I set for 2011.  Woo Hoo!!  
Just in time for the holidays.


Don't forget to stop back tonight at 8pm EST for my Fall into Fall link party. 

-Judy

Monday, October 24, 2011

Roomspiration Review - Guest Bedrooms

Happy Monday!  Hope you all had a great weekend.  Remember Roomspiration?  Today all of the hosts of Roomspiration will be featuring the top viewed links from their leg of the party on their blog.  After checking out my features, please head on over to these blogs to check out their top links.  You will be sure to find inspiration for every room of your home.

Abode Love - entryways
View Along the Way - living room
Family Brings Joy - craft rooms
Involving Color - dining rooms
a la mode - nurseries
Just a Touch of Gray - master bedrooms
The Blooming Hydrangea - closets and nooks
The Mustard Ceiling - laundry and mudrooms
The DIY Showoff - kitchens

As you all know, I hosted Guest Bedrooms from Roomspiration.  Here are the top three most clicked links from the party:
This beautiful guest bedroom created by Design OCD.  

The colors create a room that is calm and serene.  Perfect for a guest bedroom.
Next up is the guest bedroom created by Triangle Honeymoon.  

She took their guest bedroom from boring to bright and fabulous.  

Last but not least, a gorgeous guest bedroom from Hanging with the Hewitts.
Here is the before photo...what a transformation!!
Thank you all again for inspiring me and for participating in Roomspiration.  Hope you drop by all of the other hosts blogs today for more inspiration.  


Don't forget about the MyMemories Giveaway I have going on.  You can click here to enter.  
-Judy

Sunday, October 23, 2011

It's Giveaway Time - My Memories


I love to scrapbook, however, I don't always have the time.  That's why when My Memories contacted me and asked if I would like to try out their scrapbooking software...of course I said YES.  Anything that can make my life a little easier and help me catch up on my scrapbooking sounds great to me.
It's so easy...really easy.  You can start using one of their templates or you can design your own.
You know me...I designed my own.  Here is what I created:

There are so many designs to choose from, the possibilities are endless.  There are tons of free papers available, but they also have an online store for even more choices.  My favorite part was all of the embellishments available...I added buttons and grommets to this design, but there was ric rac, flowers and so much more to choose from.  It is super user friendly.


Here's another example of what you can do with My Memories Digital Scrapbooking Suite Software.  This page was created from the free RAKScraps Mega Kit.

Now for the best part...it's your turn:
My Memories would like to give one DIYbyDesign reader their own copy of My Memories Suite Digital Scrapbooking Software - a $39.97 value!!
Imagine all of the possibilities as to what you can create.
Here's what you have to do for your chance to win:

Mandatory To Enter:  
1. Follow DIYbyDesign.   

2. Visit MyMemories.  Choose your favorite digital paper pack or layout.  Then leave me a comment telling me which one you loved.

For Additional Entries:
1.  Follow My Memories' blog.

2.  Like My Memories on their new facebook page. 

3.  Like DIYbyDesign on facebook.

Leave a separate comment for each way you entered for a total of 4 chances to win!!


If you can't wait to see if YOU are the winner, head on over to My Memories now and use Code STMMMS11526 
to save $10 off the purchase of My Memories Suite V2

Giveaway will be open through Monday October 24 at midnight.  Winner will be announced Tuesday evening at my Fall into Fall party.  Good luck!
Have a great weekend.

-Judy
Related Posts Plugin for WordPress, Blogger...