Pages

Tuesday, May 31, 2011

Swing into Spring - It's a Party - #18

Welcome to this week's Swing into Spring party.  First of all I would like to apologize for the mess up with the linky tools in the first twenty minutes of the party.  By mistake I clicked on basic party and didn't realize it until twenty minutes in.  Lesson learned...always double check before posting.  Even with the linky issues, 123 of you linked up.  So much talent and inspiration to chose from.  Always difficult, but here are this week's features:

I always love a good placemat pillow.  This one is really beautiful.  Hope you will stop by 1st Lady of the House  to check out the rest of her blog.
I am in love with these DIY lanterns created by House Dressing.  Gotta love what spray paint can do.  

I just love this project.  It's a huge pouf knitted by Dukes and Duchesses.    I've never seen anything like it...how cool looking.  Now that's alot of knitting!!
I am in love with this nursery created by a la mode for her daughter.  How gorgeous!!

This is a garage sale lamp revamp done by The Mustard Ceiling.  You have to stop by her blog to see where this lamp makeover began.  It's truly remarkable.


If you were featured, please grab an "I've Been Featured" button (you can now find my buttons by clicking on the buttons tab right under my header).  Now let's get started with this week's party.  I can't wait to see what you have been up to.  Link up anything you have been working on...home decor, sewing, crafts, organizing, baking, recipes etc.     I will keep this link open through Friday.


A few rules:
1.  Please become a follower.  

2.  Please grab my party button above and display it either on your sidebar or somewhere in your post.  This way word can spread about the party.  The more people at the party, the more fun we will have.

3.  Please enter the link to your actual post, not just a link to your main blog page.

4. Please visit others who have linked up.   Everyone works hard on their projects and blogs...let's show each other some love by visiting each other.  Let's have some fun and hopefully make a few new friends along the way.

Ok...Let's Party

-Judy

Chalk Paint Project Finished

My first chalk paint project is finished.  I am very happy with the results.  This project started with an awesome Craigslist purchase.   $20 - what a deal!
photo from Craigslist
The chair had some great bones.  I started this project by stripping the chair of all fabric.  It wasn't easy...it had nailhead trim all over it.

It was at this point that the fun began.  I had ordered Anne Sloan's chalk paint from Robyn Story Designs, a retailer in Florida.  They were awesome to deal with...I ordered late on a Friday afternoon and received my Anne Sloan paint, waxes and brushes by Wednesday morning. Don't you just love instant gratification?  If you are in the market for chalk paint, you should call Robyn Story Designs...they have inventory of Anne Sloan paint and waxes and are so helpful on the phone.
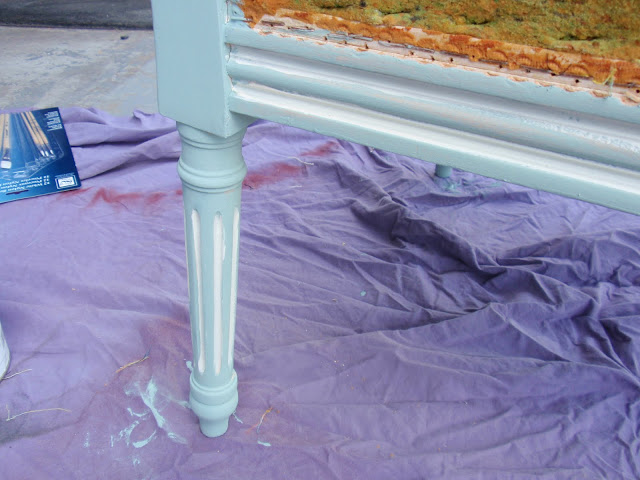
I started by painting the chair a combination of Duck Egg Blue with highlights of Old White.
After painting the entire chair, I used the clear wax.  I had ordered the wax brush, but because this chair had so much detail, I found it easier to use a rag to apply the wax.  I will use the wax brush on my next project.


You can see in the above photo that when you first apply the clear wax it slightly darkens the paint color.  However, once it dries, it lightens up again.
I tried to get a close up of what it looked like when I went to sand it to start distressing.  I think this is where you can really see the benefit of chalk paint vs. latex.  You know when you go to distress latex how sometimes it doesn't evenly sand off...or it will peel?  That doesn't happen with chalk paint.  It's super easy to distress and even easier to control how much you want distressed.  One tip...definitely wear a mask when you sand.  There is definitely more dust that with latex (however, less after waxing than before...I had sanded some before and then it's like clapping erasers together).
I also ordered the dark wax.  I used this extremely sparingly.  I again used a rag, dipped it in the wax and then wiped off most on a paper towel before applying it to my chair.  I just wanted to give some dimension to the detail...not totally change the color.
I had saved all the pieces from when I took off the original upholstery.  Makes it very easy to use it as a pattern.  I used foam I had for the under cushion.
Using my electric bread knife, I cut the foam to size easily.
I used a drop cloth I purchased from Home Depot as my fabric.  I cut a piece a little larger than I needed and laid it over the seat.
  Using the air compressor staple gun I got for Christmas...

I started stapling...
...and stapling.
Once it was stapled all around, I cut away the excess fabric.
I then cut out the fabric for the arms and the back and front.  I added foam and then stapled it all around.
Again, I cut away the fabric.  It doesn't have to be perfect...the trim will cover all of the staples.
For the back I started by stapling the fabric from the front.  I cut away all the excess.
I then added a piece of batting.
Then I added the cardboard (I used the same piece I had removed...it was still in good shape), then the foam, more batting and then the top fabric.  Yeah...this part wasn't so easy.  With that many layers it was hard to get it all to line up.  However, after I got a few staples in, I was home free.
It was now time for the trim.  I bought the trim from JoAnn's for $0.99/yard and then someone handed me a 10% off coupon when I was checking out, so I only paid $0.89/yard.  I bought eight yards ( I had about a yard left, but my rule of thumb is to always buy more than less...nothing is worse than having to go back out when you are in the middle of a project).
Using my hot glue gun and my scissors (rather than my fingers to push it into place) I attached the trim.  If you've ever worked with hot glue you know that you can burn your fingers so easily, so I like to use my scissors...the glue peels right off the scissors.
I'd like to say I was done at this point, but I still had to make the box cushion for the seat.  Again I used the old fabric as a pattern and cut out a front and a back to the seat cushion and the side panel.  I also made cording to coordinate.
I pinned and then sewed the three layers together.
Here is the final product.  I love how it came out.
I added the pillow as a final touch.
Remember this pillow?  I made it out of two dinner napkins.  All I did to make it fit the new chair was open up the pillow, remove the insert, add a smaller insert and sew a smaller seam.  The width of the pillow stayed the same.
So what do you think of my first attempt at re-upholstery?  It's the perfect addition to my guest room.   I have to be honest...it was so much work.  It took way longer than I ever anticipated, but I love the result.  Can't wait to hear what you think.

-Judy

Friday, May 27, 2011

Chalk Paint

I took a leap into the world of chalk paint.  After seeing so many wonderful projects in blogland, I was excited to receive my shipment.  I ordered from a retailer in Florida on Friday and my products arrived on Wednesday.  That's a pretty fast turn around.
I ordered a starter kit which consisted of a quart of old white, duck egg blue, a clear wax, a dark wax and a wax brush.
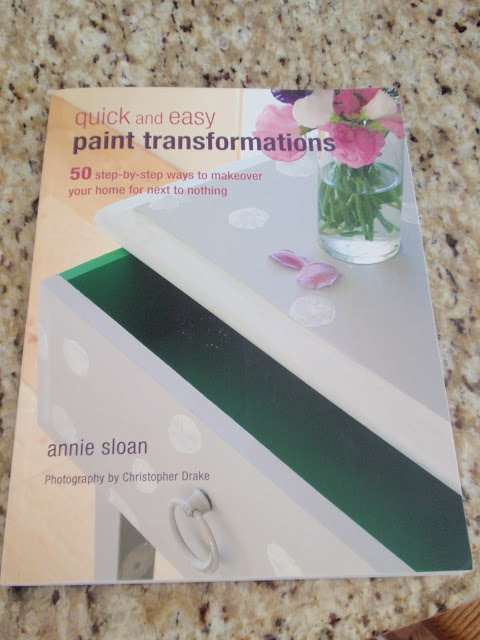
It also came with Annie Sloan's book.  After leafing through the book I was ready to start my first transformation.
Remember my Craigslist find?
After removing all of the upholstery, I was ready to paint.  My plan was to paint the chair the duck egg blue and accent it with the old white.
I was very happy when I opened the can of duck egg blue that it looked exactly as I had pictured it.  Whew!
The Old White is also beautiful...it's a creamy white.  It kind of reminds me of a nicer version of Heirloom White spray paint.
Well let me tell you...this paint is unlike any other paint I have ever used.  I totally get why it's called chalk paint.  That's really what it looks like.
All in all, so far I am very impressed with the paint.  It's very easy to work with.  The paint goes on smoothly and easily and covers completely in one coat.

The paint also comes off extremely easily.  How do I know this, you ask?  I was painting the accents in the old white when I got some on a part that I didn't mean to.  I had a wet rag and went to wipe it off.  It not only took off the old white but it also took off the duck egg blue, which had been applied a day earlier.  Whoa!  That's when I went back and read the book a little more carefully rather than just flipping through the pages.
As it turns out, it's the wax that really sets the paint.  Apparently after the wax is applied and has had time to cure, the paint will be permanent.  

So my plan for the holiday weekend is to finish this chair.  Next step is to apply the wax.  I would have loved to get that done yesterday, but the wax needs more than the ten minutes I could devote.  For one, you need mineral spirits to clean the brush after use so it will have to wait for Saturday.  I can't wait to reupholster.  I'll be sharing the transformation next week.

This weekend also officially marks the beginning of our summer entertaining.  The pool is open and ready to go.  What do you have planned for Memorial Day weekend?

-Judy
Thursday, May 26, 2011

Happy Birthday Little Buddy

Both of my kids have May birthdays, so May is a crazy but wonderful month for us. Today is my son's birthday. Alex turns 14 today...okay...I actually choke over those words.
6 months old
Wasn't it just yesterday that he fit into that bucket?  Doesn't everyone have a photo like this?
9 months old
I tried to enjoy every second when he was a baby...but it still flew by.   There are moments in time that are so clear in my mind.  I actually remember the day I took this picture...I remember everything about it.
1 year old
We used to call Alex "the little man" because that's what he was...a little man.  He is the best person I know and having him as my son has made me want to be a better person on a daily basis.  He is kind and caring, incredibly smart, and he makes everyone he encounters smile.  You know how there are people like that?  People that when you are around them just make you happy.  Well, that's him.
8 years old
Happy 14th Birthday Alex.  We love you!

-Judy

Tuesday, May 24, 2011

Swing into Spring - It's a Party - #17

Welcome to this week's Swing into Spring party.  As always, last week's party was filled with inspiration and amazing ideas.  It's always so difficult to just pick a few, but here are this week's features:
I love this dining room makeover done by The Blooming Hydrangea.  Hope you will stop by her blog and check out the before and after photos.
This post really caught my eye, especially since I am trying to find the perfect stencil for my bathroom makeover.  Trial and Style created this.  I love it.  Please stop by her blog to check out the full tutorial.
I love this trash to treasure project created by Redecorating on a Whim.  Love the pretty fabric.
While I am still waiting for my shipment of Anne Sloan chalk paint, I couldn't help but feature this beautiful dresser refinished with chalk paint.  Please stop by Aquaseventy6 to check out the before and after.
When I saw this post, I absolutely drooled.  I am in love with this office makeover.  I recently found A La Mode and this office is only one of the beautiful rooms in her home.  I could look at this picture all day long.


If you were featured, please grab an "I've Been Featured" button (you can now find my buttons by clicking on the buttons tab right under my header).  Now let's get started with this week's party.  I can't wait to see what you have been up to.  Link up anything you have been working on...home decor, sewing, crafts, organizing, baking, recipes etc.     I will keep this link open through Friday.


A few rules:
1.  Please become a follower.  

2.  Please grab my party button above and display it either on your sidebar or somewhere in your post.  This way word can spread about the party.  The more people at the party, the more fun we will have.

3.  Please enter the link to your actual post, not just a link to your main blog page.

4. Please visit others who have linked up.   Everyone works hard on their projects and blogs...let's show each other some love by visiting each other.  Let's have some fun and hopefully make a few new friends along the way.

Ok...Let's Party

-Judy


Related Posts Plugin for WordPress, Blogger...