Pages

Showing posts with label sewing. Show all posts

Thursday, January 30, 2014

DIY Pillow With Zipper

I love to sew and I especially love to sew pillows.  Changing up pillows is a quick and easy way to redecorate any room.  I have made many pillows over the years but I have always been afraid to try making a pillow with a zipper.  I've tried looking up tutorials but they always seemed a bit confusing.  I usually make envelope pillows and pillows where I hand sew the pillow closed after adding the insert.  
I finally got up the courage to try my hand at a zipper enclosure pillow after seeing this tutorial from Centsational Girl last week.  Seriously, this tutorial has forever changed my view of sewing a pillow with a zipper.  It's so easy!!
First I cut my fabric to size for my pillow insert.  I love this self-healing cutting mat I got at Wholeport.  It seems to keep the fabric in place much more than any other mat I have ever used before. 
  I use a square when making pillows.   I use a pencil and mark the edges of my pillow on the back side of the fabric.
It's much easier to make straight cuts using a rotary cutter.  I used to try not marking the fabric and just using the rotary cutter with the square, but that never seems to go well.  Usually I end up moving the square just a little bit and messing up the cut.  Much easier to mark it and then use the rotary cutter.  I ultimately made four pillows so the rotary cutter made things go much faster.
I followed the Centsational Girl directions completely. 
After sewing the edge close to the zipper, I also sewed the outside edge of the zipper to make the edges look a little more professional.
In less than twenty minutes from start to finish,  I had completed my pillow.  
Two of the pillows I used on the chairs in our basement family room.
Just look at my zipper enclosure.  So happy with it.  I actually tried to buy the invisible zippers, but JoAnn's didn't have it in the sizes I needed.  These worked just as well.
The other two I made to use on my family room sofa.
Yep - really happy with my new zipper enclosure pillows.  
Can't wait to hear what you think.


-Judy

Pin It


Monday, December 9, 2013

DIY Christmas Stocking Tutorial - A JoAnn Celebrate the Season Project

I have thoroughly enjoyed being a part of the JoAnn Craft Store celebrate the season challenge.  
As soon as I was asked months ago to participate, I knew exactly what I wanted to create for the Christmas season...new DIY Christmas stockings.  
This project is so much easier than you would think.  
If you can sew a straight line, you can make these stockings.  
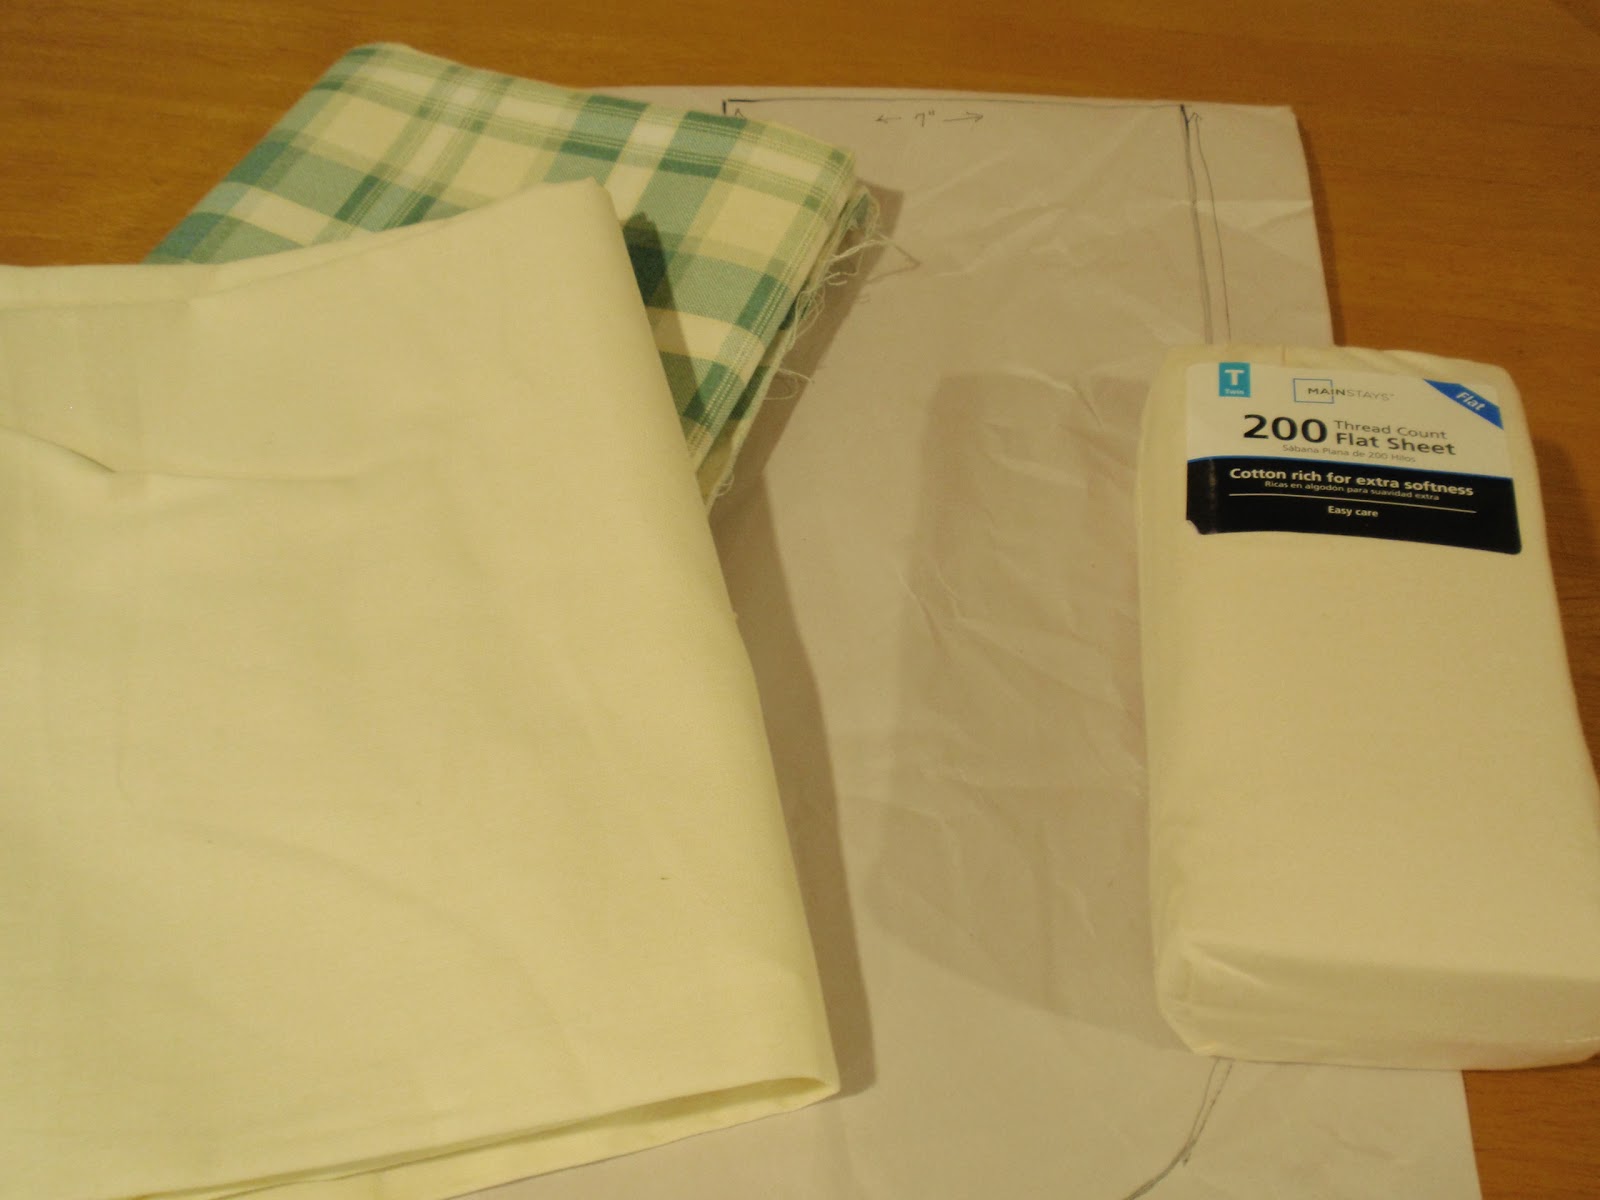
First things first, I gathered my supplies.  I went to JoAnn Fabric and Craft store and picked out this beautiful plaid fabric and a coordinating cream fabric.  I also picked out beautiful trim to match.  Joann's has some of the most beautiful fabric and trims to choose from.  To line the stockings I decided to use a flat sheet I had purchased at Walmart some time ago but had never used.  Flat sheets are a great way to line projects, including drapes.  I created a pattern on large paper (which was used to wrap my dishes I bought for Thanksgiving from Bed Bath and Beyond).  I used my old Pottery Barn stockings as a guide and traced around it onto my paper.  The stocking pattern measured 9" across the top and 15" to the heel of the stocking.  I also made a pattern for the cuff which measured 10" x 16".
I cut two stockings from my fabric and two from my lining fabric and one from my coordinating fabric for the cuff.

Then I started layering...lining first, then plaid stocking face up, then plaid stocking face down and then lining fabric again.  Then I sewed around the stocking leaving the top open.
Next I cut a piece of coordinating ribbon and pinned it to the lining only of my stocking.
For the cuff, I folded my fabric lengthwise, right sides together and sewed a seam.  I then unfolded my fabric and folded it this time width wise (to form the 5" cuff).  Next I slipped the cuff over the stocking as shown above.  Be sure to keep the seam either on the side or as shown so that it does not end up on the front of the stocking.  Carefully pin the cuff at the top of the stocking to a layer of lining and stocking fabric all the way around.
I picked a pretty flat trim to add to the edges of my stocking cuff.  I love using this fabric glue...it grabs super fast and has always worked well for me.  I started in the back and glued the trim all the way around, ending it on the seam in the back.
It was that easy.  The first stocking took me about an hour, just because I was trying to make sure I liked the size, etc.  The next three took less than a half hour total to complete.
Finally, hang your stockings by the chimney with care...and hope that St. Nicholas soon will be there.

Can't wait to hear what you think of my #fabulouslyfestive stockings.

To check out more holiday craft ideas, you can go to Joann Celebrate the Season.

Also, be sure to stop back tomorrow.  I have a very special giveaway planned.
Hope to see you then.

-Judy

Pin It

Disclaimer:  I was given a gift card to JoAnn's to purchase my supplies, however, the opinions I have expressed are entirely my own.

Sharing with Savvy Southern Style

Tuesday, November 12, 2013

DIY Give Thanks Pillow - A JoAnn Fabric Celebrate the Season Craft

Thanksgiving is right around the corner.  I like to add touches of Thanksgiving all over my home.  I put together a Pottery Barn inspired pillow using supplies I found at JoAnn Fabric and Craft store.  

To create your own DIY pillow, you will need the following:
- light or white fabric
- ink effects paint
-in effects base coat (if using a fabric with more than 60% cotton)
- coloring book pages
-small paint brush

I went online and found these Thanksgiving coloring pages.

I found this cool product at JoAnn Fabric and Craft called ink effects.  You can transfer anything you can draw onto any fabric.  
Using a small artist brush, I painted each of the coloring book pages and used black ink effects paint to paint over all of the black lines.
This is what it looked like after I was done painting.
Next I prepared my fabric.  I was using some left over drop cloth fabric I had.  I wasn't sure of the cotton content, so I used the basecoat just in case.  
Then I printed out the words "Give Thanks" using word and creating the mirror image.  I then painted this using the black ink effects paint too.  Remember whatever image you use, it will be the mirror image once it gets ironed onto the fabric.  

Next, following the directions on the ink effects box,  I ironed on the painted coloring pages onto my fabric.  It transfers in under a minute and can be transferred multiple times onto additional fabrics.
I added detail using embroidery thread.
A pretty addition to my foyer decor to remind us what the season is truly about...giving thanks.

As a special thanks to all of my DIYbyDesign readers, 
JoAnn Fabric and Craft is providing this 50% off coupon.

Hope you will all stop by JoAnn to check out other Thanksgiving projects. Hope you will use the coupon to create your own #turkeytablescapes Thanksgiving craft.
-Judy

Pin It


** Disclosure ** This post is a part of Joann Fabric and Craft Stores Celebrate the Season holiday campaign.  I received compensation in the form of a gift certificate to buy the supplies for this post.  All words and opinions are my own.

Thursday, September 26, 2013

DIY Tissue Box Cover

Sometimes I just get in a creative mood and get on a roll of making things.  That's what happened last week.  I wanted to use my embroidery sewing machine, so I came up a project to do using it.  
I had some left over drop cloth in my stash.  I particularly like this drop cloth because it has good body and keeps it's form.  Even though it looks like linen, it's a little more substantial than linen.
Before cutting any of the fabric pieces, I embroidered the word Tissue onto my fabric.  
I cut four equal pieces of fabric 5" x 7" and sewed all four sides - right sides together.
I then cut a piece to fit the top, folded it in half and cut a curve in the middle.
I used more brown embroidery thread to sew around the hole I created in the fabric and sewed all four sides together.
It was that easy.  
If you don't have an embroidery machine, you can still create a tissue box cover in any fabric to coordinate with your decor.
Can't wait to hear what you think.

-Judy

Pin It


Tuesday, June 11, 2013

Neck Roll Pillow Tutorial

One of my all-time favorite pillows to make is a neck roll pillow.  They are super easy and quick to make.  Here is a tutorial for the neck roll pillows I made for my parent's master bedroom.
These neck rolls are so easy to make (also called bolster pillows).  It took about a half hour to make both pillows.  Originally they wanted two to put on their bed.
But, when they got this chair, they moved one of the pillows onto it instead.  You can check out how we framed the mirror behind this chair here.
I started with a neck roll form and measured around it and also measured the length.  In my case the measurement around was 19" and the measurement from left to right was 14".
I cut my fabric 14 1/2" x 19 1/2" (the 1/2" being added for seam allowance).  I like to use a square to mark the back of my fabric.  This is the way I can insure straight lines.
To create the sides, you need to measure the diameter of the side.  Mine measured 6".  This meant half the diameter was 3".  I added 1 1/2" to this measurement to fold over to make the pocket for the ribbon to go through.  So the total for each piece would be 4 1/2" x 19 1/2" - I cut two pieces that size.
On each of those side pieces, I fold over the long edge about an inch or so (enough to be able to have ribbon put through.
Then with right sides together I sew the 19 1/2" ends together.  Notice that the pocket that was just created it toward the center (that way when it is all on the right side, that will be the end).
Now is the time to add any embellishments.  I sewed grosgrain ribbon onto the two seams I created when adding the end pieces.
I simply sewed around all four edges of the ribbon.
This time I left it at that because the fabric was a busy enough.  You could add anything else you want.  I folded the fabric in half and with right sides together (and making sure that the ribbon lined up together) I sewed it together being careful not to sew through the two pockets for the ribbon to go through.
Here is the old pillows I had made them (I just took the inserts out to make the new ones).  You can see that I added a center band to this one, as well as a ruffled edge.  This time they wanted something a bit more streamlined.
Once together, I took a safety pin and pinned it onto the ribbon.  Then I threaded it through the pocket I had created on each side.  Here's a tip - the larger the safety pin the easier it is to thread it through your pocket.  This was the only pin I could find and it kept opening up and going through my finger...a little frustrating.
This is what it should look like when you have finished threading the ribbon through the end.
Simply pull the ribbons and tie a bow.
Simple as that.  I love how it came out.
It looks perfect on their chair.  Let me know what you think.  
I always love and appreciate your comments.
Don't forget to stop back tonight at 8pm EST for my Swing into Spring party.  Hope to see you there.

-Judy

Related Posts Plugin for WordPress, Blogger...