I've been showing you my Christmas decorations for the past few days and I thought now might be a good time for me to teach you how to make the bows I have on my tree, my mantle and my staircase.
This is the one of the many bows I have on my railing. It was made using wired ribbon and floral wire. If you don't have floral wire, you can use those little flowers they sell in Michaels or AC Moore that have wire on them as I did below (they are usually in the wedding favor aisle).
I've made bows using a cardboard template as well as without cardboard. For me the cardboard is ideal if you are making many bows and you want their size to be uniform. Otherwise it is very tough to measure it out exactly each time. If you are only making one bow, you don't need the cardboard.
For this bow I started with cardboard folded in half (to give it extra strength) that had a final measurement of 9 inches long.
I start by laying out a piece of ribbon which extends beyond the cardboard (for the tail on one end of the finished bow).
I then start wrapping my ribbon around the cardboard, lengthwise. When you wrap the ribbon, it won't be able to go on top of the tail part. It's ok if it's just next to it like I show above.
I continue wrapping it until I have gone around five times (you can go around more times the bigger and fuller you want your bow). I like five loops on each side (ten total). Don't wrap it too tightly or you will have a tough time getting it off of the cardboard.
When you are done wrapping you should end on the opposite side of the first tail. DO NOT cut the ribbon at this point. Keep it attached to the roll.
Remove it from the cardboard. Be careful not to let it come apart as you remove it. Since the ribbon is wired it should stay together without much effort.
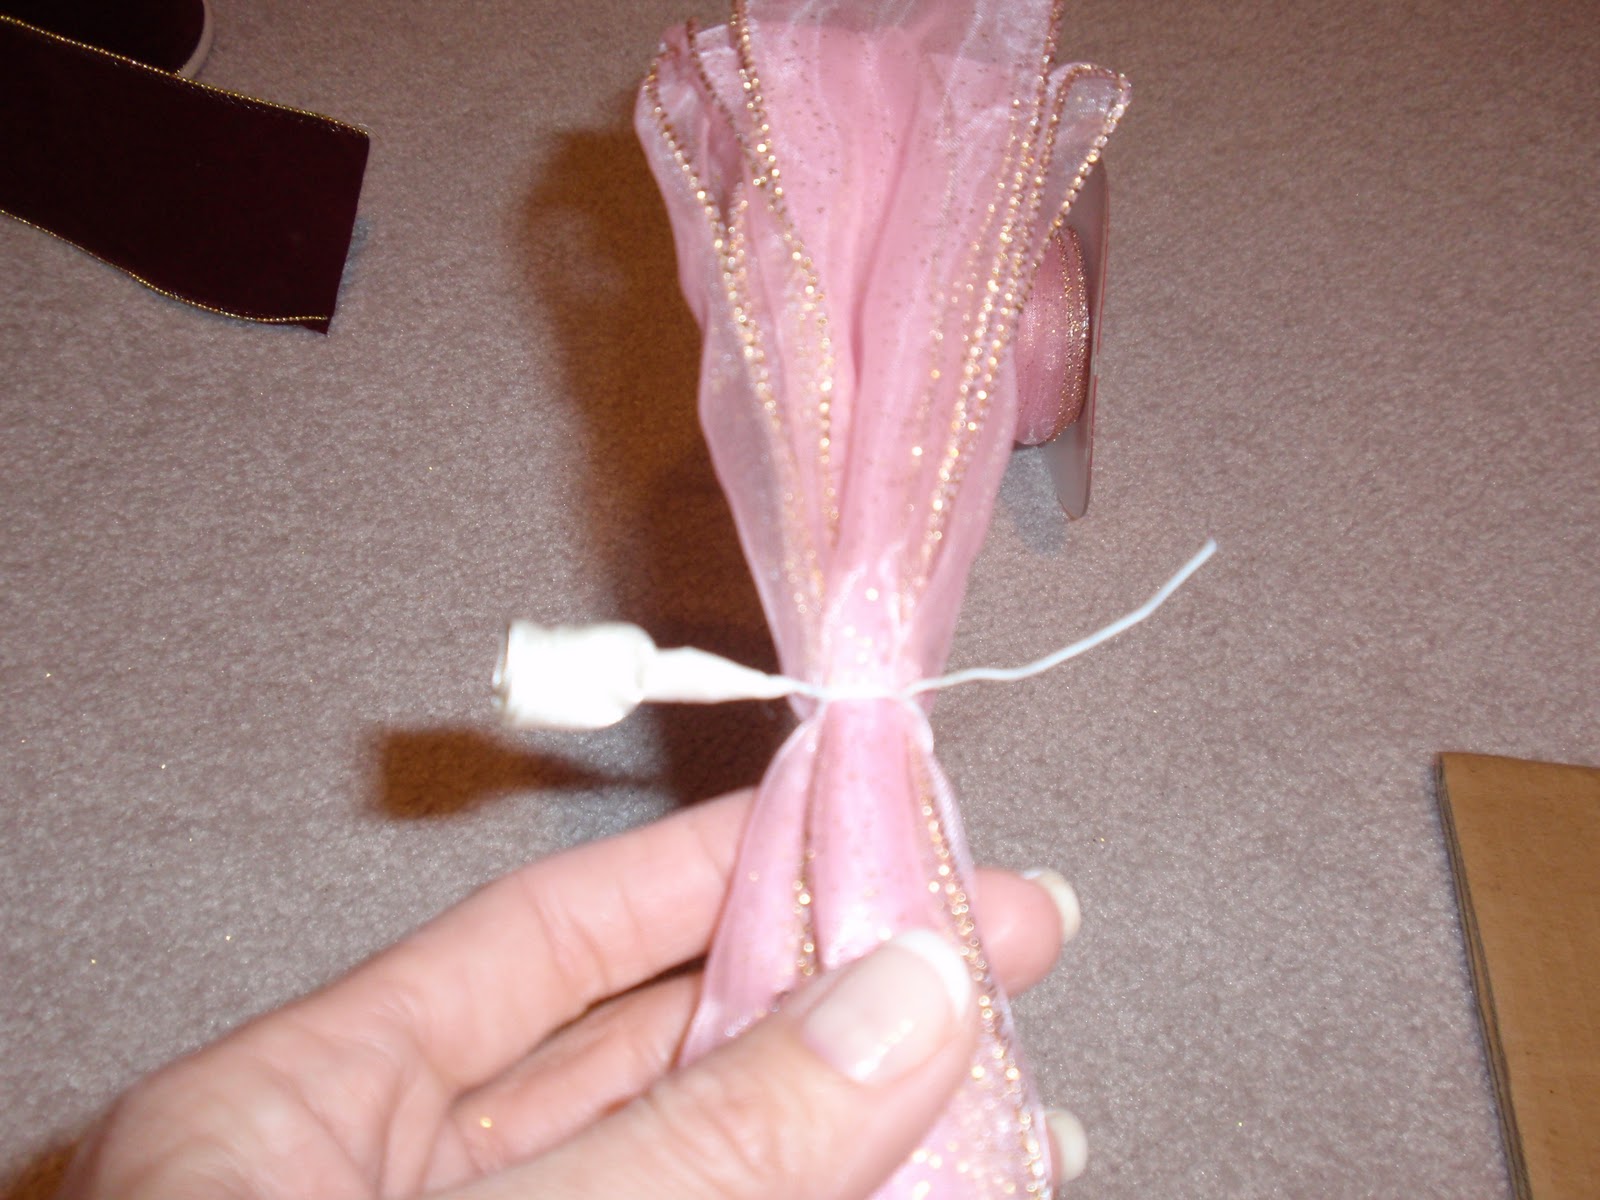
In the center pinch your ribbon together.
Now take one of the flowers with wire and simply wrap the wire around once and twist the wire together a few times (like when you rewrap a loaf of bread).
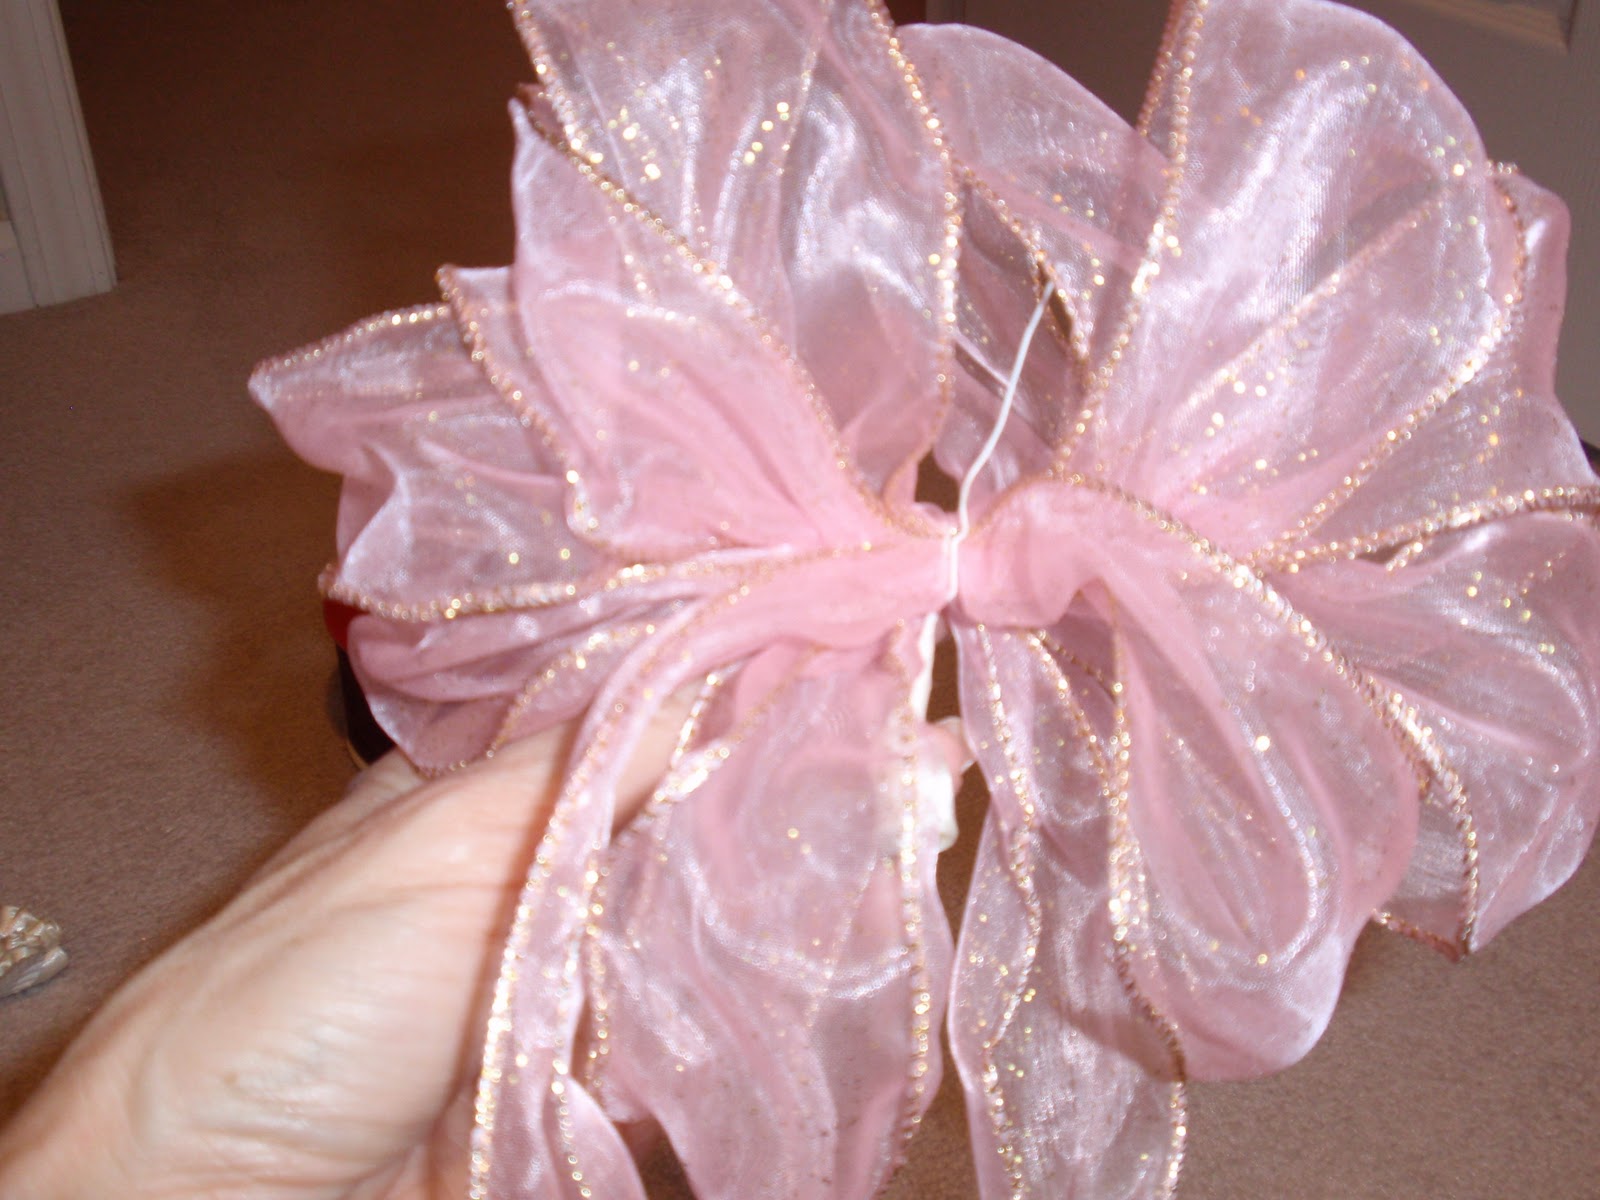
Now that it is together, start pulling one loop out at a time and fluffing it up. Use your fingers to spread out each loop. You don't have to be too careful, it should hold together easily.
Continue this process one loop at a time until you finish one side.
Then open up all of the loops on the other side.
Ok. Remember when I told you not to cut the ribbon before. Here's why. From the side that is still attached to the spool of ribbon take a small amount of ribbon and form a loop over the center where your wired flower is. Take the extra portion of wire on the flower and secure the loop from behind.
Adjust your flower, cut the ribbon from the spool to a length that matches the other tail and voila...beautiful bow. So easy, so quick, and so perfect for holiday decorating.
Here are some up close photos of some of my other bows.
These bows can be used year after year. It's okay if they get a little squashed in storage after the holidays are over. Next year you can just poof them out again. I've been using some of these bows for more than ten years.
I hope you try this super easy project. Let me know if you do. I'd love to see what you've done. As always, I love and appreciate your comments.
-Judy
I'm participating in a Christmas vignette party over at
Rhoda's at Southern Hospitality and a holiday house tour at
Hooked on Houses.. Come check it out.
![]()


30 comments:
Judy, thank you so much for this little tutorial, I can't wait to give it a try.
Merry Christmas!
Judy
I am not good at these things, but your tutorial almost makes it seem do-able.
I think I'll give it a try. Wish me luck! (I will need it, as I am craft-challenged.)
=)
Pretty Bows and great Tutorial. I'm definately going to make BigBows now.
this was a great tutorial
thank you :)
~victoria~
I have not used the cardboard to help. I'm adding that next time. I have several bows to make! Thanks!
What a pretty way to decorate!
Those are simple and lovely. If I tried making them, they would look like big balls of cat hair....maybe you could come by and make some for me? I'll make pie!
I love all the comments. Rocky Mountain Woman - what kind of pie???
That is the loveliest staircase and tree! Your bows are perfection. I have to save this for all my remaining years so I won't forget how to make these beautiful creations.
This is wonderful. Thanks for the tut. Can't wait to try it out.
Thanks for the lesson on the bows.
Happy Holidays
Michele
This is awesome-- I always wanted to know how to do this. Can you use regular ribbon rather than wired too?
Thanks for commenting on my blog too-- I just tried you bow, and it worked out great! That is the first good bow I have ever made, seriously. I put it on top of my tree. I'll be making them for the banister too-- Thanks so much! (Turns out my ribbon was wired after all)
Thanks! I have never been able to make bows.
Brenda
That is a very cute bow. I think I could even manage that one. Thanks for sharing.
Your tutorial is so easy to follow. I love the colors and textures of your ribbons. Beautiful! Thanks for sharing with Sweets This Week!
~Sarah
Very nice tutorial! I love making bows, but I never worry about the size being exact. I am an eyeballer! LOL!
Hi there Judy~ What a great tutorial and your pink bow is just gorgeous!!! Thank you for sharing at my party this week! :)
Wow! Who knew how easy these beautiful bows are to make??!! Thanks for sharing this. I'm off to make me some bows!
Hugs,
Donna
Wow girl! You have made A LOT of new friends since I was here the other day! :-) Thank you so much for linking up this tutorial to the party this week. I always end up kinda winging it with my bows and end up frustrated so I am definitely going to take this approach in the future!
Hope you have a great weekend!
Vanessa
great tute! Love that you have a diy tape measure instead of a sewing tape measure!
thanks for linking
gail
Thanks for the tutorial as mine just never looks right so avoid them. Merry Christmas
This is a great way to keep all of the bows the same size!!! Thanks so much for the tut!!!
What a great tutorial and a fun stop on our little journey through Alphabe-Thursday's letter "J"!
Mine are always a little lop-sided but I can see how this would keep them totally uniform.
Thanks for linking. I think you helped a bunch of us out today.
A+
Wonderful tutorial and SO HELPFUL! Thank you for sharing on the Boardwalk Bragfest. I love to learn new things!
thanks i am bow-impaired so i really appreciate your tute!
malia
www.yesterdayontuesday.com
Thank you for linking your tutorial to my party! I had forgotten how to make these so it was helpful. Have a great weekend!
xoxo,
Jami
Hi Judy, Thanks so much for linking this up! I hope your holiday season is wonderful and happy! xo, Maria
Hi Judy,
Thanks for the tutorial. It was very helpful to create some neat bows. I used a DVD instead of a cardboard. Please have a look at my creation:-)
http://creativitymypassion.blogspot.com/2010/12/christmas-bow.html
Esther
http://creativitymypassion.blogspot.com/
These are beautiful. I use to store my bows with empty toilet tissue rolls.
Post a Comment