Hope you all had a great weekend. I teased you all on Friday with a
sneak peak at my solution for transforming my husband's white closet organizer system.
Without further ado...here is the transformation:
Well, I spent all day on Saturday working some magic on my husband's closet.
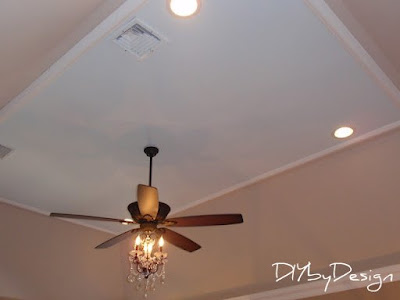
I started by painting the inside of the closet the same color as our master bedroom tray ceiling.
Then came my solution to changing those white drawers and shelves.
A few of you guessed it right...contact paper was my solution. I was in Home Depot looking at the closet organizers. I saw the valet bar there and grabbed it. When I turned around, right behind me was the contact paper. I picked up this wood tone one and compared it to the dark closet organizer Home Depot was selling. It looked so similar I figured it was worth a try. It really worked perfectly.
I have to be honest...this project is not for the faint of heart. It took ALL DAY on Saturday. It took so long mainly because the key to having it really look like wood is to not have any bubbles. The only way to achieve that is so go super slow and to smooth it out every inch or so as you apply it. There were many times during the process that the $2300 for a whole new organizer system seemed like a bargain compared to the work I was doing. But I am not a quitter, so I pressed on.
The drawers were the easiest part.
Adding the sleek new handles really made the drawers look awesome.
I fixed the drawer fronts by using wood putty. Simple fix.
I added a valet bar purchased at Home Depot.
I also added a slide-out belt holder.
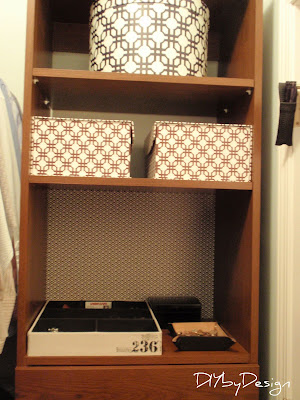
On the other side of the closet I added an area for all of my husband's things he needs each day.
I found this great organizer in Home Goods.
I used different contact paper to cover the wall behind this area.
It picks up the design in the storage boxes too.
This is what this part of the closet looked like before.
Here's a few more views of the after...
I love the new masculine look of the closet.
I also added a framed full length mirror to finish the look.
Here's one more look at the transformation.
The whole makeover cost just around $100. A significant savings from the $2300 for a new closet system. In person it looks as good, if not better, than it does in the photos. The transformation is huge! Best of all, my husband loves his new closet.
How about you? I can't wait to hear what you think.
-Judy


26 comments:
Wow. There is no way I would be able to pull off the contact paper execution the way you did. Good job!
That is quite the transformation! I would have never imagined that you used contact paper on the organizer. It looks flawless! I would never have the patience to do it.
You are a total genius if you can work with contact paper and get it that smooth. I have tried that a few times and it is definitely a nightmare of a job. Your closet redo is totally fantastic. Love it. Great job. Hugs, Marty
Wow! Looks so different at a great cost!
makingitfeellikehome.blogspot.com
WOW Judy that is a makeover done to perfection!! I love the way it turned out!
That looks fantastic, Judy! I would never have thought contact paper! I have to give you props for sticking with it because I know how it can be to work with. Your time was well spent for sure! I love the way you did the inside portion, too.
Judy, it looks awesome! I can't believe you transformed the closet with contact paper - be still my heart!!! You rock.
Wow Judy! Way to go, not only did you save #2200, you totally knocked the ball out of the park. I love the contact paper on the back of the shelves too. Your work was worth it this weekend, looks great!
Wow! Love the contact paper solution - Looks great!
You clever lady you!! That is so fantastic Judy and I'm super impressed with your patience! It totally looks like you went and got an expensive new closet system and your attention to detail is what pulled that off so well. Way to go friend! :-)
Vanessa
Awesome change and ingenious idea!
awesome idea, looks great. i couldn't not have done it, i have no patience.
Looks great, but I have to admit that your before would be our after!
;)
WOW! I never would've guessed that was contact paper. It looks awesome!
Oh I adore the closet makeover! Well done.
I hope you'll stop by my blog. I am hosting a giveaway for a $50 Kirklands gift card.
Thhe closet makeover is a job well done. I like the boxes you used. The contact paper was ingenious.
That is simply amazing! What a huge difference that contact paper makes. Such a rich look. Love the organization too!
Wow! It looks AMAZING! & the price cannot be beat. Great Job!
Wow Judy, you out did yourself on this one! I know it was tedious and time consuming, but oh so worth it in the end. Very manly looking but with a touch of pizazz. Love, love it.
Wow! You are the transformation QUEEN~ This is soo amazing! Thanks so much for sharing with the Pink Hippo Party.. can't wait to see what you share next!
What a great transformation! Clever girl! I bet your husband is thrilled!
Oh, you're kidding me!? It's incredible! I am so impressed! I can imagine it took a while because there is so much space! Looks so high end! Great job!
Melody
What a wonderful project! Congratulations! Being a closets Bergen service provider, DIY closet projects are indeed amazing. It's true that you can save a lot and make it the way you like it!
WOW--great job! I would never had guessed the wood look was from contact paper! I featured this project over on Sew Woodsy yesterday!
This is crazy amazing Judy! I'm with you- when you really want to save money and have something look A-May-Zing, you just have to put in the time! And boy did your efforts pay off!! Awesome job!
xo Becca
Very Informative I really appreciate for posting these type of Articles.
Best website design in bangalore
Post a Comment