

I have been wanting to make my own coasters for a while now. We have a box of left over tumbled marble tiles in our garage from our kitchen backsplash which I knew would be perfect for this project.
 |
| Do you like my new Le Creuset tea kettle? It's in my favorite color. |
I started by going to The Graphics Fairy, and picking out four french designs that would reduce to 4"x4" easily. It's important that you don't pick a design that is too wide or else it will cut off part of the design when you reduce it to 4"x4". Next I printed out the mirror image of the design on my printer (you need it to be the mirror image of the design since that is the part that will be sticking to the tile).

There are so many different ways to transfer a design onto tile. I wanted to do this entire project without having to leave the house to buy anything, so I went with this method.
I cut out the design and brushed mod podge onto the printed side of the paper.

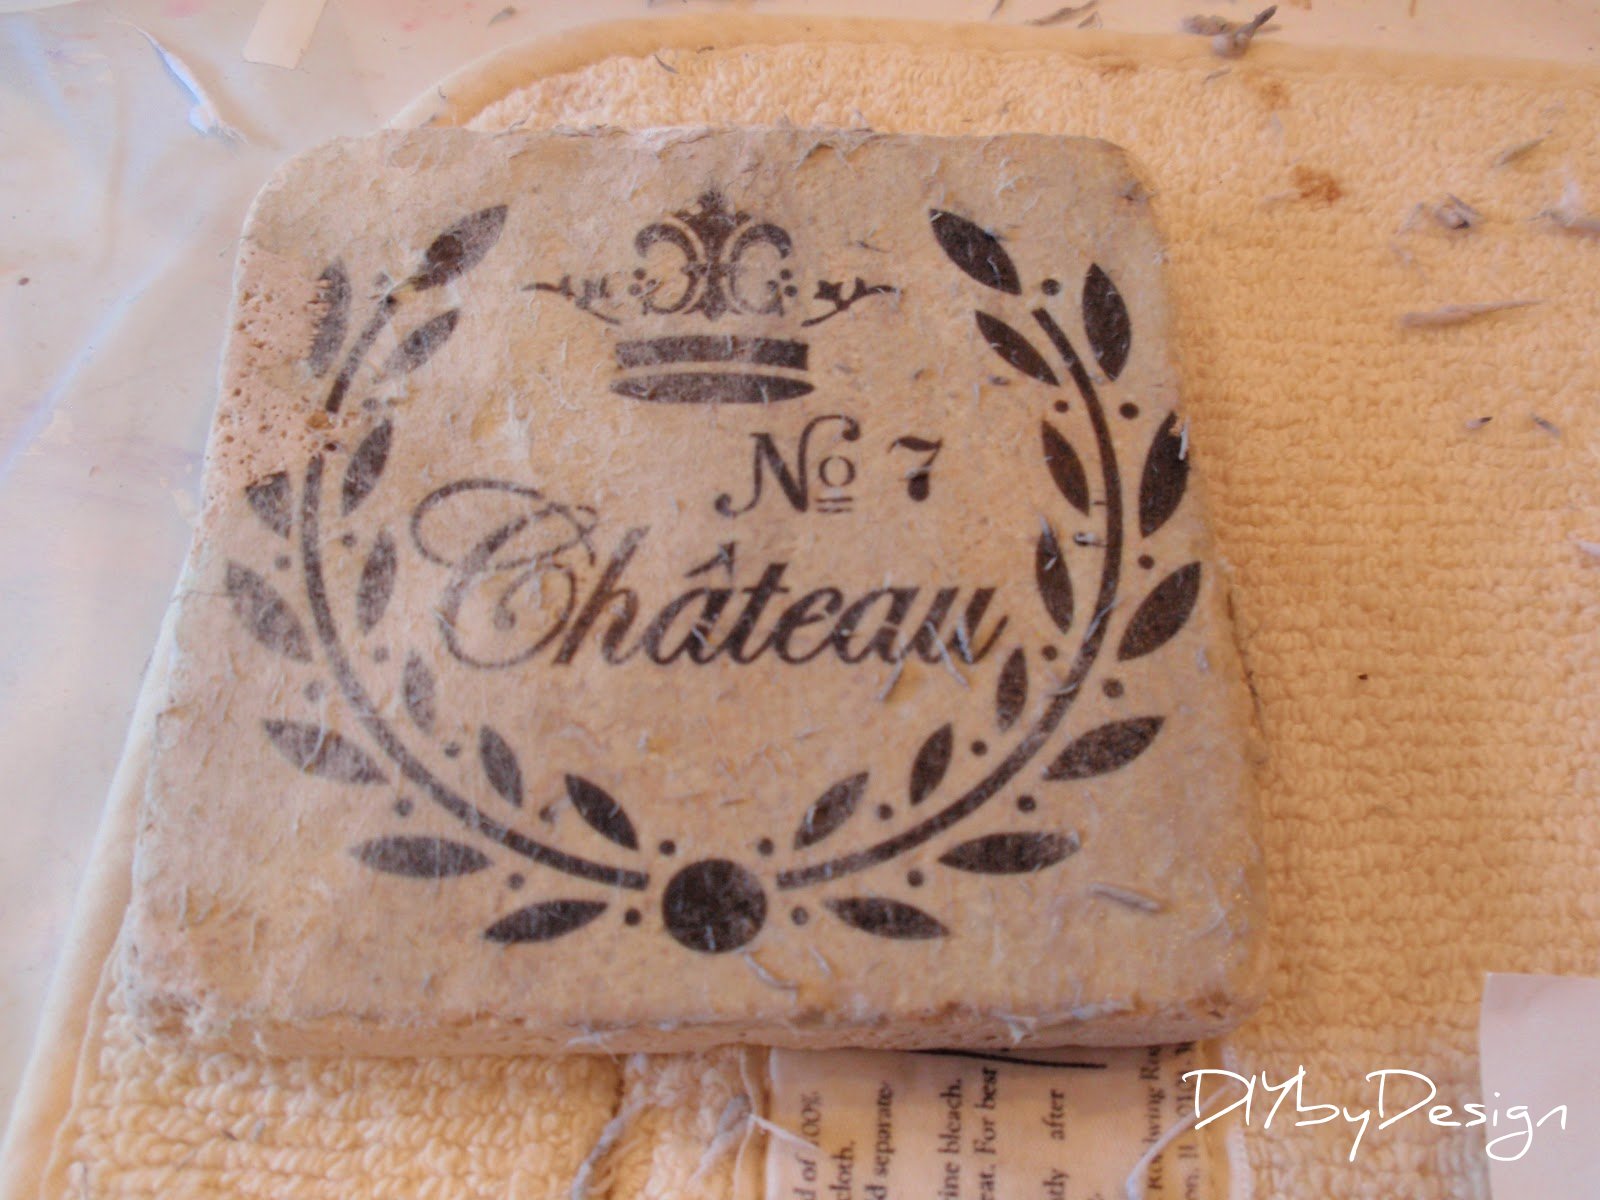
I then placed it on top of the tile and smoothed out the paper.

I baked the tiles at 170 degrees for 20 minutes.

When the tiles came out, I wet my finger and started to rub off the paper.
Do not soak the paper or else you will wipe off the ink as well.
You just have to keep wetting your finger and wiping off the back of the paper a little at a time.
You can see in this photo that I had a little bit more to wipe off.
It took only a few minutes to get it all off.
It took only a few minutes to get it all off.

Once all of the backing of the paper is off, it is time to polyurethane.

I brushed a thin layer of polyurethane on top of each tile to protect it
from any moisture from drinks placed on it.

Once the polyurethane was thoroughly dry (a few hours), I added self stick cork to the bottom.
If you don't have self stick cork, you can use felt.
You just want to ensure that the tiles won't scratch the top of your furniture.
 |
| It was only 11am when I took this photo...too early for wine...so it's fruit juice. Lol |
Time to enjoy my new coasters.
These would also make a great gift.
Can't wait to hear what you think.
-Judy


“My entry to At The Picket Fence's Inspiration Friday sponsored by Appliances Online and the Beko Fridge Freezers”.
43 comments:
How pretty Judy. Great way to repurpose, those are fantastic!
Gorgeous. I love the transfer idea. I still need to give this a try. Love them. Hugs, Marty
Oh wow Judy, these are great! Very clever!
These turned out great, Judy! They came out so clear! I did not have luck with this technique the two times I tried it. Maybe I wet the paper too much. I'll have to give it another go.
They turned out amazing. What a clever idea.
Those look awesome! Great idea.
These look great. Did you use a ink jet printer or a laser printer? This is something I might have to try.
Hi Judy,
I LOVE your coasters!!!
I just received them from a favorite things swap party.
Here's the link:
http://alapinlife.blogspot.com/2012/02/brandi-dont-disturb-this-groove.html
Dee
What an adorable idea, I love it! You are so creative, well done! xo ~Liz
These coasters are great, good way to use up those old tiles that usually sit in the box in the basement.
wow! I didn't know you could transfer ink that way. So chic and pretty. Great job!
I am going to have to try that.....what a great idea!
Really cute idea. They would make a good gift. I can see them done with a family crest or just a monogram, too. xo Diana
ps. I have NEVER heard of this transfer method before. xo Diana
classic & so very pretty - I've not seen mod podge baked before - thanks for the tip! xo
www.NorthernCottage.net
It's my favorite color too! I have one almost like it, a bit darker though. Your tiles are lovely too!
How clever with the Modge Podge! I just did a tutorial on this last week as well! I just used my ink stamps, but your option is great for more intricate designs.
http://sophiasdecor.blogspot.com/2012/02/quick-and-easy-diy-coasters.html
Kristen
they are so cute!
what a great idea :D
~victoria~
You are kidding me? They are adorable Judy! Thanks so much for teaching me how to do it! Definitely going to do it on some tiles I have laying around! :)
Melody
ChattyChics.com
You are kidding me? They are adorable Judy! Thanks so much for teaching me how to do it! Definitely going to do it on some tiles I have laying around! :)
Melody
ChattyChics.com
You are a DIY genius! Love these!
wow - those came out great! I thought if you stuck it in the oven, it would burn up! Guess not... {:-D
What a great transfer method, Judy! Many thanks for the tips; the coasters are terrific. BTW, did you use an ink jet printer?
I love them and want to make some!! But I am confused - what kind of paper do you use??
Debra
justspiffit@gmail.com
Oh wow, Judy
We must be kindred spirits, I have the same designs printed out. Only I printed mine on transfer paper for my dining room set, redo? I did that at Thanksgiving, yikes!! I just found them again last week, in a drawer.
Thanks for the inspiration,
Chrissy
Wow Judy!! These are beautiful and look so expensive and like you bought them. Great tutorial I may try this out. Thanks.
Love 'em, one can never have too many coasters!
Super cool.
=)
Beautiful frenchy coasters... love the transfer method! Thanks for the share! Have a great weekend!~Poppy
I love this idea. I'm hoping to redo our kitchen counters & backsplash soon. Now I know what to do with the extras!
What a great idea. Putting them in the oven kind of surprised me, but it worked well.
those are beautiful.
I was surprised at the oven 'curing' but it makes such good sense!
Love your transfers. It would be fun to do these with numbers on them (or letters for people in the families first names)
This was a particularly inspiring post! I need to come and follow you around for a day to get moving on all the projects that need done around here.
Thanks for linking up.
A+
So cute, but I think the condensation will still run off the coaster. Any idea's on how to make them with an edge of some kind?
It was very creative of you to make these tiles. Definitely, a good piece for dining table and home decor.
This method is way better than trying to use acetone - too stinky and not consistent enough! Modge Podge works great too, or you can also use a clear varnish if you don't have Modge Podge. I also put felt stickers on the bottom of mine so they didn't slide around so much on the table.
Really great work, I really appreciate the creativity you have done. After reading your post I also want to try this. Whenever I made this I will definitely use it for many things like to gift someone, to decorate my house and much more. Thanks for sharing this wonderful and innovative idea with us.
marble tile miami
This is beautiful! The neutrals are so soothing and the variation of the tile makes a real impact. Wonderful job!
white marble tile
I just made a batch. This might be a silly question but should there be a film left over when you rub the paper away? Sometimes when I'm rubbing it takes the film off in little patches. or should this process "dye" the marble?
What a great idea. Cute idea.....I love mine. What a cute and easy craft. I may just have to try this out. My friend and I get together each Thanksgiving break and make crafts. For some reason we've been doing Halloween crafts the past 2 years, so I'm thinking I'll find something Halloweeny to stamp on the coasters
.
Whenever I made this I will definitely use it for many things like to gift someone, to decorate my house and much more.
Marble Coasters
I as well am very curious as to what kind of paper you used. I am needing to do this for favors for my son's wedding November 22nd this year and so for this looks the best! I had tried the using tracing paper, and the tissue paper and it did not turn out so well. What about pictures? Have you tried any of those?
Nice post, I bookmark your blog because I found very good information on your blog
Bierdeckel bedrucken
The Tumbled Marble Coasters Tutorial is great, i have to admit that the way that house have been decorated is amazing. It is a great satisfaction to see that a house can be turned into a beautiful home, and with the tutorial you have shared, i can see that safety is adhered to as well. You area great blogger, kindly keep on sharing.
Managing a New Dairy Products Processing plant
Post a Comment